


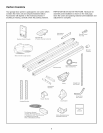
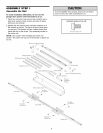
ASSEMBLY STEP 3
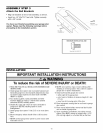
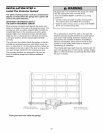
Attach the Rail Brackets
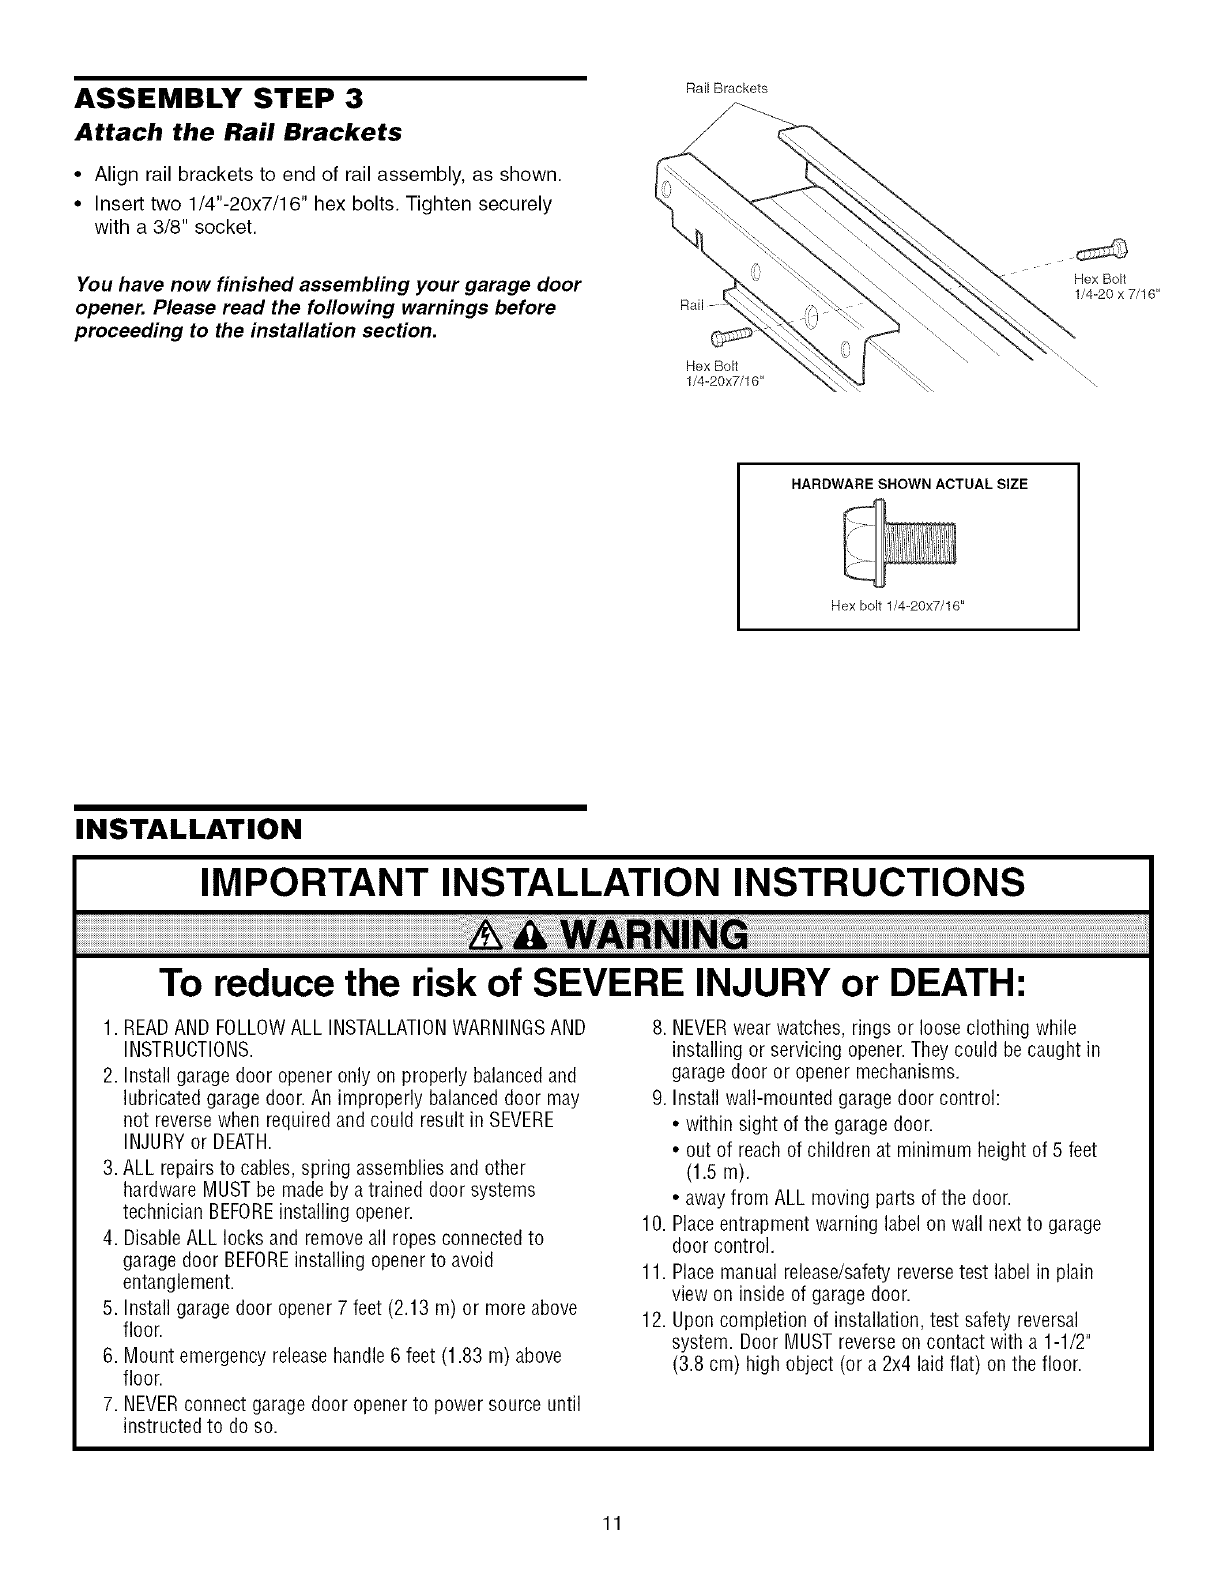
• Align rail brackets to end of rail assembly, as shown.
• Insert two 1/4"-20x7/16" hex bolts. Tighten securely
with a 3/8" socket.
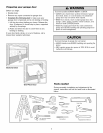
You have now finished assembling your garage door
opener. Please read the following warnings before
proceeding to the installation section.
Rail Brackets
Hex Bolt
1/4-20x7/16"
Hex Bolt
1/4-20 x 7/16"
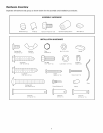
HARDWARE SHOWN ACTUAL SIZE
Hex bolt 1/4-20x7/16"
INSTALLATION
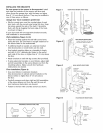
IMPORTANT INSTALLATION INSTRUCTIONS
To reduce the risk of SEVERE INJURY or DEATH:
1. READAND FOLLOWALL INSTALLATIONWARNINGSAND
INSTRUCTIONS.
2. Install garage door opener only on properly balancedand
lubricated garage door.An improperly balanceddoor may
not reversewhen required and could result inSEVERE
INJURYor DEATH.
3. ALL repairsto cables,spring assembliesand other
hardware MUSTbe madeby a trained door systems
technician BEFOREinstalling opener.
4. DisableALL locks and remove all ropesconnectedto
garage door BEFOREinstalling opener to avoid
entanglement.
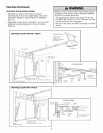
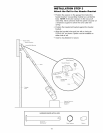
5. Install garage door opener 7 feet (2.13 m) or more above
floor.
6. Mount emergency releasehandle 6 feet (1.83 m) above
floor.
7. NEVERconnect garagedoor opener to power source until
instructed to do so.
8. NEVERwearwatches, rings or looseclothing while
installing or servicing opener.Theycould be caught in
garage door or opener mechanisms.
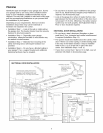
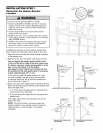
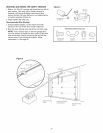
9. Install wall-mounted garagedoor control:
• within sight of the garagedoor.
• out of reachof children at minimum height of 5 feet
(1.5 m).
• away from ALL moving parts of the door.
10. Placeentrapment warning label onwall nextto garage
door control.
11. Placemanualrelease/safetyreversetest label in plain
view on inside of garage door.
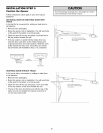
12. Uponcompletion of installation, test safety reversal
system. Door MUSTreverseon contact with a 1-1/2"
(3.8 cm) high object (or a 2x4 laid flat) on the floor.
11