


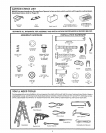


Assernbiy
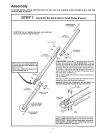
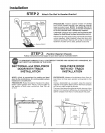
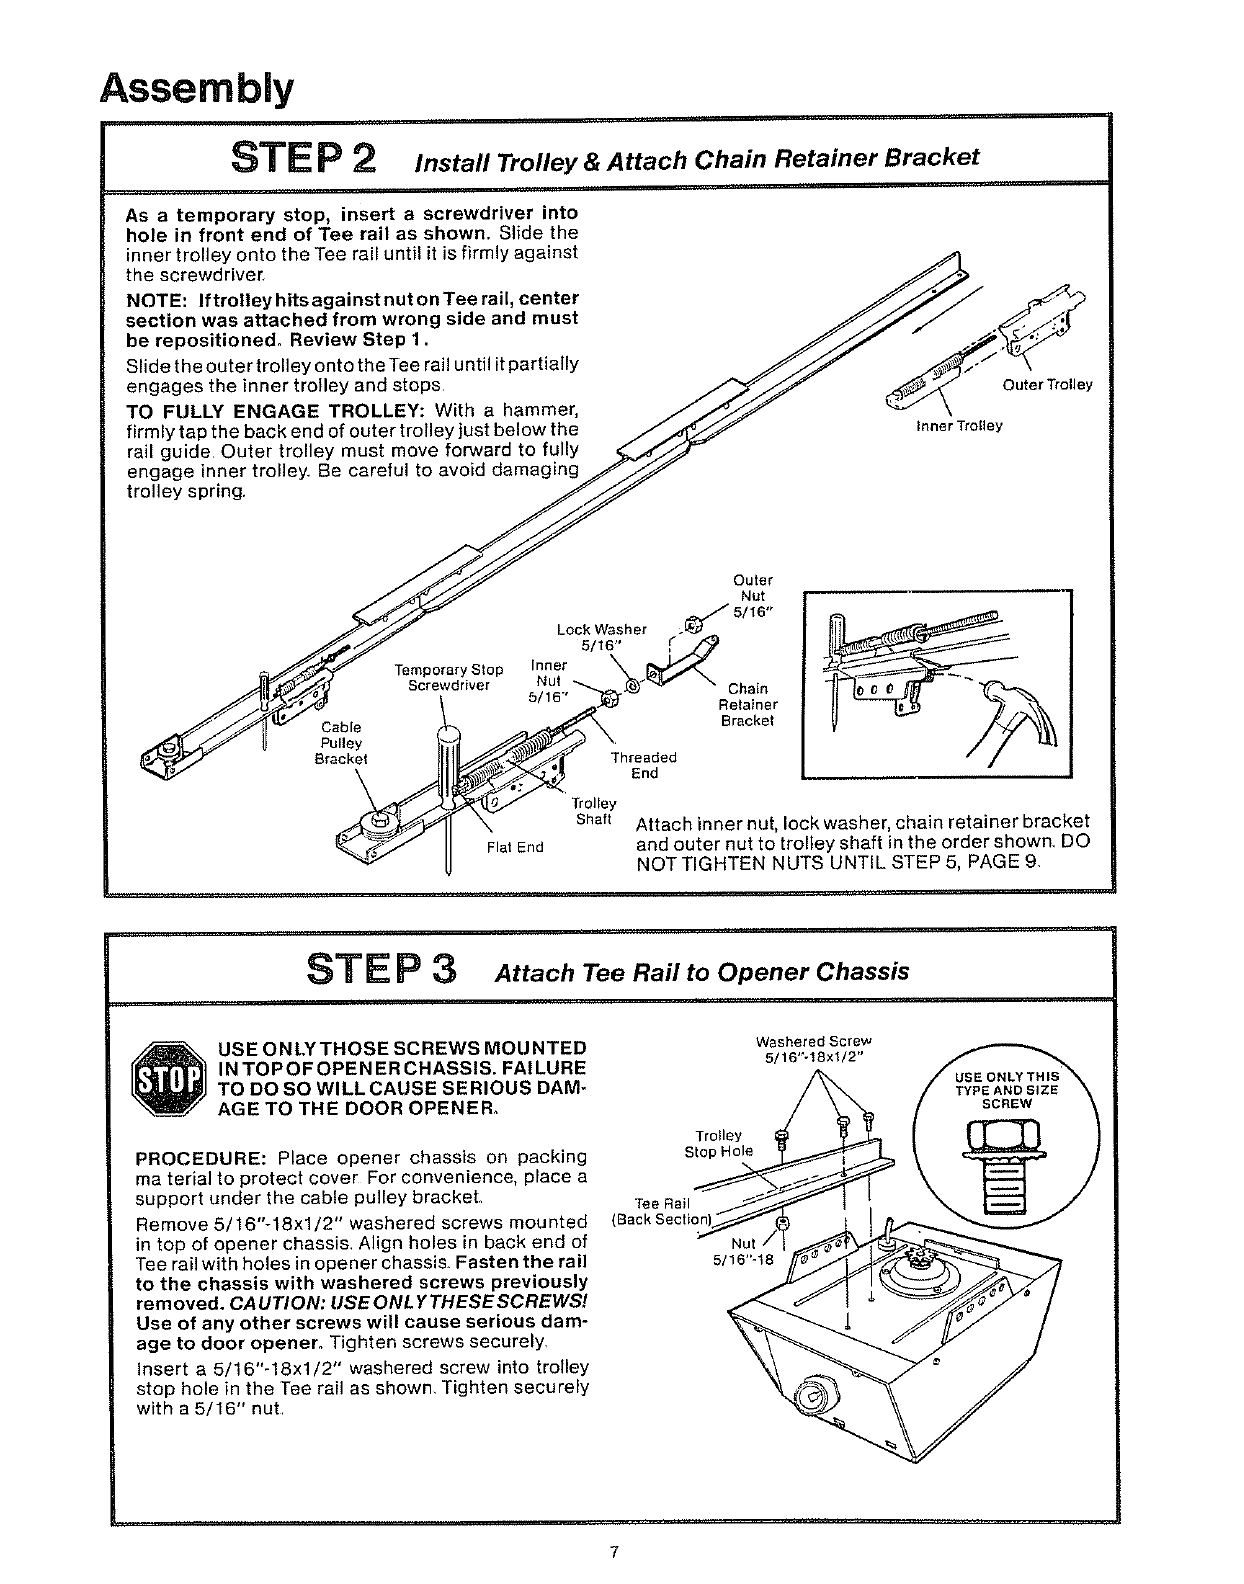
STE P 2 Install Trolley & Attach Chain Retainer Bracket
As a temporary stop, insert a screwdriver into
hole in front end of Tee rail as shown. Slide the
inner trolley onto the Tee rail until it is firmly against
the screwdriver
NOTE: If trolley hits against nut on Tee rail, center
section was attached from wrong side and must
be repositioned. Review Step 1.
Slide the outer trolley onto the Tee rail until it partially
engages the inner trolley and stops
TO FULLY ENGAGE TROLLEY: With a hammer,
firmly tap the back end of outer trolley just below the
rail guide Outer trolley must move forward to fully
engage inner trolley Be careful to avoid damaging
trolley spring,
Outer Trolley
Inner Trolley
Cable
Pulley
Bracket
\
Temporary Stop
Screwdriver
Flat End
Lock Washer
5/16"
Inner
Nut
Threaded
End
Outer
Nut
._5/16"
r
Chain
Retainer
Bracket
Trolley
Shaft
Attach inner nut, lock washer, chain retainer bracket
and outer nut to trolley shaft in the order shown_ DO
NOT TIGHTEN NUTS UNTIL STEP 5, PAGE 9,
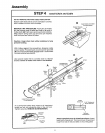
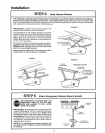
STE P 3 Attach Tee Rail to Opener Chassis
USE ONLYTHOSE SCREWS MOUNTED
IN TOPOFOPEN ER CHASSIS. FAILURE
TO DO SO WILL CAUSE SERIOUS DAM-
AGE TO THE DOOR OPENER°
PROCEDURE: Place opener chassis on packing
ma terial to protect cover For convenience, place a
support under the cable pulley bracket
Re move 5/16"-18xl/2" washered screws mounted
in top of opener chassis Align holes in back end of
Tee ran with holes in opener chassis. Fasten the rail
to the chassis with washered screws previously
removed. CAUTION: USEONLYTHESESCREWS!
Use of any other screws will cause serious dam-
age to door opener. Tighten screws securely,
insert a 5/16"-18xl/2" washered screw into trolley
stop hole in the Tee rail as shown, Tighten securely
with a 5/16" nut
Washered Screw
5/16"-1Sxl/2"
Stop Hole
Tee Rall
(Back Sectior
5/16"-18
7