


8
W415-0298 / K / 12.06.07
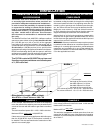
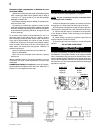
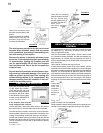
The curtain mesh must be kept fully closed during operation
to help prevent accidental burns from occurring.
The heater must not be used when the hood is re-
moved. Hook the hood over the lip of the curtain support
plate.
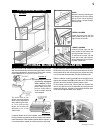
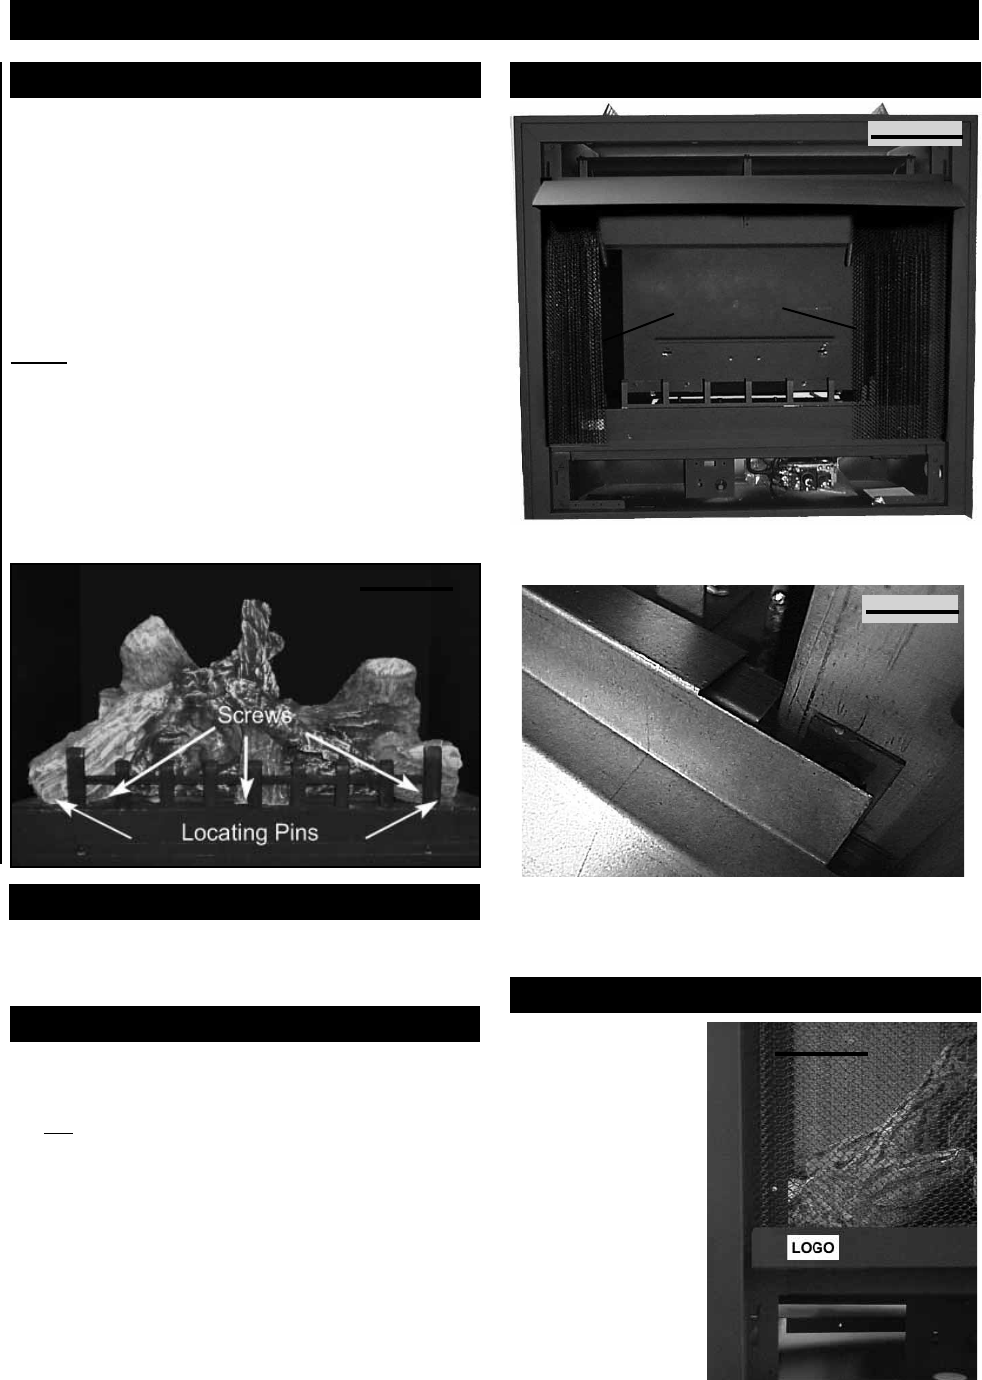
Remove the backing of
the logo supplied and
place on the screen
cover, as indicated.
FINISHING
LOGO PLACEMENT
HOOD
FIGURE 13
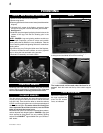
Randomly place the charcoal embers along the front and
sides of the log support tray in a realistic manner. Fine dust
found in the bottom of the bag should not be used.
Tear the embers into pieces and place along the front row
of ports covering all of the burner area in front of the small
logs (#2 & #3). Care should be taken to shred the embers
into thin, small irregular pieces as only the exposed edges of
the fi bre hairs will glow. The ember material will only glow
when exposed to direct flame; however, care should be
taken to not block the burner ports.
Blocked burner ports can cause an incorrect fl ame pattern,
carbon deposits and delayed ignition. PHAZER
TM
logs glow
when exposed to direct fl ame. Use only certifi ed “glowing
embers” and PHAZER
TM
logs available from your Continen-
tal® dealer.
CHARCOAL EMBERS
GLOWING EMBERS
FIGURE 12
HOOD
CURTAIN
MESH
FIGURE 11
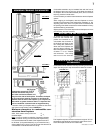
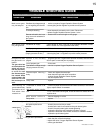
GRATE AND LOG INSTALLATION
1. Remove curtain mesh and rod assembly
2. Remove log carton
3. Remove grate from the lower control area (stored there when
shipped)
4. Unscrew the 3 screws in the fi rebox, set grate in place
and secure using the 3 screws that were just removed.
See Figure 11.
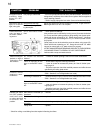
5. Install the one piece logset by aligning the two holes on the
bottom of the logs, with the two locating pins in the
fi rebox.
NOTE: PHAZER
TM
logs and glowing embers exclusive to
Continental® Fireplaces, provide a unique and realistic
glowing effect that is different in every installation. Take the
time to carefully position the glowing embers for a maximum
glowing effect.
Log colours may vary. During the initial use of the fi replace,
the colours will become more uniform as colour pigments
burn in during the heat activated curing process.
6. Reinstall rod assembly and mesh curtain
FIGURE 10