


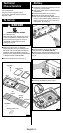

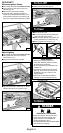
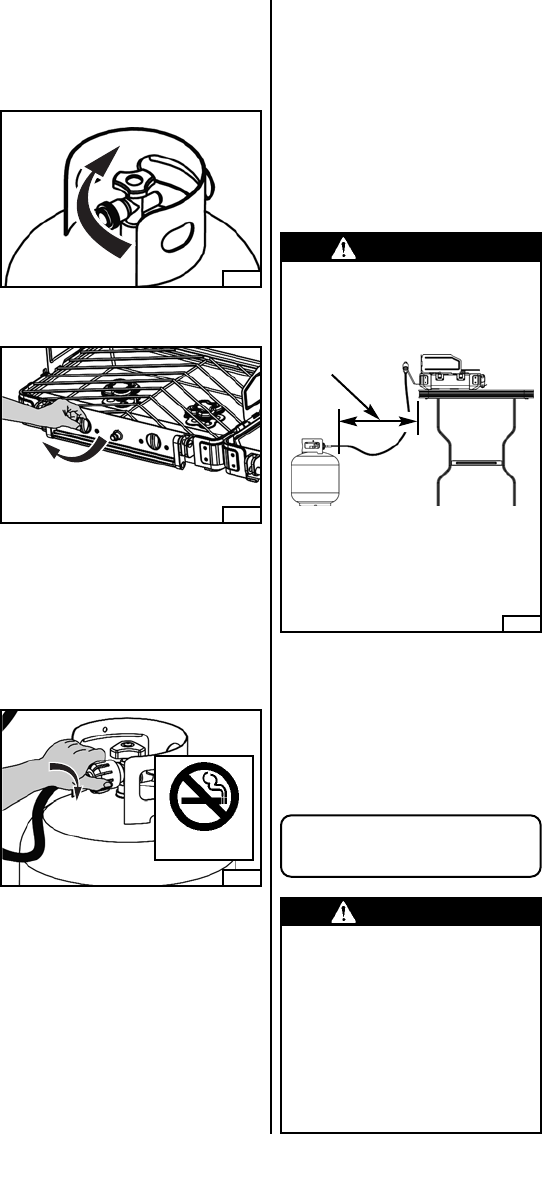
5. Set the LP Cylinder a flat and level surface with
the outlet valve facing toward the back of the
stove.
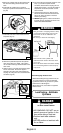
6. Check that the cylinder valve is closed by
turning the cylinder knob clockwise to a full stop
(Fig. 26).
Fig. 26
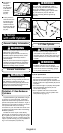
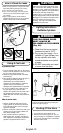
7. Check that both stove control knobs are in the
off position (Fig. 27).
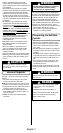
8. Remove the protective caps from the cylinder
valve and coupling nut. NOTE: The coupling
nut connects to the large outside threads on the
valve outlet.
9. Hold the hose in one hand and insert the nipple
into the valve outlet. Be sure the nipple is
centered in the valve outlet. Hand-tighten the
coupling nut, taking care not to cross-thread the
connection (Fig. 28).
Fig. 27
10.Turn the coupling nut clockwise, tighten to a full
stop. If you cannot complete the final
connection, disconnect the coupling nut and
repeat steps 8 and 9. If you are still unable to
complete the connection, DO NOT use this
hose and valve!
11. Check that the hose has no kinks or sharp
bends and clears areas that will become hot
during use. Never put strain on the hose
where it joins a fitting.
12. BEFORE lighting stove, check all connections
for leaks using the procedure as shown in the
section titled “LEAK TESTING”.
Fig. 28
No Smoking
Leak Testing - Refillable
Cylinders
DANGER
TO PREVENT FIRE
OR EXPLOSION HAZARD:
• NO SMOKING. DO NOT use or
permit sources of ignition in the
area while doing a leak test.
• Perform leak tests outdoors
only.
• NEVER perform a leak test with
fire or flame.
English-9
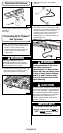
20” to 24”
WARNING
• The gas hose is a tripping hazard. Keep
yourself and others away from the gas
hose when in use or attached to an
appliance.
• Do not tip or move the fuel supply.
• Turn off fuel at the cylinder and
disconnect both ends of the hose when
not in use.
• You must follow these instructions exactly
or a fire causing death or serious injury
may occur.
Dismantling High Pressure Hose
• Before dismantling the high pressure hose, be
sure gas pressure in the hose is eliminated.
• Ignite stove and turn off gas valve on cylinder.
• Allow flame to self-extinguish.
• When flame is out, close valves on appliance.
• Remove hose.
Fig. 29