


Encendido Encendido Encendido Encendido
electrónico estándar electrónico estándar
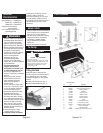
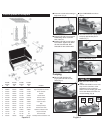
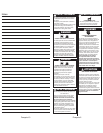
No. 424 424 414 414 Descripción
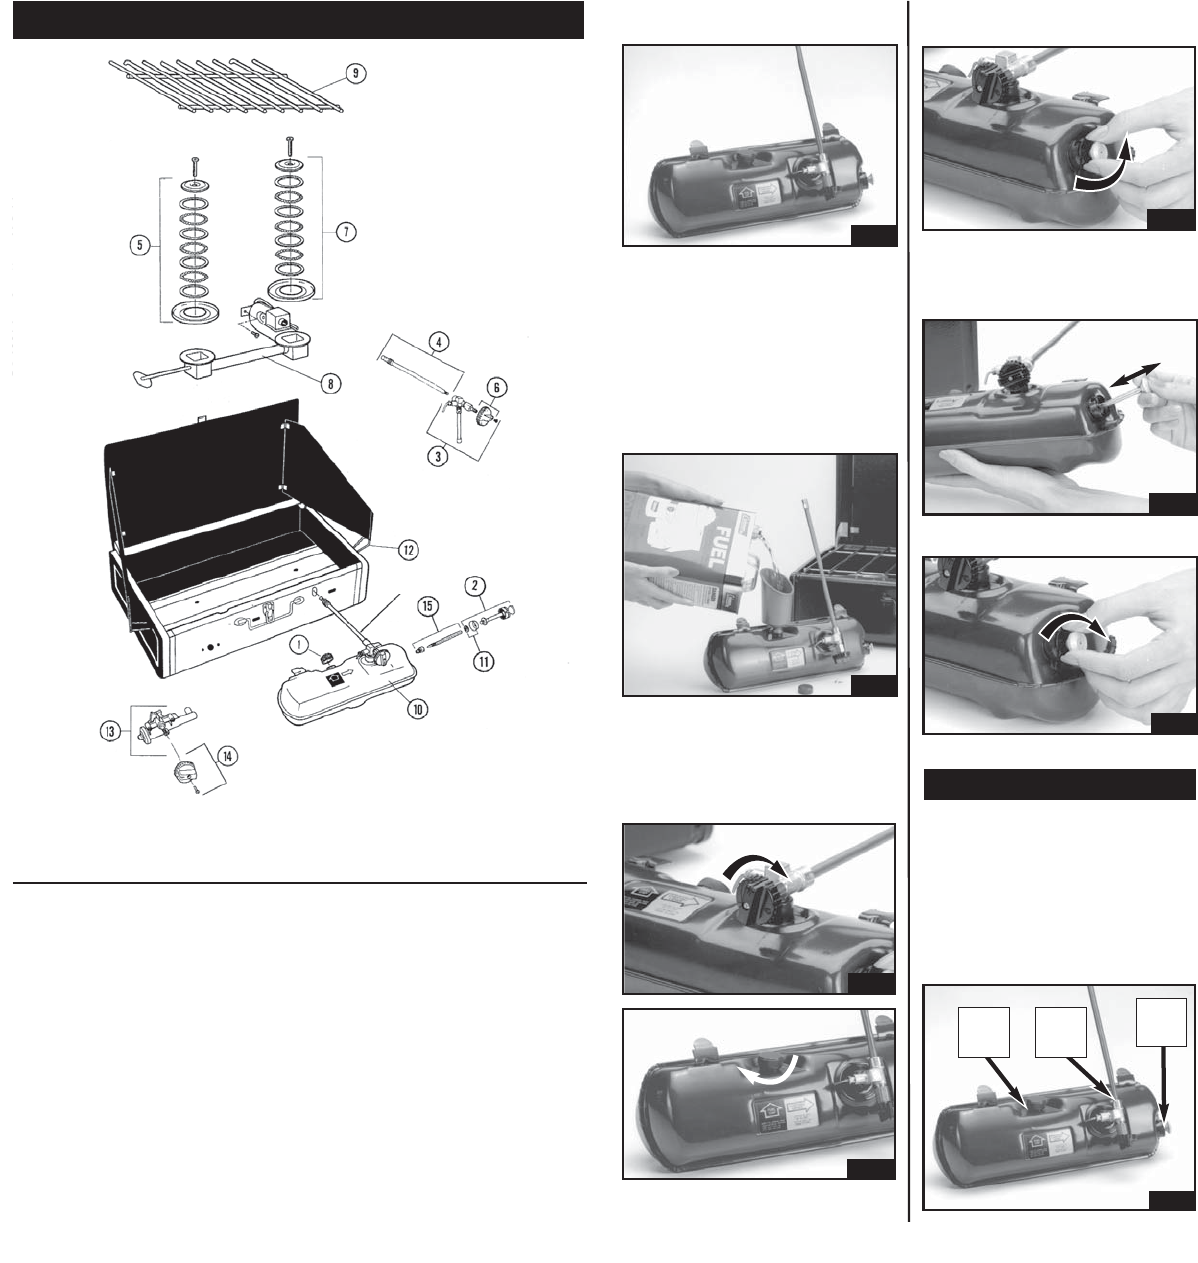
1 220C1401 220C1401 220C1401 220C1401 Tapa De Combustible
2 220A6201 220A6201 220A6201 220A6201 Juego De Reparación De La Bomba
3 424-6601 424-6601 414-6601 414-6601 Válvula Y Generador
4 424-5621 424-5621 414-5621 414-5621 Generador
5 413-3631 413D3461 413-3631 413D3461 Quemador Auxiliar
6 R413-149T R413-149T R413-149T R413-149T Perilla De La Válvula
7 425A3451 425A3451 425A3451 425A3451 Quemador Principal
8 425-5381 425A5281 413-5381 413A5281 Conjunto Del Colector
9 424-3151 424-3151 414-3151 414-3151 Rejilla
10 424-5601 424-5601 414-5601 414-5601 Ensamblaje del Tanque
11 639-1091 639-1091 639-1091 639-1091 Taza De Bomba Y Presilla
12 413B4971 413B4971 413B4971 413B4971
Presillas De Los Deflectores De Viento
13 413-2201 N/A 413-2201 N/A Conjunto De Encendido
14 413-1481 N/A 413-1481 N/A Perilla De Encendido
15 200-6381 200-6381 200-6381 200-6381 Ensamblaje De Válvula De Retención Y Tubo
Lista de piezas de reemplazo
Español-9
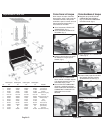
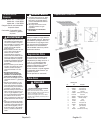
VEA EL DETALLE "A"
English-4
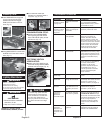
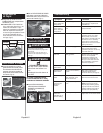
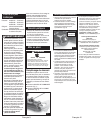
■ Place tank on level surface resting at
angle shown. (Fig. 2)
Leak Check
Fig. 2
■ Remove FUEL CAP. Use a funnel or
suitable filling device and fill with
clean, fresh fuel.
■ Replace FUEL CAP on tank and on
fuel container.Tighten firmly.WIPE
UP ANY SPILLED FUEL AND
DISPOSE OF IN A SAFE PLACE.
Fig. 3
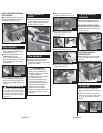
Pumping
■ Be sure FUEL VALVE is OFF
(Fig. 4) and FUEL CAP is firmly
closed (Fig. 5).
Fig. 4
Fig. 5
■ Place thumb over hole in pump knob
and pump approximately 30 full
strokes. (Fig. 7)
■ Close PUMP KNOB. (Fig. 8)
Fig. 7
Fig. 8
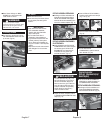
■ Make sure FUEL VALVE is fully
“OFF”.
■ CHECK FOR LEAKS in one or more
ways. Look for fuel mist or a wet
appearance of fuel on surfaces.
Listen for hiss of escaping gas. Smell
for fuel odor. Never use a flame. Do
not use if leaking. (Fig. 9)
Fig. 9
■ Open PUMP KNOB one full turn.
(Fig. 6)
Fig. 6
CHECK
FOR
LEAKS
CHECK
FOR
LEAKS
CHECK
FOR
LEAKS