


Chapter 3
Advanced Configuration with the Web-based Utility
20
Wireless-N Internet Home Monitoring Camera
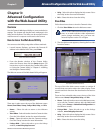
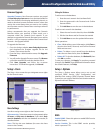
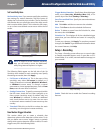
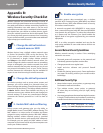
Set Sensitivity Area
Set Sensitivity Area If you want to specify the sensitivity
area settings for motion detection, click this button to
display the Set Sensitivity Area window. The Set Sensitivity
Area window lets you specify the area of the video screen
that is used to detect motion. This is either the full screen,
or up to three user-defined custom areas within the full
screen.
Set Sensitivity Area
NOTE: In order to set the Camera’s sensitivity
area, you will need to access the Web-based
utility using Internet Explorer 6 or higher.
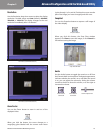
The following fields appear on the left side of the Set
Sensitivity Area window for each sensitivity area. Specify
the settings as needed, then click Apply.
• Full Screen or Window 2-4 This is the name of the
sensitivity area, either Full screen by default, or if
Setting Custom Area is selected, Window 2, Window 3,
or Window 4 (custom areas). To change a custom
area name to a more appropriate name, such as Front
Door, enter the new name in this field.
• Setting Custom Area To specify custom area(s) within
the full screen, check this box, then configure up to
three custom sensitivity areas. By default only one
area, Window 2, is selected. To create an additional
area, check the box next to its name. You can move
or resize each area as needed. Custom areas may also
overlap.
• Threshold Slide this to the left to reduce the area’s
sensitivity, or to the right to increase sensitivity.
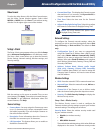
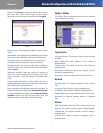
New Motion Trigger Schedule
This section allows you to create a schedule that
determines when motion detection will be active. To do
this, you define one or more “trigger” events, or periods
during which motion detection will be in effect. For each
trigger event, fill in the following fields.
Trigger Motion Detection Specify how often this trigger
event occurs: Every day, Weekdays (Mon - Fri), or on
specific days of the week (Sunday to Saturday).
Start Time and End Time Specify the start and end times
for the event.
Add Click Add to add the new event to the schedule.
Clear Click Clear to clear the schedule of all events.
Delete To delete an event from the Schedule List, select
the event, then click Delete.
Schedule List This displays all of the scheduled trigger
events that you have defined and saved. It is empty by
default.
To save your changes, click Apply. To cancel any unsaved
changes, click Cancel. To get additional information about
the screen’s features, click Help.
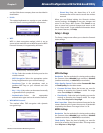
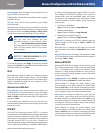
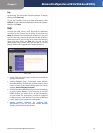
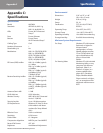
Setup > Recording
The Setup > Recording screen allows you to record video
to Samba compatible devices such as your Mac or PC’s
shared folder, or to a NAS (network-attached storage) on
your network.
Setup > Recording
Enable Check this box to enable the Camera’s recording
features.