Setup
COLORado™ 1 IP User Manual Rev. 01c -7-
Master/Slave
Connectivity
The Master/Slave mode allows a COLORado™ 1 IP fixture to control one or more
COLORado™ 1 IP fixtures without a DMX controller. The controlling fixture becomes the
“master” when running an Auto or Custom program as well as when in STATIC mode.
The controlled fixtures are the “slaves” and you must set them to “SLAVE” mode from
their respective control panels. During the Master/Slave operation, the slave fixtures will
operate in unison with the master fixture.
The master and slave fixtures link to each other using the standard DMX serial
connection. If you are not familiar with the Master/Slave connectivity, you may download
the “DMX Primer” document from the CHAUVET® Web site.
DO NOT connect a DMX controller to the fixtures operating in Master/Slave mode.
Otherwise, the signals from the DMX controller may interfere with the signals from
the master unit.
The Operation chapter of this manual provides detailed instructions on how to
configure the Master and Slave units.
ID Addressing
The COLORado™ 1 IP uses the ID Addressing feature to increase the number of
addressable fixtures in the same DMX universe when in the TOUR personality. Refer to
the Operation chapter in this manual to learn in detail how to configure the
COLORado™ 1 IP fixtures when using ID Addressing. If you are not familiar with the
various connection methods when using ID Addressing, you may download the “DMX
Primer” document from the CHAUVET® Web site.
Lens
Replacement
The COLORado™ 1 IP comes with the 15° lens assembly pre-installed from the factory.
However, there is an optional lens kit (CLENS3042) available as an accessory, which
will alter the beam angle of the fixture to 30º.
Follow the instructions below to to change or replace the LED lens assembly.
a) Disconnect the fixture from the AC power before opening it.
b) This procedure gives you direct access to the LEDs, which are very fragile.
Use maximum care when handling the lenses over the LED assembly.
The numbers in parenthesis in the procedure below correspond to the parts
indicated in the Exploded View section of the Technical Information chapter.
Procedure
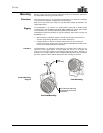
a) Remove the gel frame holder by removing the four Phillips screws (not shown).
b) Remove the front cover (1) by removing the eight Allen screws that hold it in place.
c) Remove the rubber seal (2) and the glass cover (3). The rubber seal may be a
separate ring or it may come mounted around the glass cover. Use caution,
because the glass is loose under the front cover and it may fall.
d)
After removing the glass cover, remove the Phillips #2 screws that hold the lens
assembly in place.
e) Remove the existing lens assembly and replace it with the new lens assembly.
f) Reverse the process to complete the lens replacement.
After replacing the lenses, make sure that the fixture is completely sealed (IP66
rating) before installing it outdoors. Otherwise, you will void the fixture’s
warranty and risk damaging the fixture permanently.


