


17
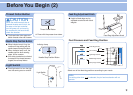
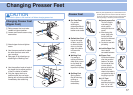
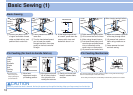
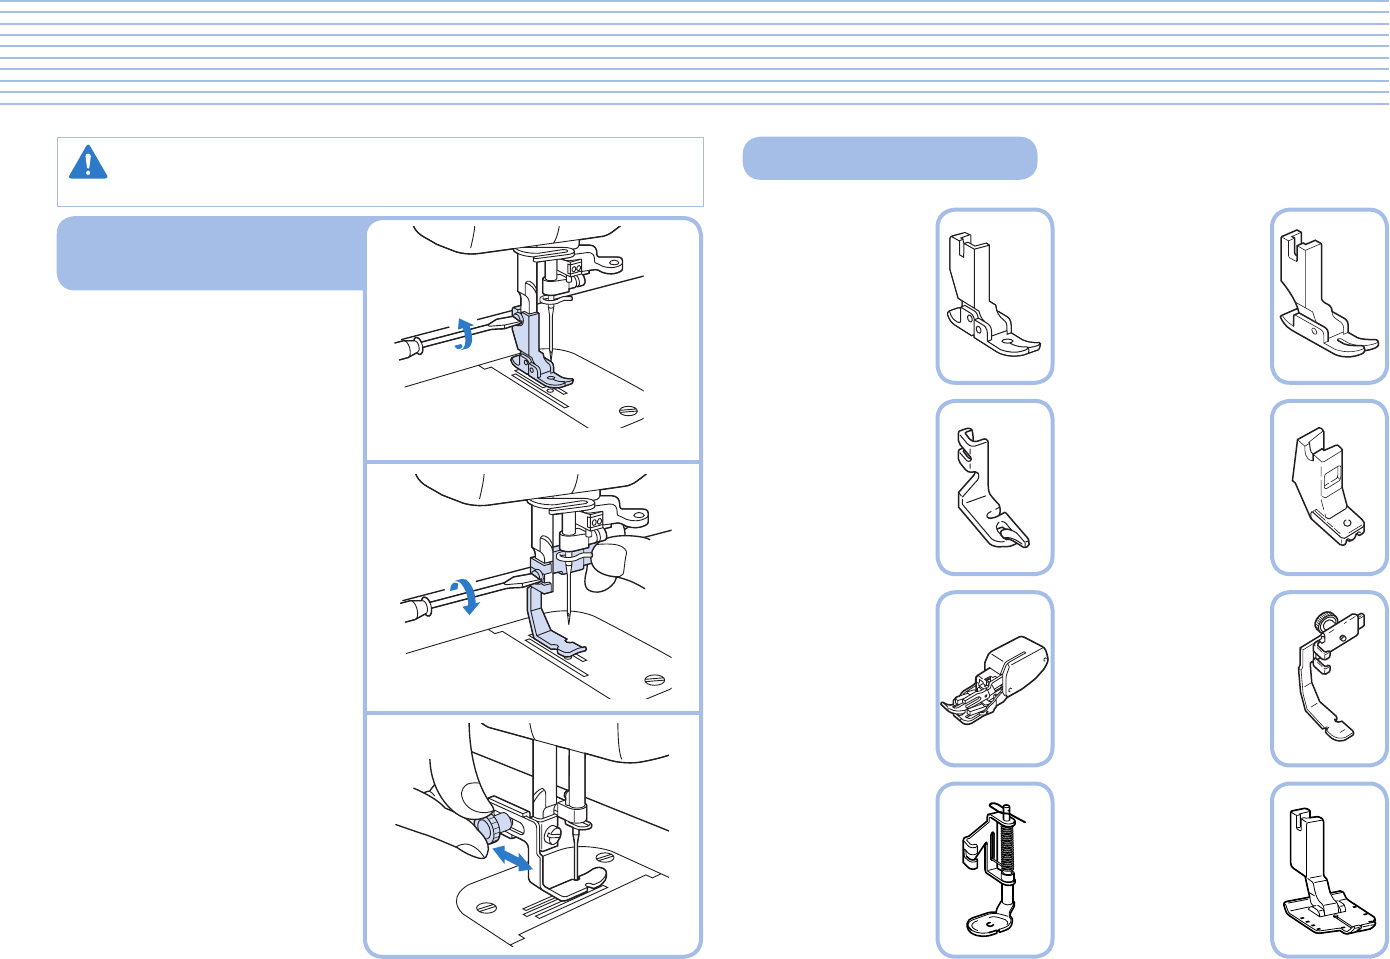
Changing Presser Feet
(Zipper Foot)
Raise presser foot, and raise 1
needle to highest position.
Loosen and remove screw using 2
screwdriver.
Changing Presser Feet
Presser Feet
Attach zipper foot and tighten 3
screw.
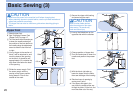
Use the same method to attach ✽
the other feet that come with
your machine.
See page 22 for directions on ✽
attaching the “Walking Foot”.
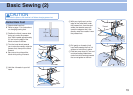
Use the position knob on back of ✽
the zipper foot to adjust position
of foot in relation to needle.
Only the zipper foot has a ✽
position knob. You can begin
sewing with all other presser feet
immediately after attaching.
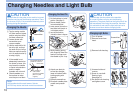
Use only feet supplied with your machine. Each foot is
✽
specially designed for this machine and has clearance
for the pin at the rear of each foot. Use of other presser
feet may damage or break the pin feed mechanism.
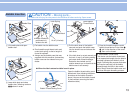
CAUTION
Make sure the power to the machine is off before changing presser feet.
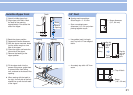
Walking Foot ●
For sewing or
quilting on fabrics
which stick or tend
to slip Useful for
sewing multiple
layers as in quilting.
1/4” Foot ●
For quilt and
patchwork piecing
with 1/4” or 1/8”
seam allowance.
Zipper Foot ●
Use to attach fasteners
other than concealed
fasteners. The zipper
foot can also be used
to secure piping in
place as you sew. Use
the side of the foot
closest to the needle to
rest against the edge of
the piping as you sew.
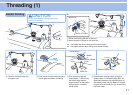
General purpose Foot
●
This foot is used for
most sewing. (Can
also be used for
sewing thick fabrics or
seams.)
When sewing thick
✽
seams, lightly guide
the fabric with your
hand on the downward
side of the seam.
Can also be used with
✽
pin feeding.
Pin Feed Foot ●
For perfect
stitching on
otherwise difficult
fabrics like velvet,
leather and suede.
Rolled Hem Foot ●
Use on the edge
of fabric, such as
on hems of dress
shirts, to fold the
edge of the fabric
in three while
sewing.
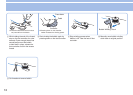
Invisible Zipper Foot
●
Use to attach
concealed fasteners.
Quilting Foot ●
Spring action
foot for darning,
quilting or
free-motion
embroidery.