


63
3
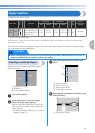
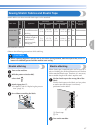
Zipper Insertion
A zipper can be sewn in place.
The values below “Auto” are set when the pattern is selected. The setting can be adjusted to any value within the range
indicated below “Manual”.
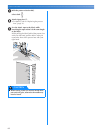
There are many methods for attaching zippers. Therefore, only the procedures for inserting a centered zipper
and a side zipper are described below.
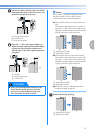
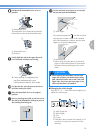
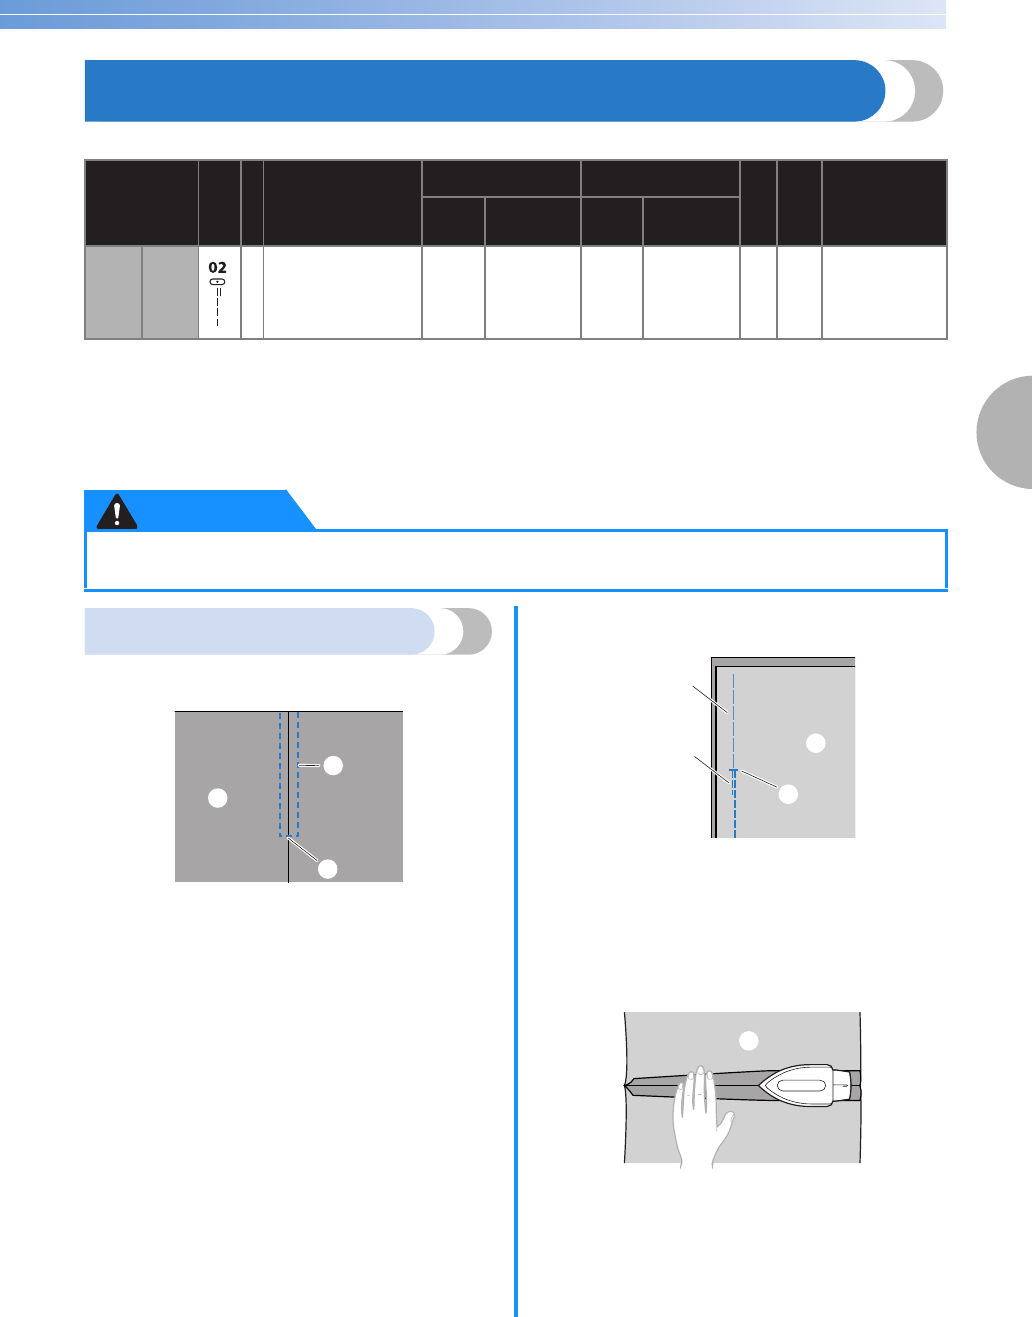
Inserting a centered zipper
Stitching is sewn on both pieces of fabric butted
against each other.
a Right side of fabric
b Stitching
c End of zipper opening
a
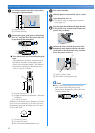
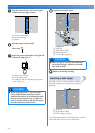
Turn on the machine.
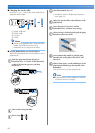
b
Attach zigzag foot “J” and sew straight
stitches up to the zipper opening.
With the right sides of the fabric facing each
other, sew reverse stitches after reaching the
zipper opening.
• For details on basic stitching, refer to “Basic
Stitching” (page 53).
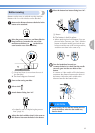
c
Baste the two pieces up to the edge of the
fabric.
a Basting stitching
b Reverse stitching
c Wrong side of fabric
d End of zipper opening
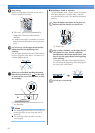
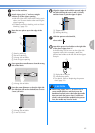
d
Press open the seam allowance from the wrong
side of the fabric.
a Wrong side of fabric
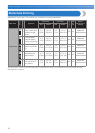
Stitch Name
Pattern
Presser Foot
Application
Stitch Width
[mm (inch)]
Stitch Length
[mm (inch)]
Twin Needle
Walk-
ing
Foot
Reverse/
Reinforcement
Stitching
Auto Manual Auto Manual
Straight
stitch
Center
J
Attaching zippers,
basic stitching, and
sewing gathers or
pintucks, etc.
3.5
(1/8)
0.0–7.0
(0–1/4)
2.5
(3/32)
0.2–5.0
(1/64–3/16)
Yes
(J) Yes
Reverse
*
1
Do not use reverse stitching.
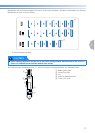
●
Before replacing the presser foot, be sure to turn off the sewing machine, otherwise injuries may occur if a
button is accidentally pressed and the machine starts sewing.
*
1
CAUTION
a
b
c
a
b
c
d
a