


4. ASSEMBLY
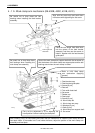
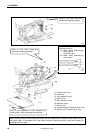
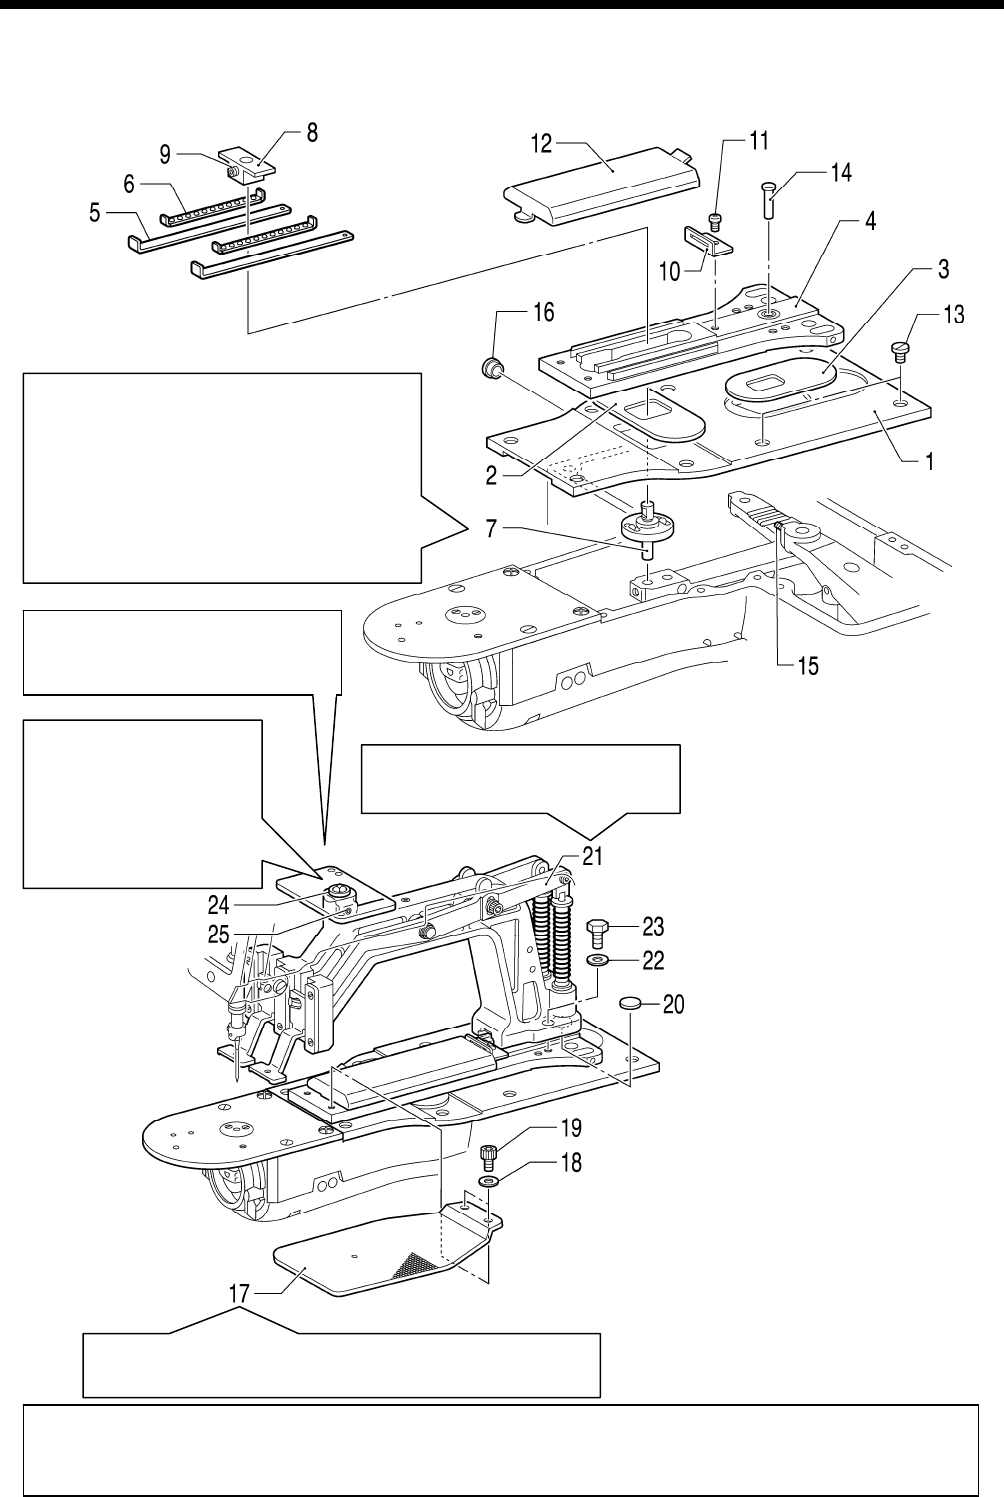
4-17. Work clamp arm mechanism (KE-433B)
KE-430B, 430C series
91
3429Q
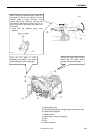
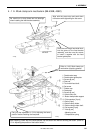
Install parts 1 to 6, clamp them using
parts 7 and 8 so there is no play in them,
and tighten the set screw 9.
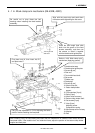
Note:
Install so that the two ball bearings of
the feed bracket guide shaft assembly
do not fit into the holes in the feed
bracket guide plate.
Be careful not to d
rop these three
ball bearings when installing the
work clamp arm assembl
y
.
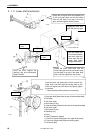
1. Feed bracket guide plate
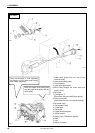
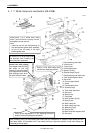
After installing, carry out test feeding and check that the needle hole is inside the work clamp and the
feed plate frame. If the needle hole is not inside the frame, adjust the position of the work clamp arm
assembly and feed plate.
Refer to “4-20. Work clamp arm
mechanism (Applying grease)”
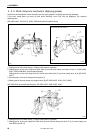
3430Q
2. X
feed cover
Secure the work clamp
arm support shaft with the
set screw so that the
bottom of the work clamp
arm support plate and the
ball bearings touch when
the work clamp is raised.
3. Y
feed cover
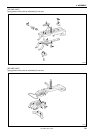
4. Feed bracket assy
5. Spacers [2 pcs]
6. Retainer assys [2 pcs]
7. Feed bracket guide shaft assy
8. Tack length regulator block
9. Set screw
10. Cover support stand
11. Screw
12. Feed bracket cover
13. Screws [8 pcs]
14. Tack width feed shaft
15. Set screw
16. Rubber cap
17. Feed plate
18. Plain washers [2 pcs]
19. Bolts [2 pcs]
20. Work clamp felt
21. Work clamp arm assy
22. Washers [2 pcs]
23. Bolts [2 pcs]
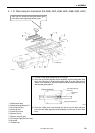
24
. Work clamp arm support shaft
Carry out the adjustment in “5-24. Adjusting the home
po
sition” before installing the feed plate.
25. Set
screw