


TTW1 Universal Service
Replacement Blower
MITW -12 / -15 Series
Page 14
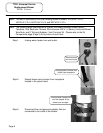
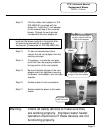
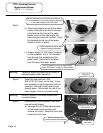
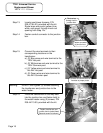
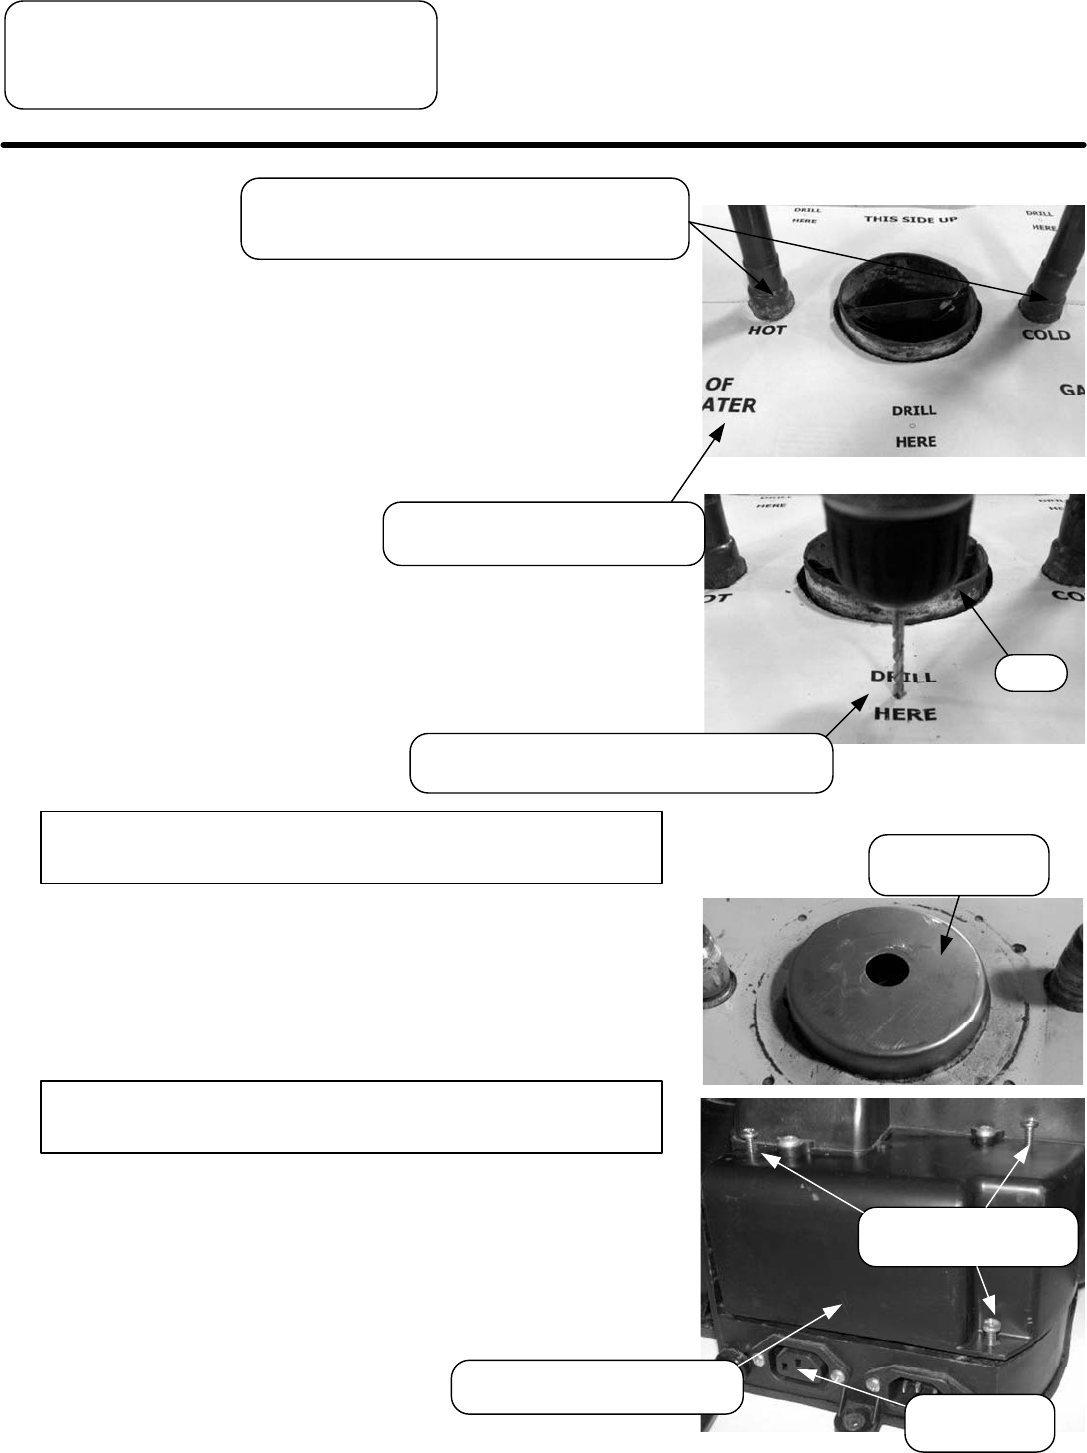
Step 8. Install the flue restrictor, P/N
239-47191-00, firmly on the flue. It may
be necessary to lightly tap down the flue
restrictor. Be sure to tap it evenly and
straight down. Wire brush the top of the
water heater if rust or corrosion exists.
Warning: Failure to install flue restrictor will result in
improper water heater operation.
Place flue
restrictor on flue.
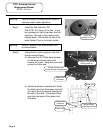
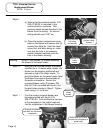
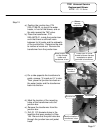
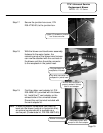
Step 9. Instructions to remove power cord from
new universal blower:
a.) Unscrew the (3) Philips head screws
on the blower access cover and
remove the cover. Keep the cover and
screws for future use.
Loosen all (3) screws
holding cover on.
Power inlet
connector
Blower access cover
(covers access compartment)
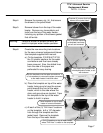
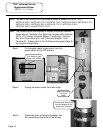
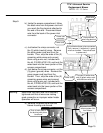
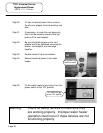
Place template on top of water
heater in correct orientation.
Drill (3) locations on top of water heater,
where “Drill Here” is noted on the template.
Slip the template over the water connections. It
is not necessary to remove the pipes connected
to the water heater’s inlet and outlet.
Drill
Step 7.
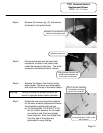
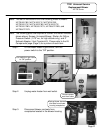
b.) Place the template on top of the water
heater, being sure to have the arrows
point towards the front of the water
heater, which is the side where the
drain and gas valve are located. Tape
the template to the top of the water
heater to hold it in place.
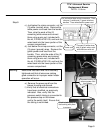
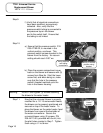
c.) At each of the (3) “Drill Here” locations
on the template, drill a 1/8” diameter
hole through the template and the
jacket head. Remove the template
from the top of the water heater.
Warning: Do NOT remove Torx head screws from
universal blower.