


9
C: INSTALLING THE OPERATOR
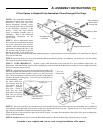
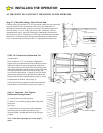
STEP 4: Mount Power Head to Ceiling:
Since there is such variety in ceiling structures,
all the mounting possibilities for the Power Unit
cannot be illustrated here. The main concern is
mounting the Power Unit securely to the ceiling
joists for operational strength, rigidity and
safety. Although there are a series of mounting
slots provided on the power unit, try to secure
the mounting straps in the slots closest to the
front. Mounting may usually be accomplished
using standard 1-1/4“ perforated steel angle
available at most hardware stores. If in doubt
about location of, and attachment to, ceiling
joists, a carpenter should be contacted to
provide assistance. A cross brace will be
necessary if power head is mounted 8” or more
from the ceiling.
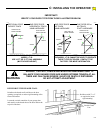
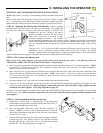
Align the center of opener tracks with the center line previously marked on the top section of the garage door to ensure rail will be
parallel with the direction of door travel.
Use supplied hangers from the ceiling beams to hang the opener at the power head end (be sure to locate and mount to the solid
structural beams, as illustrated). Predrill with 3/16” drill bit and use 1/4” lag screws of appropriate length to ensure a rigid mount.
NOTE: Hanging brackets should be at an angle to provide rigid support. If hangers have no angle or if you use longer hangers, cross
brace the hangers to eliminate the possibility of sway during operation of the opener.
STEP 5: Return to the Rail/Wall Mounting Bracket and securely tighten the bolt and nut that connect the Rail Front Idler
bracket and the Wall Mounting Bracket. Take care not to over tighten the nut; tighten only until the end of the bolt is secured to the
bracket (See Step 2, above).
110050-2
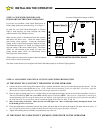
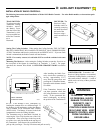
For finished ceilings, or if
structural beams are out of
position for mounting use a
third mounting angle (not
included) making sure it is
securely mounted to beams.
Cut and bend
Hangers to fit
Opener
Power Head
Structural
Beams
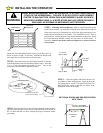
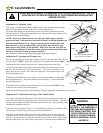
STEP 6: Door Bracket Installation
If your door comes equipped with a strut
mounted opener bracket, follow the door
manufacturer’s instructions to install the bracket
to the door then proceed to Step 7.
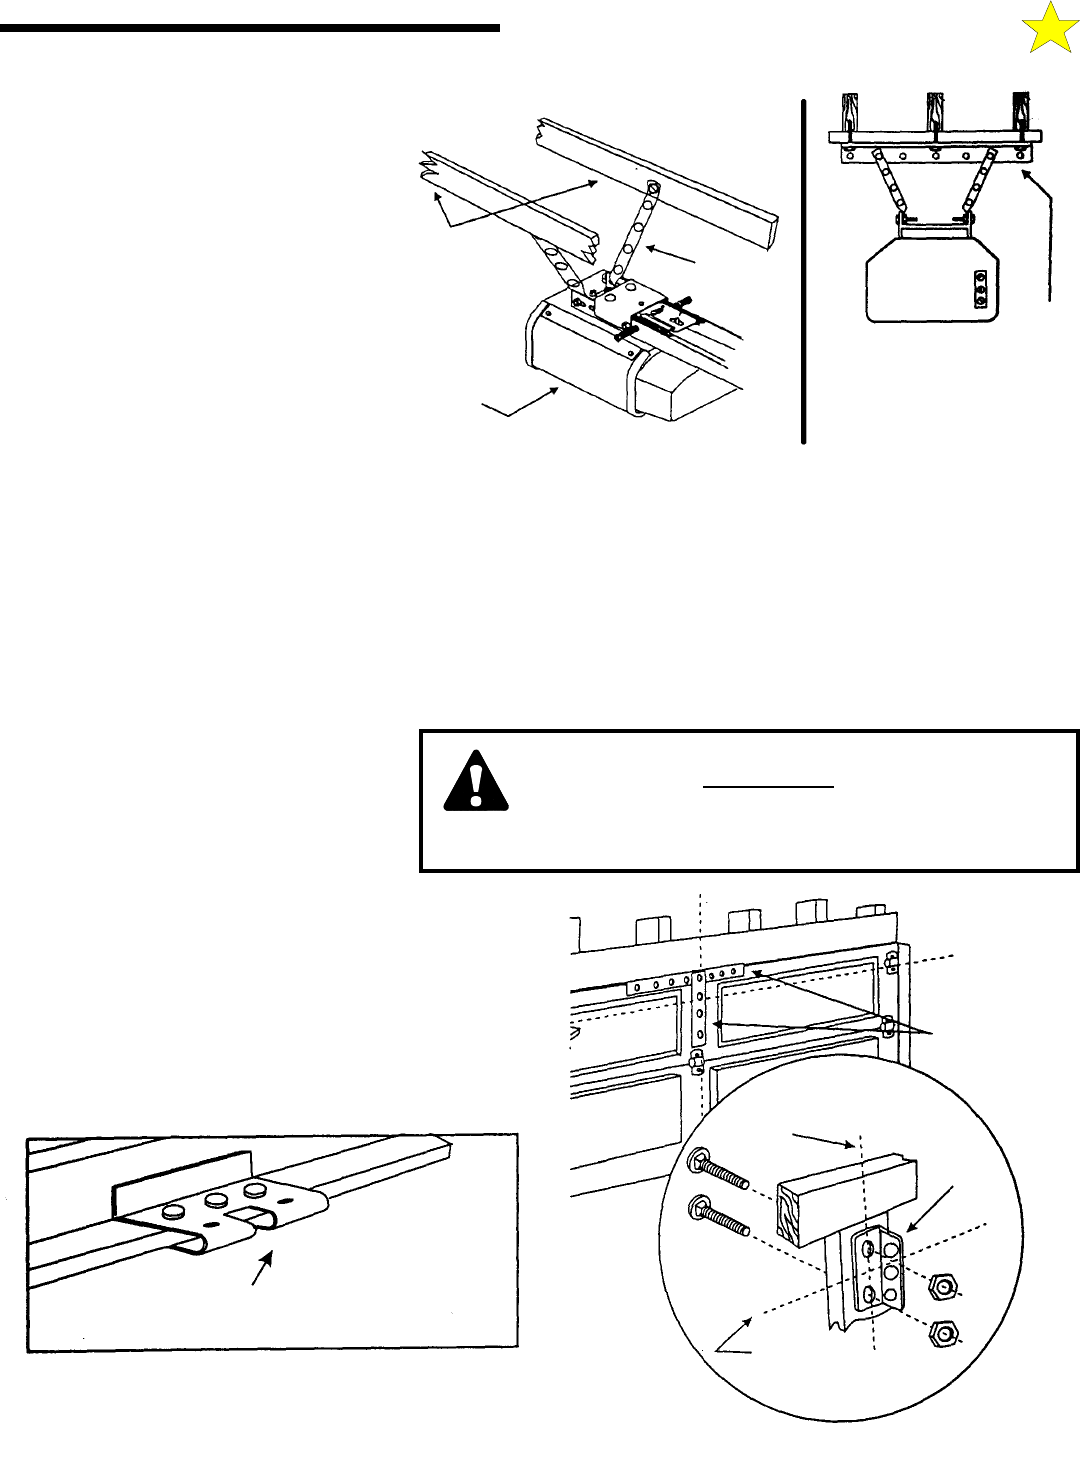
NOTE: If the door is of light construction it will be necessary
to reinforce the center stile with steel angle or wood to prevent
damage to the door if it encounters an obstruction on closing.
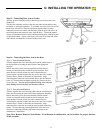
Mount the door bracket using two 1/4”-20 x 2” carriage bolts
and 1/4” nuts (supplied), on center line of door with the
middle hole in line with the top rollers.
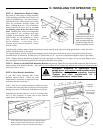
Fiberglass, aluminum or lightweight steel
garage doors will require
reinforcement before
installation of the door mounting bracket
Contact your door manufacturer for a
reinforcement kit or instructions.
WARNING
Reinforce Door
Vertically and
Horizontally
110051-2
Top Roller
Guideline
Door Center Line
Mounting
Bracket
Top Roller
Guideline
If your door comes equipped with a strut mounted opener
bracket, follow the door manufacturer’s instructions to
install the bracket to the door then proceed to Step 7.
110051-1