


17
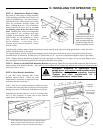
TO REDUCE THE RISK OF SEVERE INJURY OR
DEATH, READ AND FOLLOW ALL INSTRUCTIONS!
WARNING
IMPORTANT SAFETY INSTRUCTIONS
• Ensure authorized personnel only operate the door. NEVER let children operate or play with
door controls. Keep the Remote Control away from children.
• ALWAYS keep a moving door in sight and keep people and objects away from the door area
until the door is completely closed. NO ONE SHOULD CROSS THE PATH OF A MOVING
DOOR.
• TEST THE DOOR OPENER MONTHLY. The door MUST reverse upon contact with a 1-1/2”
high object (or a 2 X 4 board laid flat) on the floor. After adjusting the sensitivity or the limit
of travel, ALWAYS RETEST the Opener. Failure to ADJUST THE OPENER PROPERLY may
result in SERIOUS INJURY OR DEATH.
• If possible, USE THE MANUAL RELEASE only when the door is closed. Use caution when
using the Release with the door open. WEAK OR BROKEN SPRINGS MAY ALLOW THE
DOOR TO CLOSE RAPIDLY, CAUSING SEVERE INJURY OR DEATH.
• KEEP THE GARAGE DOOR PROPERLY BALANCED. See the door owner's manual. An
improperly balanced door MAY CAUSE SEVERE INJURY OR DEATH. Have a QUALIFIED
SERVICE PERSON MAKE REPAIRS TO CABLES, SPRING ASSEMBLIES AND OTHER
HARDWARE.
• SAVE THIS INSTRUCTION MANUAL.
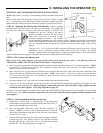
Adjustment #3: Obstruction Sensing (Closing Direction) cont.
When the door comes into contact with a 2” x 4” laid flat on the garage floor and stops intends of reversing, move the close limit stop
away from the power head unit. It is advised that you move the close limit stop one link at a time and run opener through another close
cycle, until the door reverses when it comes into contact with the 2” x 4”.
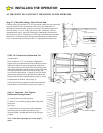
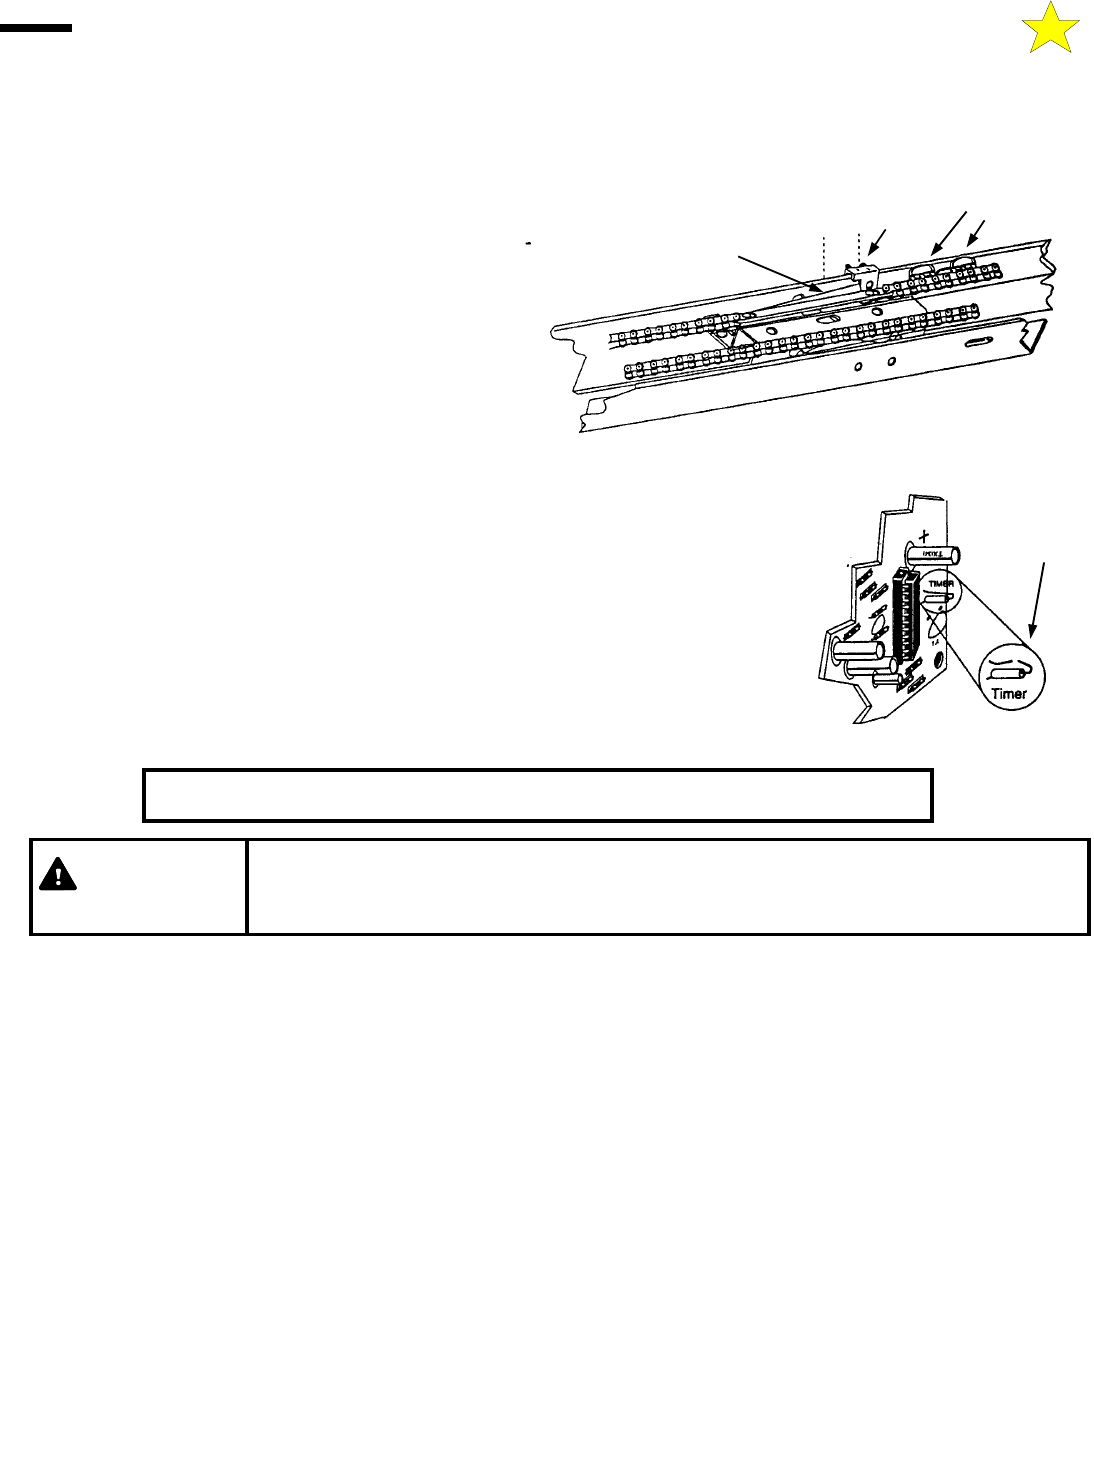
Adjustment #4: Positive Mechanical Lock Adjustment
The garage door opener is designed with an automatic mechanical
locking system. This lock secures the door in the fully closed
position.
To adjust, activate your opener and allow the door to go to its
fully closed position. Loosen the two screws on the rail stop and
move it behind behind the chain latch assembly with a gap of 1/2”
between “stop” and “latch”.
E: ADJUSTMENTS / IMPORTANT SAFETY INSTRUCTIONS
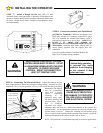
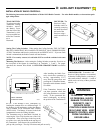
Checking the Travel Timer
Your opener is shipped with the jumper disconnected, allowing the operator to run continuously
for up to 29 seconds, then stop in the Open cycle or reverse in the closing cycle.
If your unit will run for only 17 seconds, the operator has mistakenly been shipped with the
jumper intact on the control board (perhaps the control board was replaced with a board that still
has the jumper installed). On all doors having over 9 feet of travel, it is necessary to cut the run
timer jumper on the motor control board to allow the opener to run for 29 seconds. Disconnect
the power from the opener before removing cover and cutting the jumper. MAKE SURE YOU
DISCONNECT THE POWER BEFORE CUTTING THE JUMPER. THE RUN TIMER WILL
NOT CHANGE IF THE JUMPER IS CUT WITH THE POWER CONNECTED.
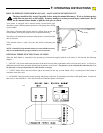
This jumper is located under operator cover on the control board, as illustrated.
Rail “Stop”
“Latch”
Stop Limits
1/2”
110057-1
110057-2
Cut and
Separate