


—
5.
OPTIONAL
ACCESSORIES
BLIND
HEM
FOOT
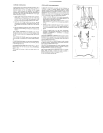
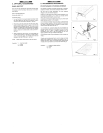
Blind
hem
feet
are
obtainable
as
notional
feet
aria
are
available
or
two
szes
0.5
for
tine-nieGium
fabrics
andl.0
for
medium
heavy
fabrics.
Snap
on
the
appropriate
foot
Set
the
stitch
length
4
5
Proceed
as
fol
ows:
t.
Turn
up
the
hem
to
the
required
depth
and
press.
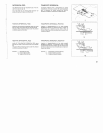
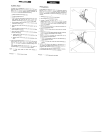
Fold
the
hem
ovcr<
against
the
rig”T
side
of
the
garment.
creanng
a
soft
foid
on
the
wrong’
vine
ot
the
fabric
—
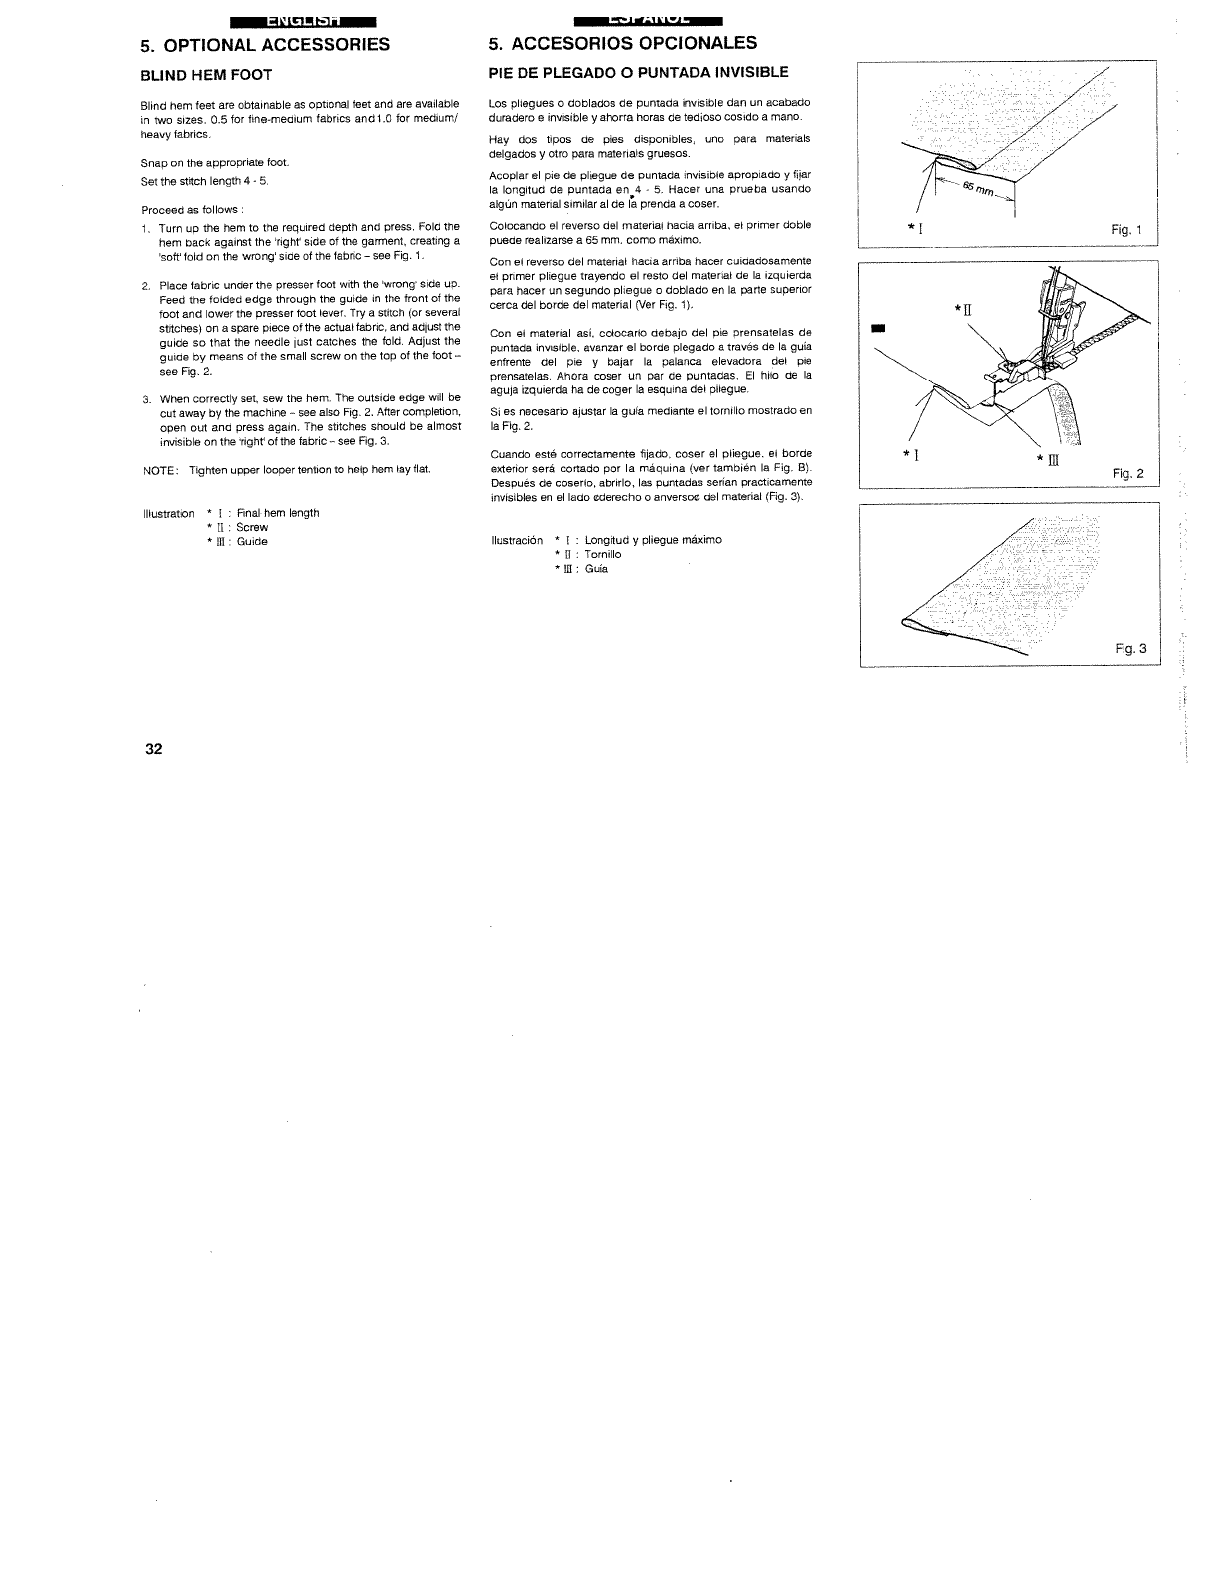
see
Fig.
2
Place
fabric
unoer
the
presser
foot
with
the
‘wrong’
srde
uo
Feed
gre
folded
edge
through
the
guide
in
tne
front
of
the
foot
and
lower
the
presser
foot
lever
Try
a
snch
or
several
stitchesl
on
a
spare
piece
of
the
actual
fabric
and
adlust
the
guide
so
that
the
needle
ust
catches
the
fold.
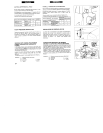
Adlust
the
gu
dv
by
means
of
the
small
screw
on
the
top
of
the
foot
—
see
Fig.
2.
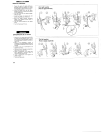
3
When
correctly
vet,
sew
the
hem.
The
outside
edge
will
be
cut
away
by
the
machine
see
also
Fig
2.
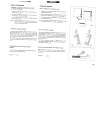
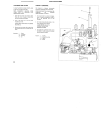
After
completion.
open
Out
and
press
again.
The
stitches
should
be
almost
invisi4e
on
the
right
of
the
fabric-see
Fig.
3
NOTE.
Tighten
upoer
loooer
tension
to
hwy
hem
ray
flat.
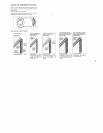
Illustration
*
l
.
Final
hem
enqth
*
II
.
Screw
*
Itt
Guide
fli
gI
•
L2
5.
ACCESORIOS
OPCIONALES
PIE
DE
PLEGADO
0
PUNTADA
INVISIBLE
Los
pliegues
0
doblados
de
oantada
invisib’e
dan
sn
acabaoo
ovradero
e
invisible
y
atrorra
hares
dv
teoroso
cosido
a
mann
Hay
dos
tipsy de
pies
dinponibles,
uno
para
materiala
delgados
p
otro
pare
materials
graesos.
Acoplar
el
pie
be
pliegue
dv
puntada
invisible
aproprado
p
fiiar
lx
longitud
be
puntada
en4
5.
Hacer una
pruoba
usando
algds
material
similar
aIde
Ia
prencta
a
cover.
Colocando
el
reverso
del
material
hacia
arriba,
el
primer
doble
o.jede
realizarse
adS
*rw.
como
maaimo.
Con
el
reverso
del
n’.ater
al
hacia
arriba
nacer
cuidadosarrente
ei
primer
pliegue
trayendo
ei
resto
del
materia
de
ix
izquierda
para hacer
un
segundo
pliegae
0
dobiado
en
Ia
parte
superior
cerca
del
bortw
Gel
material
(Ver
Fig.
Con
el
material
asi,
co
ocarlo
debajo
del
pie
prensatelas
de
puntada
invisible,
avanzar
vi
borde
plegado
a
raves
de
lx
gura
enfrente
del
pie
y
baler
lv
palanca
elevadora
del
pie
prensatelas.
Ahora
cover on
par
de
puntadas.
El
hilo
be
lv
agula
lzqurerda
ha de
coger
Ia
eaquina
del
pliegiJe.
Si
es
necesario
alustar
Ia
guia
mediante
e
tornillo
mostrado
en
lx
Fig
2.
Cuando
esth correctarnente
fijado.
coser
ci
oliegue.
e
barGe
exterior
sera
cortado
por
Ia
maqu
na
leer
tambien
Ia
F’g.
El.
Oespves
clv
coserlo.
abrirlo,
las
puntadas
serian
practican’iente
‘nvisibles
en
el
lado
cderecho
a
anversoc
Gel
matenal
IFig.
3
Ilustracion
*
.
Longtud
y
pliegue
maximo
*
tI
Tornillo
*
III:
Guia
*1
*111
Fig.2
*1
Fig,
1
32