12
Water Softener Setup
TOUCH SCREEN
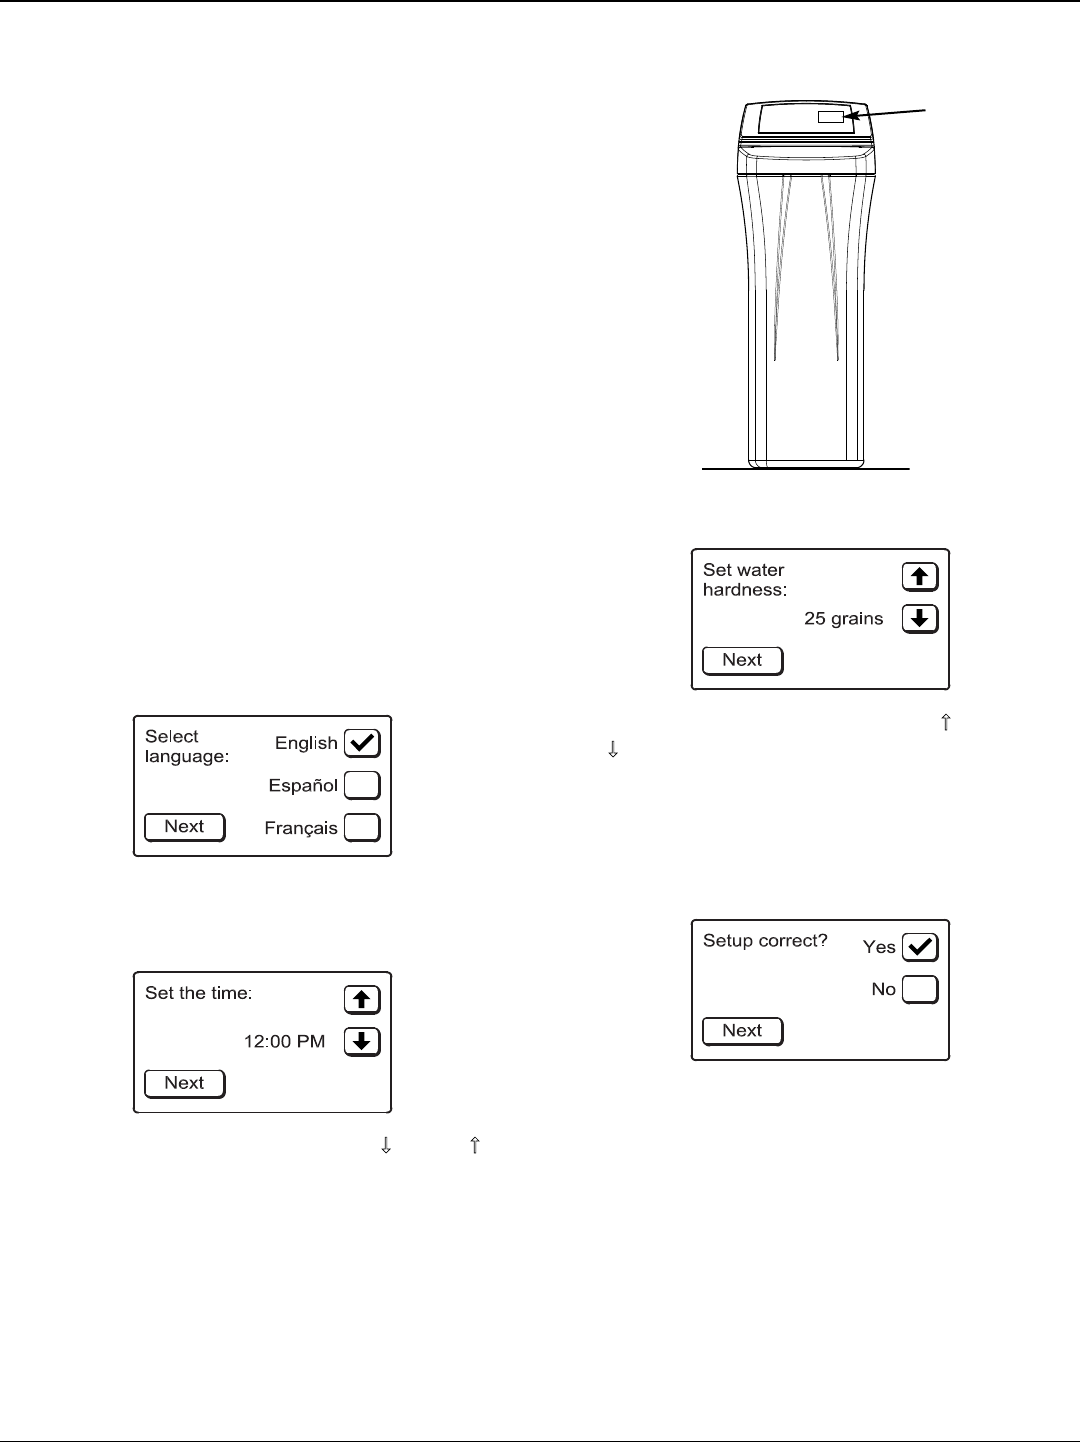
Controls for programming the water softener are dis-
played on a touch screen, located on the softener’s
front panel (See Figure 17). On-screen “buttons”
appear as rectangular outlines with rounded corners
and change with each display (See Figures below).
Button presses are acknowledged with a “beep.”
NOTE: Before cleaning the touch screen to remove
fingerprints, unplug the transformer. The con-
troller’s memory items (including clock time,
water hardness, etc.) are retained during brief
power interruptions. Use a microfiber towel or
household cleaner safe for plastics on the
touch screen.
FIG. 17
Touch
Screen
SETUP PROCEDURE
When the softener is plugged in for the first time, a
beep sounds and the display briefly shows “E-Z
Touch”, followed by the model number and software
version.
Next, a series of three setup screens prompts you to
enter basic operating information:
FIG. 15
1. LANGUAGE: If the desired language is not
checked (See Figure 15), press the button next to
the desired language, then press the NEXT button.
2. CURRENT TIME: Press the DOWN ( ) or UP ( )
buttons to set the current time (See Figure 16).
Hold the button down to rapidly advance. Be sure
AM or PM is correct. When the current time is
shown, press the NEXT button.
Questions? Call Toll Free 1-866-986-3223 Monday- Friday, 8 AM - 7 PM EST
or visit www.ecodynewatertreatment.com
When you call, please be prepared to provide the model, date code and serial number,
found on the rating decal, typically located on the rim below the salt lid hinges.
3. WATER HARDNESS: Press the UP (
) or DOWN
( ) buttons to set the value of your water’s hard-
ness (See Figure 18), then press the NEXT button.
NOTE: Do not increase the hardness setting to com-
pensate for iron in your water. The electronic
control will compensate automatically after
you set the iron level, as described on Page
17.
4. If, at this point, you want to go back and make
changes, press the button next to NO, then press
the NEXT button to repeat the three setup screens.
5. If no changes are desired, make sure the button
next to YES is checked and press the NEXT but-
ton. The softener begins normal operation,
described on the next page.
FIG. 16
FIG. 18
FIG. 19
