


– 105 –
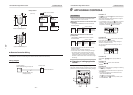
No.
1
Part name
Fan
assembly
(Continued)
Work procedure
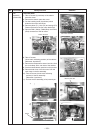
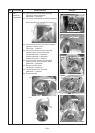
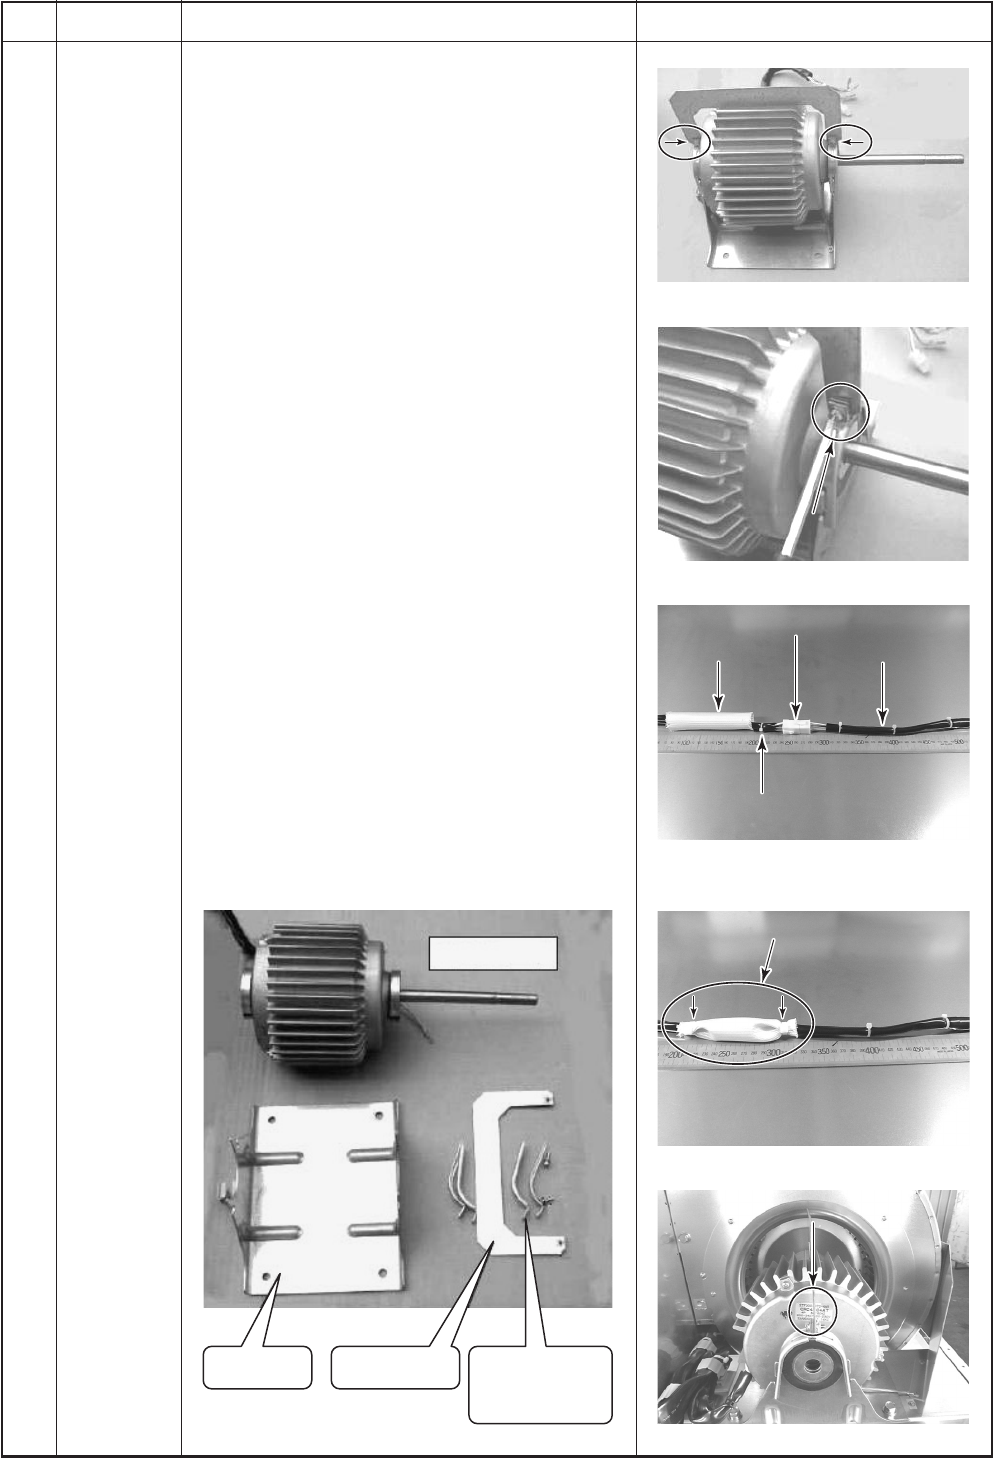
<Fan motor>
1) Take off screws (Arrow mark indicating
position) of the tightening band and then
remove the tightening band, the fixing bracket
and the fan motor.
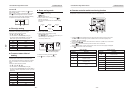
2) Cut the bundling band (2 positions) that fix the
protective tube (white) on the relay connector
of the fan motor.
3) Remove the fan motor lead wire assembly and
the protective tube from lead wire of the fan
motor.
4) Mount the fan motor lead wire assembly and
the protective tube to the fan motor to be
replaced, arrange the tube so that it covers the
relay connector and then fix it with bundling
band (2 positions).
5) Put the fan motor to be replaced on the motor
base.
Set the fan motor so that label of the model
name is at upper side when replaced.
∗ After replacement, assemble the fan motor in
reverse order so that it becomes the same
status as that before replacement.
Be careful there is no loosening of screws
when assembling.
Check also that there is no fitting of fan with
fan case, no air discharge and no abnormal
sound
Remarks
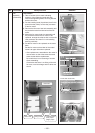
Tightening band
Tightening band
(Ø
4: 1 position for left/right each)
4: 1 position for left/right each)
Fix the both ends of the
Fix the both ends of the
protective tube so that it
protective tube so that it
covers the relay connector section.
covers the relay connector section.
Fan motor model name label
Fan motor model name label
Relay connector
Relay connector
Fan motor lead wire
Fan motor lead wire
Protective tube
Protective tube
Fan motor lead
Fan motor lead
wire assembly
wire assembly
Tightening band
(Ø4: 1 position for left/right each)
Fix the both ends of the
protective tube so that it
covers the relay connector section.
Fan motor model name label
Relay connector
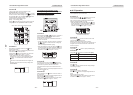
1)
1)
1)
1)
4)
4)
5)
5)
2), 3)
2), 3)
1)
1)
4)
5)
2), 3)
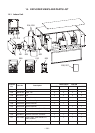
Fan motor lead wireProtective tube
Fan motor lead
wire assembly
Fan motor
Tightening band
(Left): 2 pcs.
(Right): 2 pcs.
Motor base Fixing bracket