53
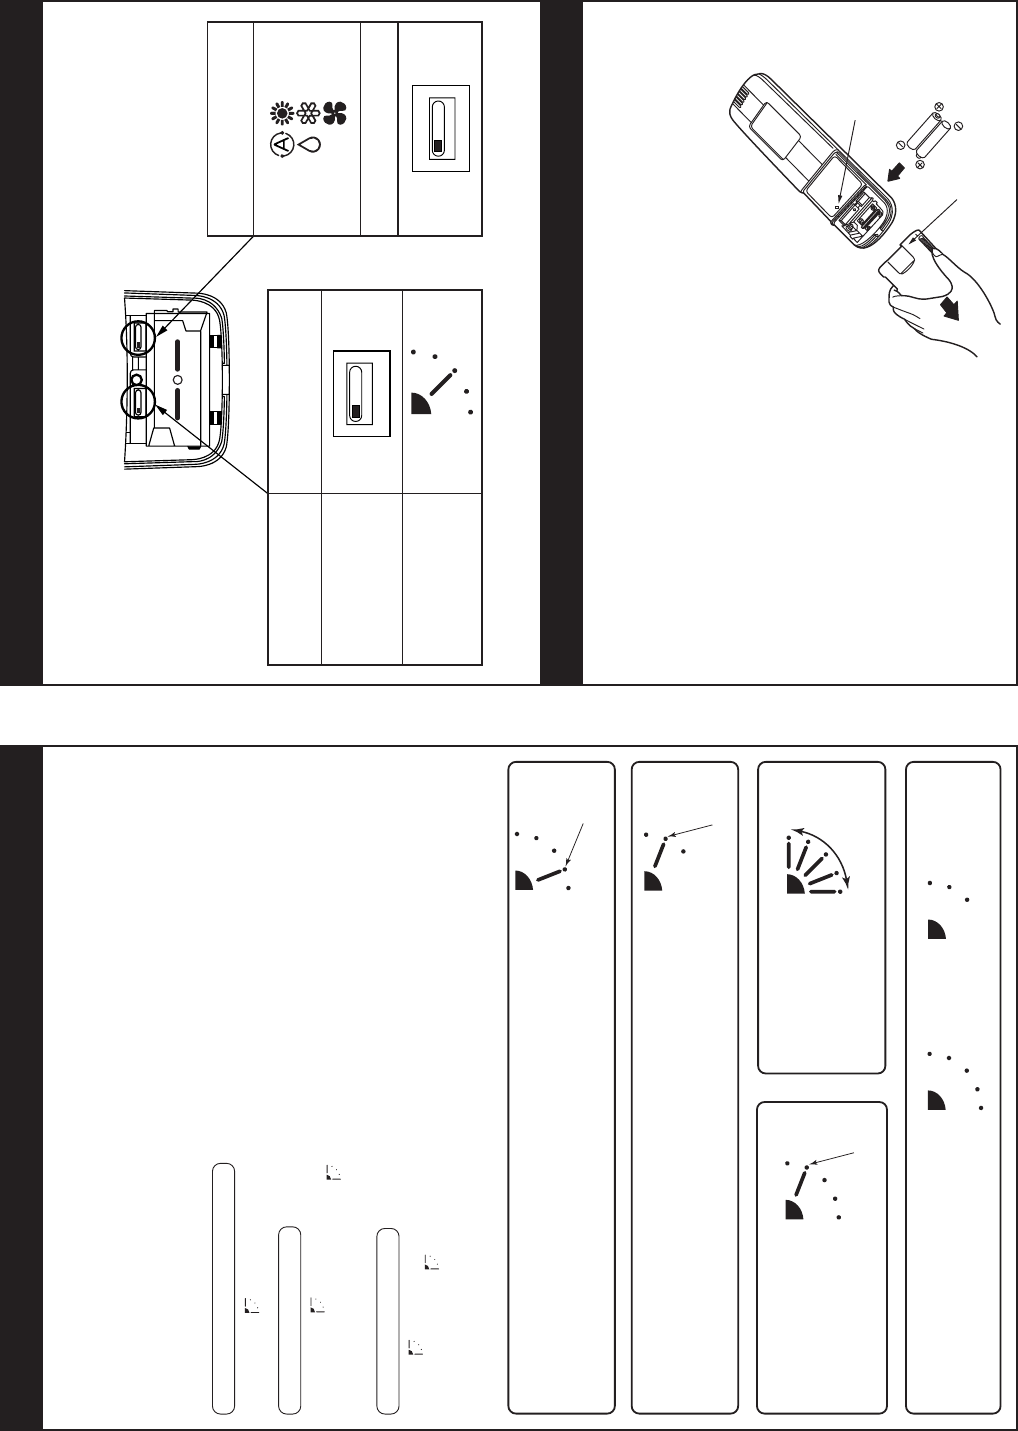
HOW TO ADJUST AIR DIRECTION
• Never move the flap (Air direction up/down adjusting plate) which is operated on the remote
controller with hands except a case of cleaning of the flap.
• While the unit stops, the flap (Air direction up/down adjusting plate) directs downward auto-
matically.
• During preparation of heating, the flap (Air direction up/down adjusting plate) directs upward.
The swinging operation starts after heating preparation status has been cleared. However,
swinging is displayed on the AUTO flap display of the remote controller even if the heating
operation is being prepared.
How to set up the air direction
Every pushing button during operation, the air direction changes.
How to start swinging
When pushing button, set the direction of the flap (Air direction up/down adjusting plate) to
the lowest position, and then push
button again, the swinging is displayed and the air direction
automatically changes upward/downward.
How to stop swinging
Pushing button once again during swinging of the flap stops the flap at the desired position.
Then, when pushing
button, the air direction can be set to position from the uppermost
position.
• In cooling or dry operation, the flap does not stop when the flap directs downward.
If doing so, the flap stops at the 3
rd
position from the uppermost position.
In heating operation
Direct the flap (Air direction up/down adjusting plate) down-
ward, otherwise the hot air may not reach at the foot.
In cooling/dry operation
Direct the flap (Air direction up/down adjusting plate) upward,
otherwise dewdrops may adhere or drip down to near of the
discharge grille.
In air
blowing operation
In all
operation modes
Display when swinging stopped
Initial setup
Initial setup
Initial setup
Series of
operation
Fan/Heat operation Cool/Dry operation
SLIDE SWITCH
• Do not change setting of the slide switch because a malfunction occurs by other settings.
• Before usage, check the slide switch is set to the position as follows;
HOW TO INSERT THE BATTERIES
1. Holding the both sides of the cover and remove it by sliding downward.
2. Correctly insert 2 AAA alkali batteries matching + and - polarities with indications.
3. Push RESET button with something tipped and attach the cover.
• Replace the batteries when the display section of the remote controller is difficult to be read,
or when the signal cannot be sent if you are not close to the sensor.
(The standard replacement time of the alkali batteries is approx. one year.)
• Use the same type of new batteries for replacing two batteries.
• In case when you do not the remote controller
for a long time, remove the batteries.
RESET button
Cover
SKN AHC
SKN
AHC
Removal of battery cover
Operation mode display
of remote controller
Slide switch position
Swing
Slide switch position
Flashing position
on remote controller
Corresponding model
for change of flap
HIGH
MED.


