51
Operation Section
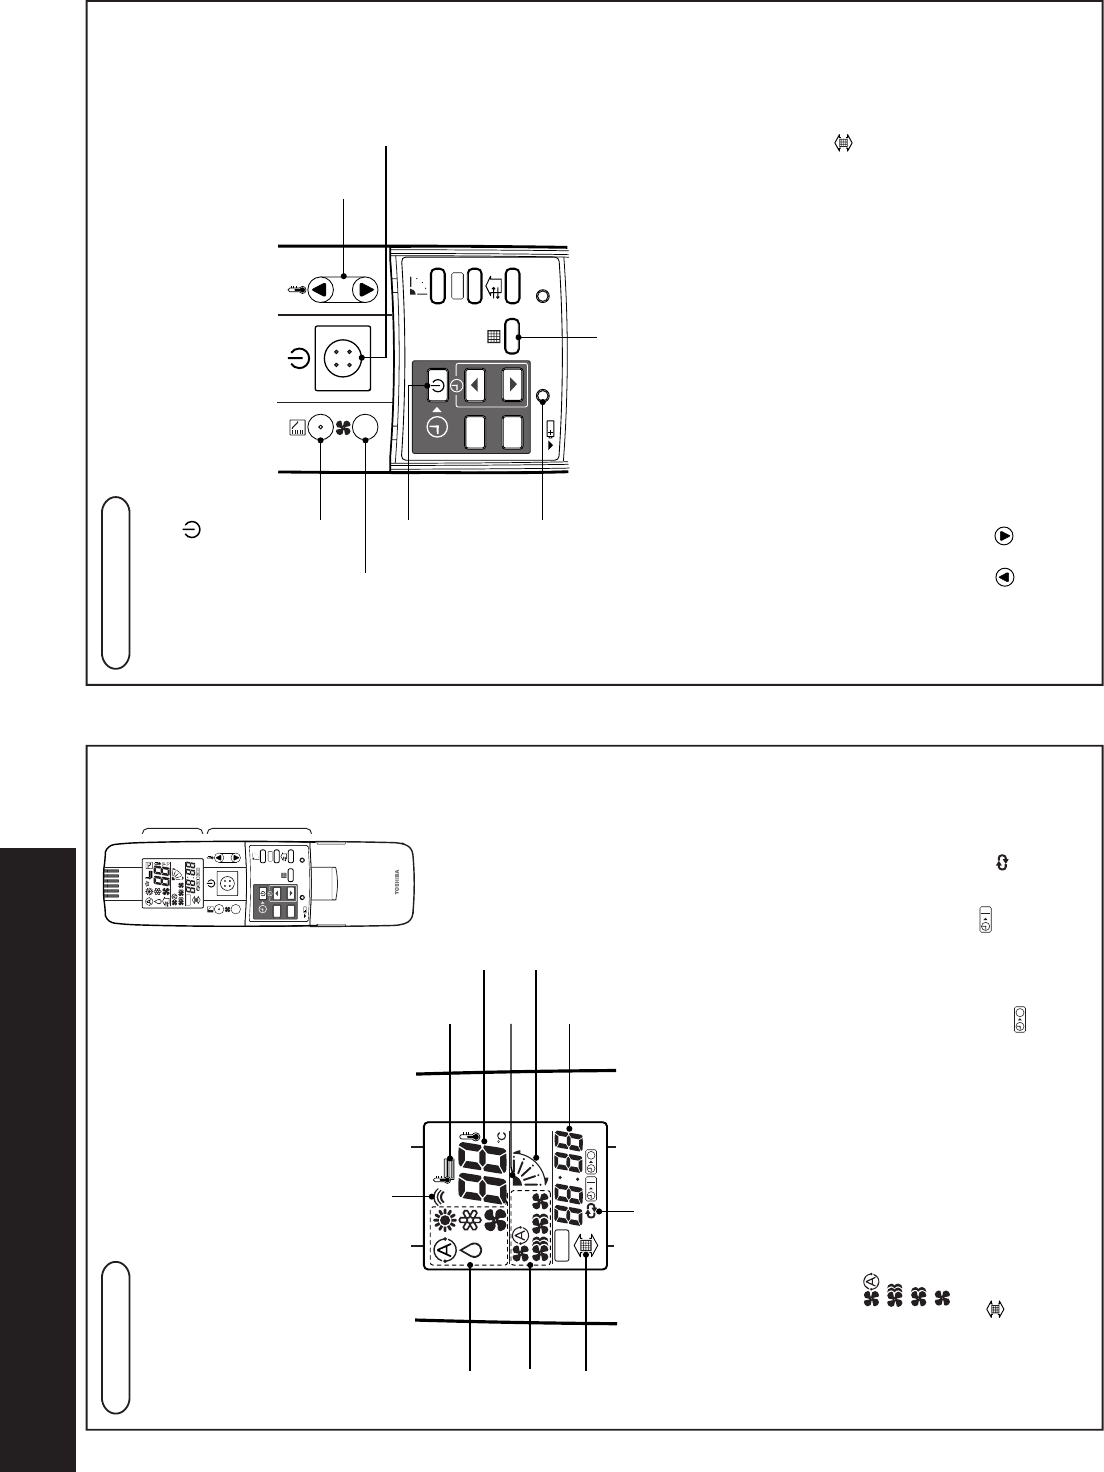
Push each button to select a desired operation.
• The details of the operation needs to be set up once, afterward, the air conditioner can be
used by pushing
button only.
1
Operation select button
Selects desired operation mode.
2
Fan mode select button
Selects a fan mode.
3
Timer set button
TIMER SET button is used when the
timer is set up.
4
Check button
CHECK button is used for check
operation. During normal operation, do
not use this button.
5
Temperature set button
Adjusts required room temperature.
Set required set temperature by
pushing
or .
6
Start/Stop button
When the button is pushed, operation starts,
and it stops by pushing the button again.
When the operation stops, the operation lamp
and all displays disappear.
7
Filter reset button
Resets (Erases) “FILTER ” display.
OPTION :
Remote controller sensor
Usually the TEMP. sensor of the indoor unit
measured a temperature. A temperature around
the remote controller can also be measured.
For details, contact the dealer from which you
have purchased the air conditioner.
SET
ACL
SENSOR
CL
ADR
7
2
1
4
3
5
6
Display Section
All indicators are shown in the right and the lower figures for the
explanation.
Only selected contents are display in actual operation.
• When turning on the leakage breaker at the first time 3
minutes later, [SET DATA] flashes about for 1 minute on the
display part of the remote controller. While this display is
flashing, the model is being automatically confirmed.
Accordingly, wait for 1 minute after [SET DATA] display has
disappeared, and then use the remote controller.
ADR
ACL
SENSOR
SET
CL
ADR
Display
section
Operation
section
1
Transmitting indication
Displayed while operating the switches of
the remote controller.
2
Mode display
The selected operation mode is displayed.
3
Fan mode select display
The selected fan mode is displayed.
(AUTO)
(HIGH)
(MED.)
(LOW)
4
Filter display
If “FILTER
” is displayed, clean the air
filter.
5
CHECK display
Displayed while the protective device
works or a trouble occurs.
6
Set up temperature display
The selected set up temp. is displayed.
7
Flap position display
8
SWING display
Displayed during up/down movement of
the flap.
9
Timer time display
Time of the timer is displayed.
(When a trouble occurs, the check code is
displayed.)
10
Timer SETIN setup display
When pushing the Timer SET button,
the display of the timer is selected in
order of [OFF]
®
[OFF] repeat OFF timer
® [ON]
® No display.
ADR
1
10
2
3
4
5
6
8
7
9
ACCESSORIES


