19
1
Push button.
The operation lamp goes on, and the operation starts.
2
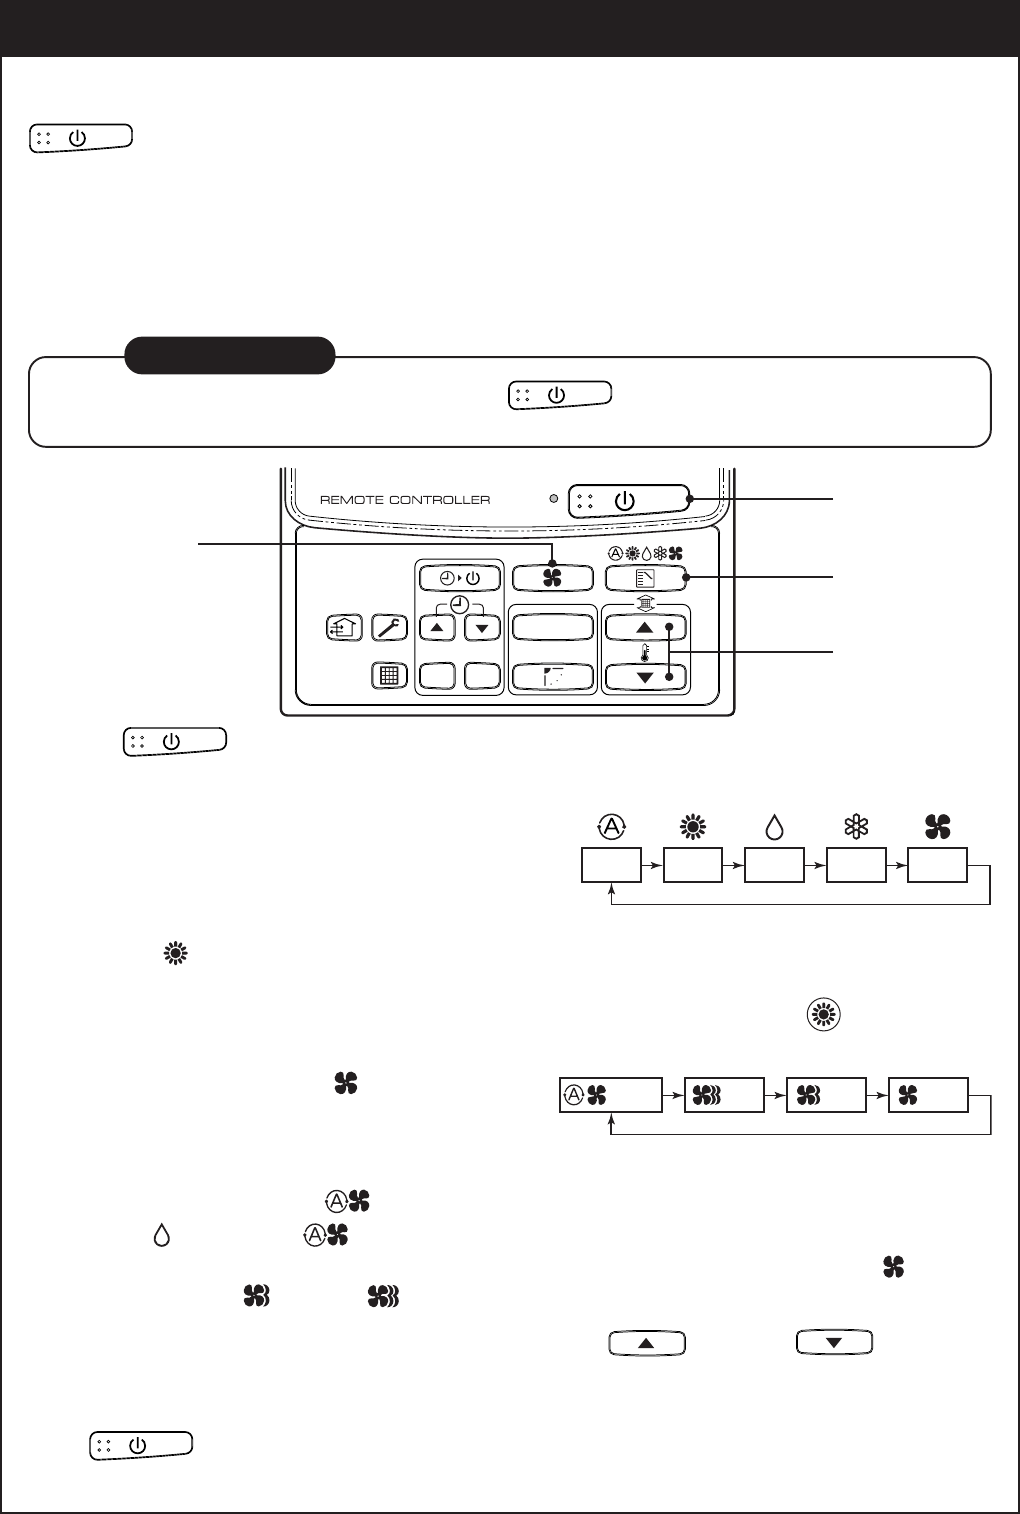
Select an operation mode with the “MODE” button.
One push of the button, and the display
changes in the order shown on the right.
• In HEAT mode, if the room temperature reaches to the set temperature, the outdoor unit stops and
the air flow becomes LOW and the air volume decreases.
• In the defrost mode, the fan stops so that cool air is not discharged and PRE-DEF is displayed.
3
Select air volume with “FAN ” button.
One push of the button, and the display
changes in the order shown on the right.
• When air volume is “AUTO ”, air volume differs according to the room temperature.
• In DRY mode, “AUTO ” is displayed and the air volume is LOW.
• In heating operation, if the room temperature is not heated sufficiently with VOLUME “LOW ” opera-
tion, select “MED. ” or “HIGH ” operation.
4
Determine the set up temperature by pushing the “TEMP. ” or “TEMP. ” button.
Stop
Push button.
The operation lamp goes off, and the operation stops.
CORRECT USAGE
When you use the air conditioner for the first time or when you change the SET DATA value, follow the proce-
dure below. From the next time, the operation displayed on the remote controller will start by pushing the
button only.
Preparation
Turn on the main power switch and/or the leakage breaker.
• When the power supply is turned on, a partition line is displayed on the display part of the remote controller.
*
After the power supply is turned on, the remote controller does not accept an operation for approx. 1 minute,
but it is not a failure.
REQUIREMENT
• While using the air conditioner, operate it only with button without turning off the main
power switch and the leak breaker.
AUTO HEAT DRY COOL FAN
LOW MED. HIGH
AUTO
UNIT
1
2
4
3
SET
CL


