


7
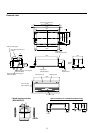
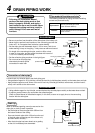
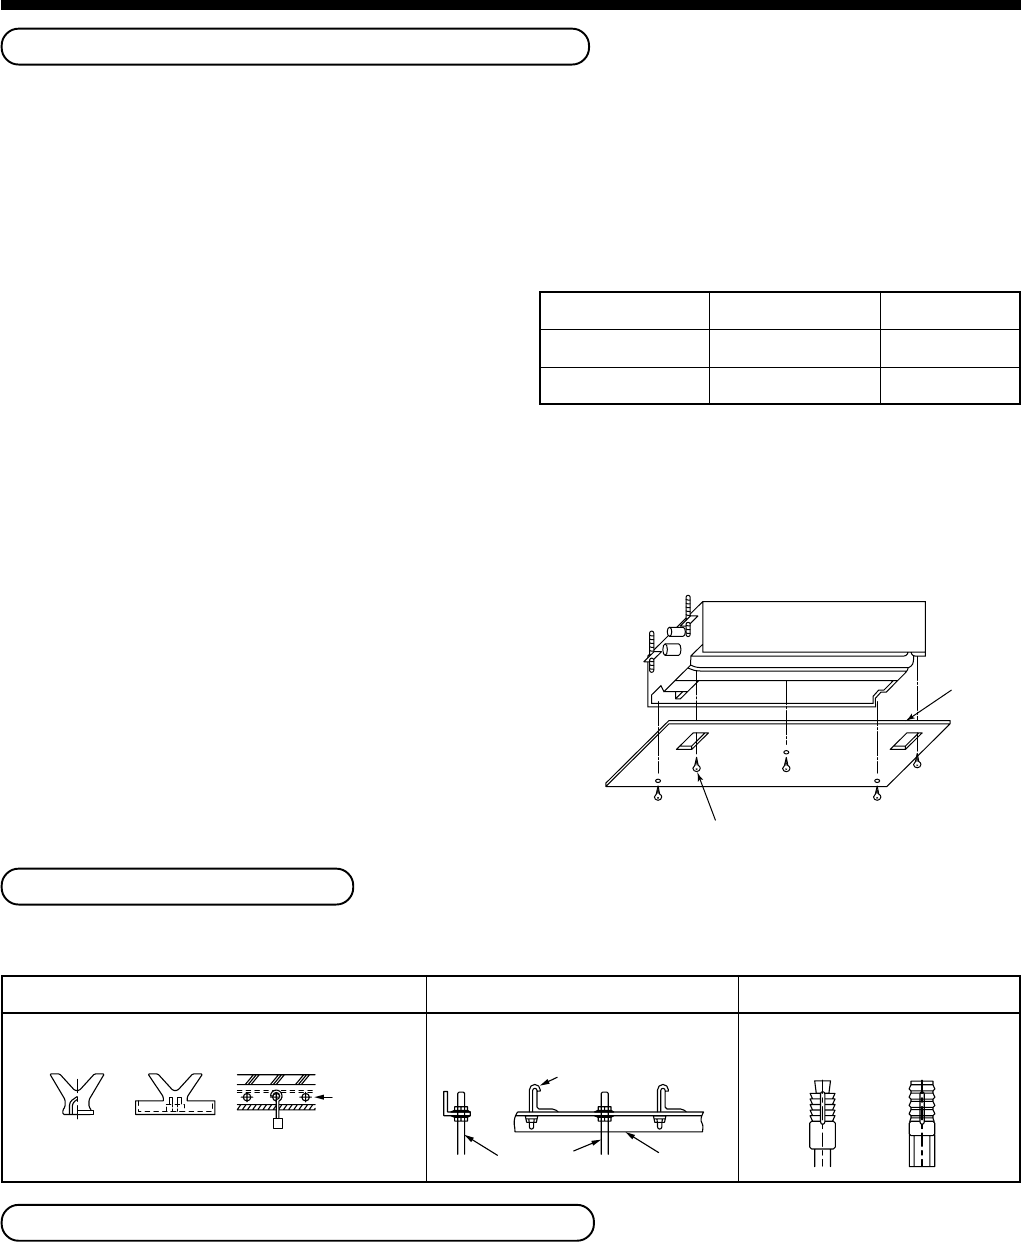
Ceiling opening and installation of hanging bolts
• Considering pipe/wire connecting work inside the ceiling after the indoor unit has been hanged, select an
installation place and determine piping direction.
• After installation place of the indoor unit has been determined, open the installation hole on the ceiling and install
the hanging bolts.
• For the ceiling opening size and the hanging bolt pitch, refer to the external view and the attached installation
pattern.
• If the ceiling has been already set up, draw the drain
pipe, refrigerant pipe, indoor/outdoor inter-unit cable,
cable for central control system, and remote
controller cable up to the position where pipes and
cables are to be connected before hanging the
indoor unit.
Please procure the hanging bolts and nuts for
installation of the indoor unit at local site.
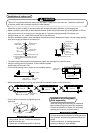
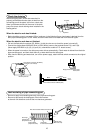
[How to use the attached installation pattern]
The installation pattern is attached inside of the package cap.
<In case of existing ceiling>
Use the installation pattern for positioning of the ceiling opening hole and the hanging bolt.
<In case of new ceiling>
Use the installation pattern for positioning of the opening hole
when setting up a new ceiling.
• Install the indoor unit after installation of the hanging bolts.
• Using the attached installation pattern fixing screws (M5 ×
20L: 4 pieces), attach the installation pattern to the indoor unit.
(Screwing to installation brackets of the ceiling panel)
• When setting up the ceiling, open a hole along the outside
dimension of the installation pattern.
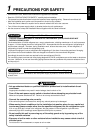
Installation of hanging bolts
Use M10 hanging bolts (4 pcs, to be local procure).
Matching to the existing structure, set pitch according to size in the unit external view as shown below.
New concrete slab
Install the bolts with insert brackets or anchor
bolts.
Steel flame structure
Use existing angles or install new
support angles.
Existing concrete slab
Use a hole-in anchors, hole-in
plugs, or a hole-in bolts.
Anchor bolt
(Blade type
bracket)
(Slide type
bracket)
(Pipe hanging
anchor bolt)
Reinforcing
steel
Hanging bolt
Hanging bolt Support angle
Pattern sheet
Ceiling panel fixing screw
(Use the attached screws.)
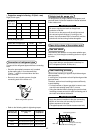
Installation of remote controller (Sold separately)
For installation of the wired remote controller, follow the Installation Manual attached with the remote controller.
For installation of the wireless remote controller, follow to the Installation Manual attached to the remote controller.
• Do not put the remote controller on the place where is exposed to direct sunlight or near a stove, etc.
• Operate the remote controller, check the indoor unit surely receives the signal, and then install the remote
controller. (Wireless type)
• Install the remote controller 1m apart from the devices such as TV or stereo. (Image may be disturbed or noise
may be output.) (Wireless type)
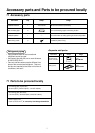
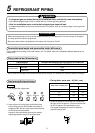
Hanging bolt
Nut
Flat washer
M10 or W3/8
M10 or W3/8
M10
4 pieces
12 pieces
8 pieces
3
INSTALLATION OF INDOOR UNIT