


26
䟺
䟺䟺
䟺4䠀
䠀䠀
䠀4䟻
䟻䟻
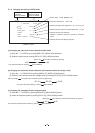
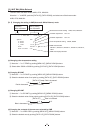
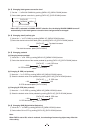
䟻 Changing detail (outline) gain
䐖!'%)䊲*%!("&$ &%%! $
䐗%%$#'&!%% ("&$ &%%! $
䠭䠯% #$$
䟿
%
#$$䠭䠯
䟺
䟺䟺
䟺4䠀
䠀䠀
䠀3䟻
䟻䟻
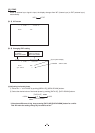
䟻 Changing black gamma correction level
䐖%%)2*%!+,.("&$ &%%! $
䐗%011!##%! ("&$ &%%! $
䠭䠯
/ --
䠭䠯
* When OFF is selected in GAMMA ON/OFF selection line, the display BLACK GAMMA turns off
automatically. So the black gamma correction level change cannot be changed.
䠄
䠄䠄
䠄4䠊
䠊䠊
䠊5䠅
䠅䠅
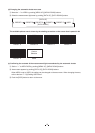
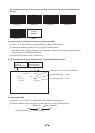
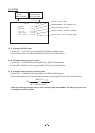
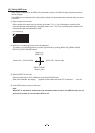
䠅 Changing pedestal
䐟 Move the “䊻” to M. PED by pushing [MENU UP], [MENU DOWN] buttons.
䐠 Select the desired value of the master pedestal by pushing [DATA UP], [DATA DOWN] buttons.
䠷DATA UP䠹 M. PED rises
䠉200 0 200
M. PED decreases 䠷DATA DOWN䠹
䠄
䠄䠄
䠄4䠊
䠊䠊
䠊6䠅
䠅䠅
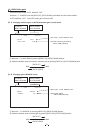
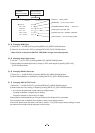
䠅 Changing DNR (Digital Noise Reduction)
䐟 Move the “䊻” to DNR by pushing [MENU UP], [MENU DOWN] buttons.
䐠 Select either ON or OFF by pushing [DATA UP], [DATA DOWN] buttons.
Note:
When DNR is set to ON, noise is reduced, but shooting a fast moving object may affect the
video clarity.
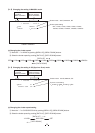
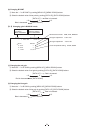
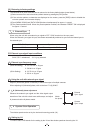
(b) Changing R. PED (red pedestal)
(a) Changing master pedestal
䐟 Move the “䊻” to R. PED by pushing [MENU UP], [MENU DOWN] buttons.
䐠 Select the desired value of red pedestal by pushing [DATA UP], [DATA DOWN] buttons.
䠷DATA UP䠹 R. PED rises
䠉100 0 100
R. PED decreases 䠷DATA DOWN䠹
(c) Changing B. PED (blue pedestal)
䐟 Move the “䊻” to B. PED by pushing [MENU UP], [MENU DOWN] buttons.
䐠 Select the desired value of blue pedestal by pushing [DATA UP], [DATA DOWN] buttons.
䠷DATA UP䠹 B. PED rises
䠉100 0 100
B. PED decreases 䠷DATA DOWN䠹