59
0010
8130
8440
8450
8460
0701
8450
8460
8200
8330
8310
8460
8210
A.0500.551 – IM-TGMAG/02.00 EN (02/2008)
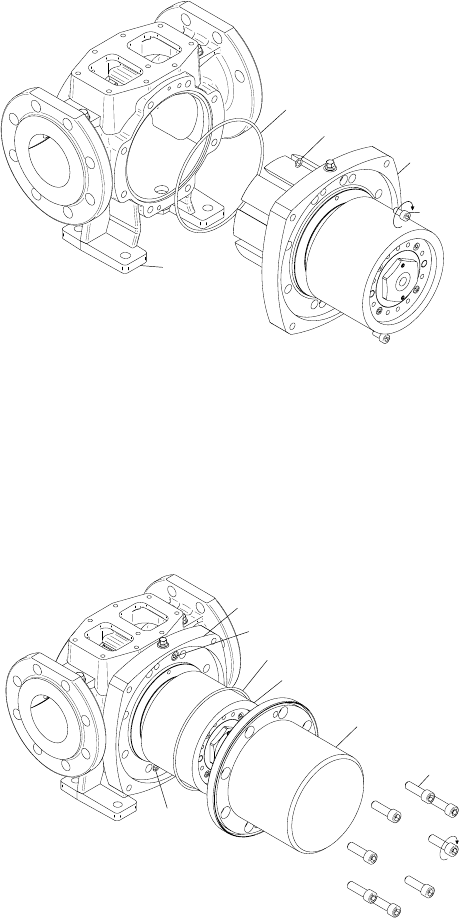
4.3.3 Assembly of the back-pull-out assembly to the pump casing
1. Check that the O-ring grooves and axial
support faces are not damaged and free
of dirt.
2. Cover O-ring (8130) slightly with
grease and fit it into the groove in the
pump casing (0010).
3. Cover O-ring (8440) slightly with
grease and fit it into the groove in the
intermediate casing (8450).
4. Fit the complete back-pull-out
assembly carefully into the pump casing
(0010). Take care of the correct posi-
tion of the holes for the tightening bolts.
5. Fit cap head screws (8460) and tighten
them to fix the intermediate cover
(8450) to the pump casing (0010).
Remark: The pump insert (8430) is centering the assembly in the pump casing (0010) with a tight
fitting. Do not hit with a plastic hammer on the rotor shaft (0701) during assembly. If the assembly
cannot be fitted by hand use long bolts to pull the intermediate cover (8450) against the pump
casing (0010).
4.3.4 Assembly of the separation can
1. Check that the O-ring groove and axial
support faces are not damaged and free
of dirt
2. Cover O-ring (8200) slightly with
grease and fit it into the groove in the
separation can (8310)
3. Fit the separation can (8330) over the
inner magnetic rotor (8310). Take care
of the correct position of the holes for
the tightening bolts and the threaded
holes for disassembly. The threaded
holes should be in line with the cap
head screws (8460).
4. Fit cylinder screws (8210) and tighten
them crosswise to fix the separation can
(8330) on the intermediate cover (8450).
Remark: The cap head screws (8210) are fixing both the intermediate cover (8450) and separation
can (8330) tightly on the pump casing (0010).


