6
accident.
3. Do not open the case to disassemble and reconstruct the product.
It may cause electric shock, operation failure and disaster such as fire. In addition, note the product, which
is disassembled or reconstructed, may not satisfy the functions and performance in the specifications and
is out of guarantee.
4. Do not operate the product with the wet hands.
It may cause electric shock or accident.
WARNING
1. Do not drop, hit to the object and give excessive impact (10G or more) at handling.
Though Ionizer itself doesn’t break, inside construction might be broken and cause malfunction.
2. When cable is mounted or eliminated, pinch modular plug claw with finger and insert or take out the plug
itself vertically. If mounted or eliminated to inappropriate direction, mounting part of modular jack might be
damaged and finally it leads to operation failure.
2. Installation
2-1. Installation of Ionizer body
Investigate the places where static problem occurs, or process and parts which generate ESD
(Electro static discharge), and carefully consider the required conditions to ensure appropriate static
charge elimination before installation.
1. Installation height
When the ionizer is installed, keep the distance between charged objects and the ionizer within the
range below.
Distance between the charged objects and ionizer (mm)
Ion-production
frequency
[Hz]
With air purge (note) W/o air purge
1 400 to 2000 400 to 500
3 300 to 2000 300 to 400
5 300 to 2000 300 to 400
10 200 to 2000 200 to 300
15 200 to 2000 200 to 300
20 150 to 2000 150 to 250
30 50 to 2000 50 to 200
60 50 to 2000 50 to 150
(Note)・As the installation height stated above is a standard, check the effect of the static charge elimination
before installation.
・The minimum installation height should be 200mm or more when the feed back sensor is use, and
that for the auto balance sensor should be 100mm or more. When the ionizer is used outside of these
conditions, be sure to check if these sensors will operate properly.
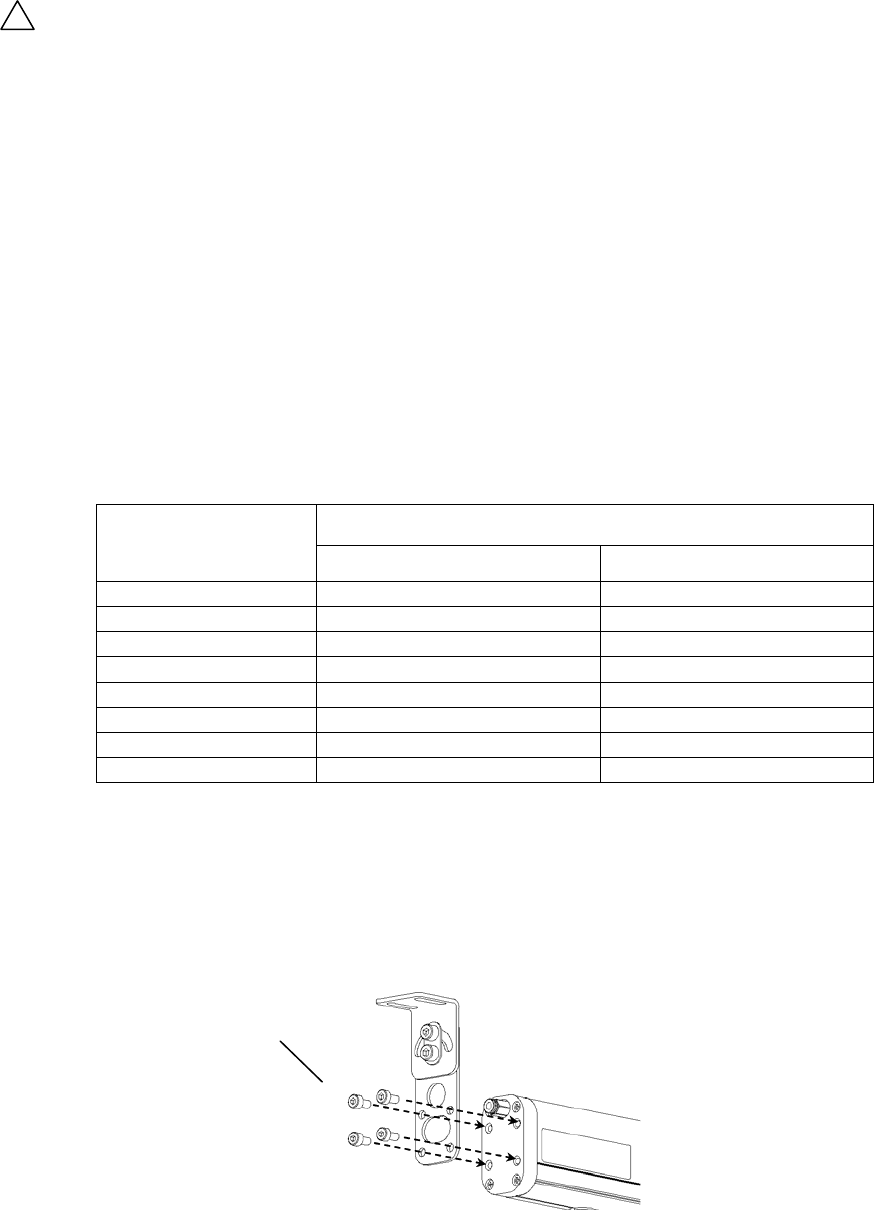
2. Mount end brackets on both sides of the ionizer body with the attached M4 threads.
!
Attached M4 threads


