VI
CTORY VSPH Models
13
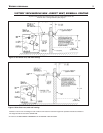
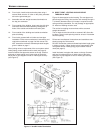
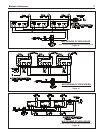
Figure 11.
V
ent/Air Intake
T
ermination
10. From inside, install inside termination plate using 4
screws. Make sure the 4" collar on the plate, penetrate-
ed into the galvanized pipe.
1
1. Assemble and seal straight screened termination to
the slip joint connector.
1
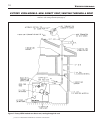
2. From outside of the building, insert vent pipe (slip joint
connector and termination assembly) through the 3"
holes of the outside and inside termination plate.
13. From outside of the building seal outside termination
plate to building.
14. From inside, proceed with air intake and vent pipe
installation. Follow vent manufacturer’s instructions and
restrictions mentioned on page 6 of this manual. DO
NOT exceed the maximum allowed equivalent lengths
given in tables on page 7.
When joining various components of the vent system and air
intake piping, proper sealant must be used (see page 6).
Install horizontal vent pipe with seams on the top. Connect
and seal air intake piping to air intake collar of the boiler.
Adjust the air pipe support to hold air intake pipe securely
(see Figure 2).
B. DIRECT VENT - VENTING AND AIR INTAKE
THROUGH A ROOF
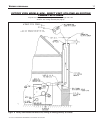
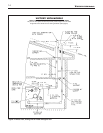
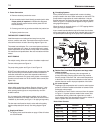
Figure 12 shows typical vertical venting.The vent pipe must
p
ass through the ceiling, floor and the roof vertically through a
7" minimum diameter cutout. A fire stop is required for each
ceiling and floor penetration. For roof passage an appropriate
U
L listed roof flashing must be used.
The vertical vent piping must terminate with a screened
s
traight termination.
The air intake terminal should be a screened 180˚ elbow fac-
ing down. The air intake opening must be at least 1 foot below
the vent opening.
Follow vent manufacturer’s instructions and restrictions men-
tioned on page 6 of this manual.
DO NOT exceed the maximum allowed equivalent length given
in tables on page 7. When joining various components of the
vent system and air intake piping, proper sealant must be
used (see page 6).
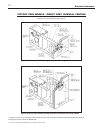
Install horizontal vent pipe with seams on the top. Connect
and seal air intake piping to air intake collar of the boiler.
Adjust the air pipe support to hold air intake pipe securely
(See Figure 2).


