


82
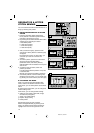
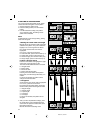
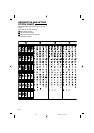
G.SETTING OF EACH PATTERN
You can change the stitch width, length, mirror/
reverse stitch and elongation of each pattern.
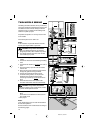
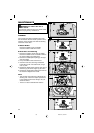
1. Set the machine to setting mode.
2. Press the setting button (2-nd. left function
button)
3. LCD will indicate the setting of its pattern.
As you shift the cursor, the setting of each
pattern will be indicated.
Note:
As letter stitches cannot change setting, setting
button will not appear.
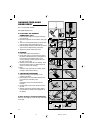
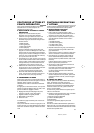
a.Setting the stitch width and length
Machine wil pre-set the stitch width and length
suitable for the pattern. They are indictated in
highlight. You can change them as follows.
First, check that the lower arrow mark is
highlighted.
If it is not so, press the mode button.
For narrower width, press function button (a-1).
For wider width, press function button (a-2).
For shorter length, press function button (a-3).
For longer length, press function button (a-4).
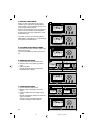
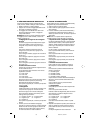
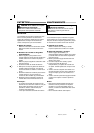
b. Mirror / Reverse stitch
Press the mode button and highlight the upper
arrow mark on the right side of LCD.
The marks of Mirror/Reverse stitch are below.
b-1. Regular stitch
b-2. Mirror stitch
b-3. Reverse stitch
b-4. Mirror and Reverse stitch
Pressing the function button directly below
these mark, mark will change alternately or in
rotation.
If mark is not indicated, its pattern cannot
change mirror/reverse stitch.
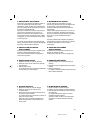
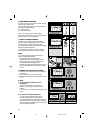
c. Elongation
Check that the upper arrow mark is highlighted.
If it is not so, press the mode button.
By pressing the elongation button (most right
function button), stitch will elongate as below.
c-1. Regular length
c-2. Double length
c-3. Triple length
c-4. 4X length
c-5. 5X length
If mark is not indicated, the pattern cannot
elongate.
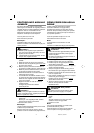
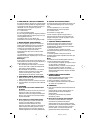
4. After you have completed the settings, press
the mode button (a) and highlight the lower
arrow mark and press the close button (most
left function button)(b).
Machine will return to selecting mode.
2003.9.10, 8:33 PM82