


2
10
AUTO
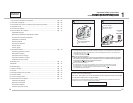
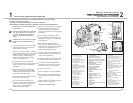
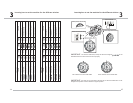
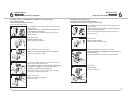
Getting to know your machine
Getting to know your machine
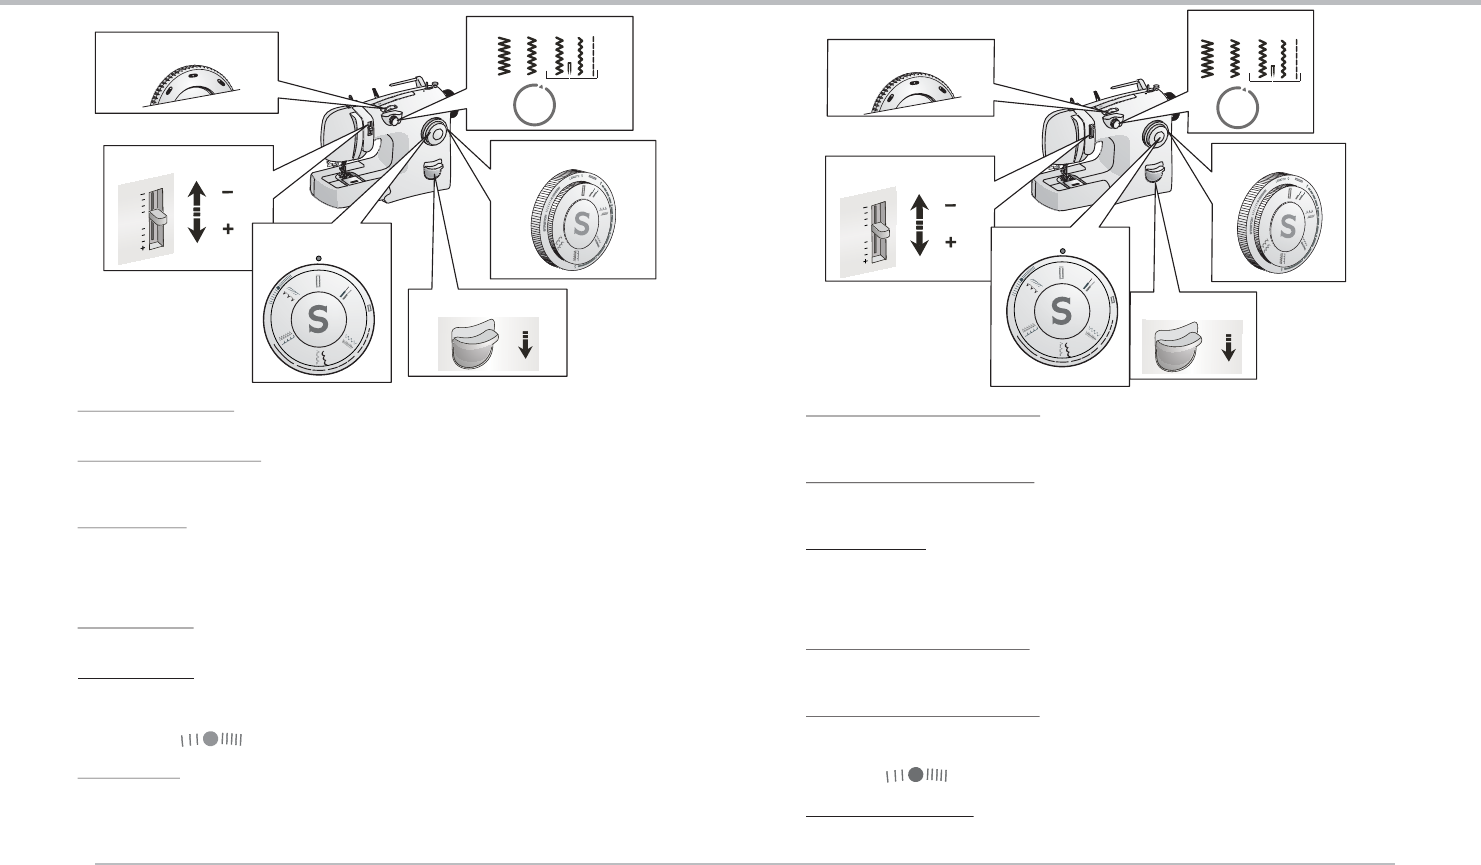
Needle position selector dial
Stitch width dial
Stitch length selector dial
Reverse button
Pattern selector Dial
Needle thread tension
Needle position selector: The needle can be moved from the center position to either the right
or left position. This is helpful when inserting zippers or cording, and when topstitching.
Needle thread tension knob: This control determines the amount of pressure on the needle
thread as it passes through the machine. It is normally positioned at AUTO. It may be necessary
to increase or decrease the tension for decorative stitches.
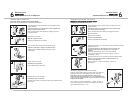
Pattern selector: Turn this dial to select a stitch pattern, such as a Straight Stitch. Turn the dial
until the desired stitch is aligned with the small red dot on the machine. The stitches are in
groups of two. The Pattern selector dial will turn easier when the Stitch width dial is set at
straight stitch. Always be sure the needle is in the highest position when turning the Pattern
selector dial.
Stitch width dial: This controls the width of a stitch. Turning the dial to the left makes a stitch
wider. When the dial is turned to the right it has no width, creating a straight stitch.
Stitch length dial: This controls how close the stitches are to one another or how far apart one
stitch is from the previous stitch. A stitch length of “5” means the stitches are farther apart.
As the number becomes smaller the stitches become closer together. When the Stitch length is
“0” the stitches are on top of one another. For the model 4212, the dial must be set at the
stretch setting when sewing any STRETCH stitches.
Reverse button: At the beginning and end of every seam, it is advised to press the reverse
button to reinforce the seam with backstitching.
2
0
5
4
3
1
S
T
R
E
T
C
H
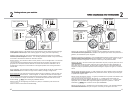
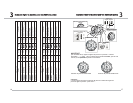
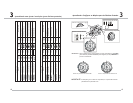
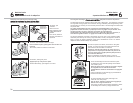
Sélecteur de la position de l'aiguille : l'aiguille peut être déplacée de sa position centrale
vers la droite ou vers la gauche. Cette manœuvre est pratique pour insérer des fermetures à
glissière, des cordonnets et pour surpiquer.
Manette de tension du fil d'aiguille : cette commande détermine la pression exercée sur le fil
d'aiguille quand il passe dans la machine. Normalement, il est en position « AUTO ». Il sera
peut-étre nécéssaire d’augmenter ou diminuer la tension pour les points décoratifs.
Sélecteur de point : tournez ce bouton pour sélectionner un point, tel qu'un point droit ou un
point de feston. Tournez le bouton jusqu'à ce que le point désiré soit dans l'alignement du
petit point rouge sur la machine. Les points sont groupés par deux. Le bouton du sélecteur
de point tourne plus facilement quand le bouton de largeur du point est réglé sur la couture
droite.
Bouton rotatif de largeur du point : il règle la largeur d'un point. Quand on tourne le bouton
vers la gauche, le point s'élargit. Quand il est positionné à droite, le point n'a pas de largeur
et forme ainsi un point droit.
Bouton rotatif de longueur du point : il règle la proximité entre les points ou la distance d'un
point au point suivant. Une longueur de point de « 5 » indique que les points sont très
éloignés les uns des autres. Quand la longueur du point est réglée sur « 0 », les points sont
superposés. Pour le modèle 4212, réglez la longueur de point sur la position « coutures
extensibles pour la couture de tout point EXTENSIBLE.
Bouton de marche arrière : au début et à la fin de chaque couture, il est conseillé d'appuyer
sur le bouton de marche arrière pour renforcer la couture par des points en arrière.
11
Faites connaissance avec votre machine
2
Manette de tension du fil
d'aiguille
Sélecteur de la position de
l'aiguille
Bouton rotatif de
largeur du point
Bouton de marche
arrière
Bouton rotatif de
longueur du point
Sélecteur de point
AUTO
2
0
5
4
3
1
S
T
R
E
T
C
H