8
SIMPLICITY SEWING MACHINE SET-UP OPTIONS
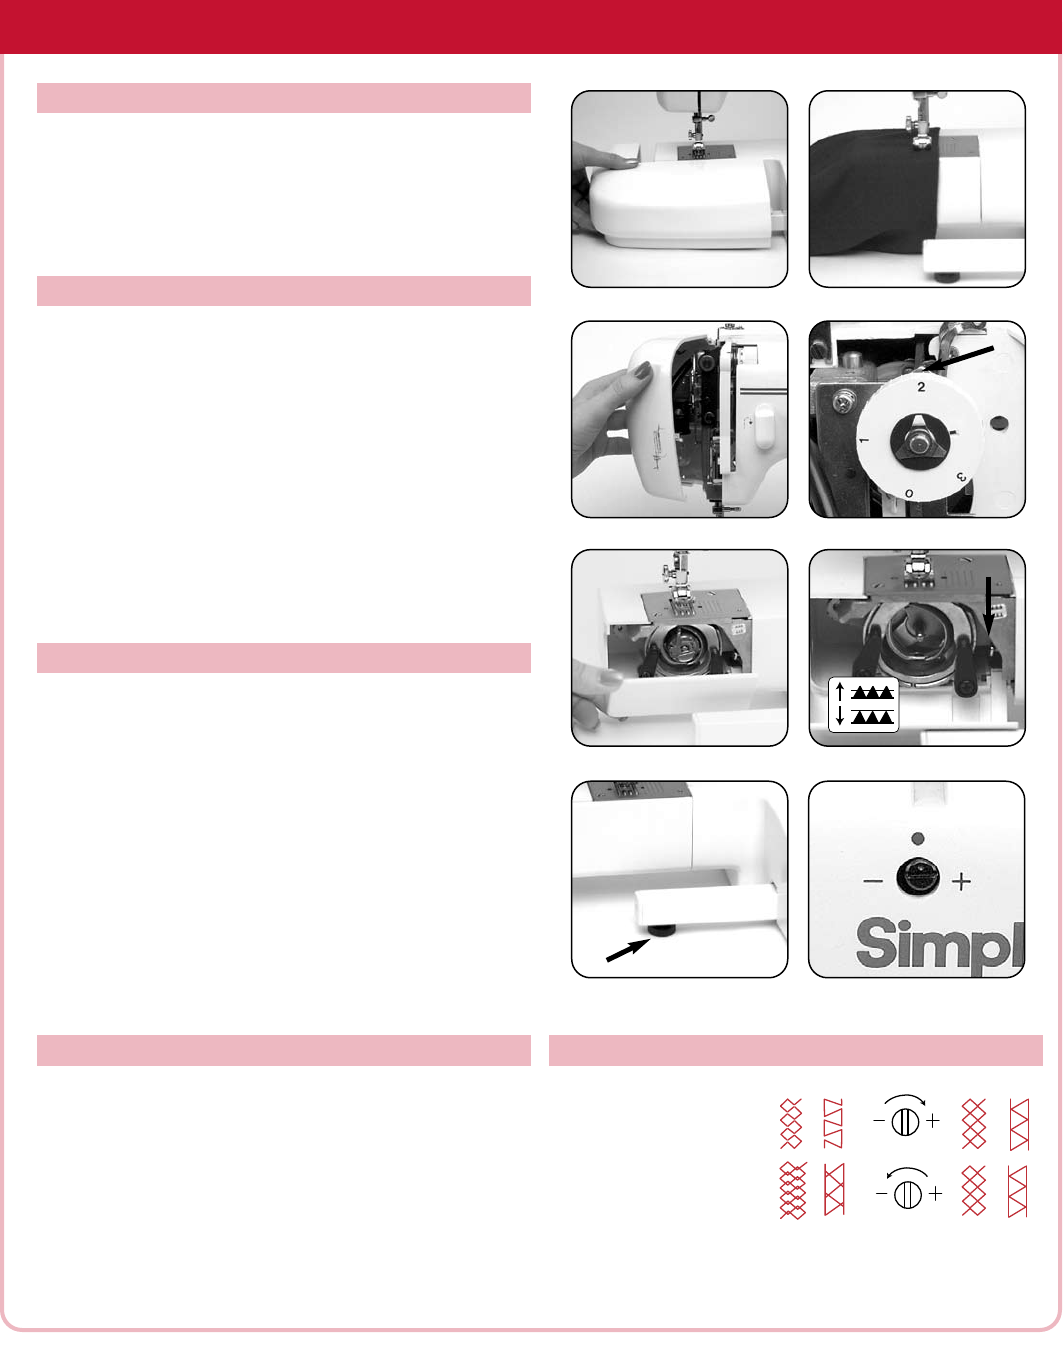
Free arm sewing makes it easy to sew hard to reach
areas such as sleeves, pant legs, and necklines.
To convert to free arm sewing, grasp the left end of the free-
arm cover and pull it out to the left to remove
[Fig. 1]. Slip the
sleeve or pant leg on the free arm as sho
wn and sew [Fig. 2].
The pressure on the presser foot can be adjusted to accom-
modate sewing on various weights of fabric to ensure
proper fabric feeding and to eliminate skipped stitches.
1. Open the face cover [Fig. 3].
2. Rotate the dial until the desired pressure number is
aligned with the indicator [Fig. 4]. Standard setting is 2.
To increase pressure move to a higher number. To
decrease pressure move to a lower number.
Set lever at 1 for heavyweight fabrics
Set lever at 2 for mediumweight fabrics
Set lever at 3 for lightweight fabrics
Set the lever at 0 for darning and free-motion sewing.
The drop feed mechanism lowers the feed teeth below the
needle plate,eliminating the need to make stitch length adjust-
ments. When the feed teeth are lowered, the fabric is guided
by hand,
allowing free movement of the fabric in any direction.
1. Turn the handwheel toward you to raise the needle to
its highest position.
2. Open the face cover and set the presser foot pressure
regulator to 0.
3.
Remove the free arm cover and open the front bobbin
cover [Fig. 5].
4. Push down on the drop feed lever and the feed teeth
will drop belo
w the needle plate [Fig. 6].
5. Push the lever up to return to normal sewing.
If the machine is not sitting on a level surface turn the
leveling screw to stabilize the machine.
1. Remove the free arm cover to access the screw under
the lev
eling bar [Fig. 7].
2. Turn the screw to the right to lower the machine.
Turn the screw to the left to elevate the machine.
CONVERTING TO FREE-ARM SEWING
PRESSER FOOT PRESSURE REGULATO
R
DROP FEED
LEVELING BAR
Fig. 1
Fig. 3
Fig. 4
Fig. 5
Fig. 6
Fig. 7
Fig. 2
STRETCH STITCH
ADJUSTMENT
When stretch stitches
(color-coded red) are
not forming properly,
turn the adjustment
screw with a flat blade
screwdriver [Fig. 8].
Fig. 8


