


10
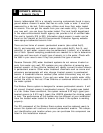
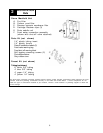
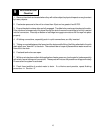
Note: The drain saddle assembly must be installed before
the 'P' trap. Do not install the drain saddle assembly be-
tween the 'P' trap and the wall.
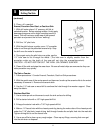
1. Position drain saddle assembly (Fig. 3) on drain pipe under
sink between the P trap and the sink connection.
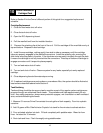
2. Orient the drain saddle so that the connector opening
points in the general direction of the planned location for
the R.O. dispensing faucet.
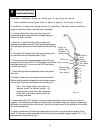
3. Screw the connector nut onto the drain saddle threaded
connector loosely (Fig. 4). Using the connector opening in
the side of the drain saddle as a guide, drill a 3/8" hole
through the wall of the drain pipe.
4. Remove drain saddle assembly. Place the adhesive foam pad over the 3/8" hole in
the drain pipe. Replace the assembly onto the drain pipe, aligning the hole in the
drain with the hole in the drain assembly.
5. Tighten the saddle bolts evenly on both sides until the saddle grips the pipe snugly - do not
overtighten. (Fig.4)
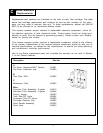
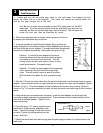
In addition to common hand tools, the following tools are required for drilling through the most
common sink materials:
1/4” masonry drill bit 1¼" porcelain cutter
1¼" hole saw Hole saw adapter
7/8" chassis punch Center punch
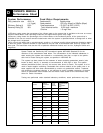
Hint: Special care should be taken when drilling the faucet hole. A clean hole can
be cut in a short period of time, but any attempt to rush the process will result in chips
and scratching. On some sinks there may be ridges on the underside of the sink. You
must avoid these ridges or other obstructions to insure an adequate flat surface for
installation of the faucet nut and washer.
When performing installations that call for locating the faucet on the counter
instead of the sink, ensure that adequate space is available underneath to accom-
modate the faucet subassembly.
Formica or Wooden Counter
1. Drill a 1¼" hole with hole saw or flat (spade) wood bit.
2. Clean off sawdust.
INSTALLATION
Drilling The Sink
5
INSTALLATION
Drain Connection
4
Fig.3
Fig.4