


9
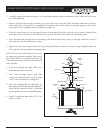
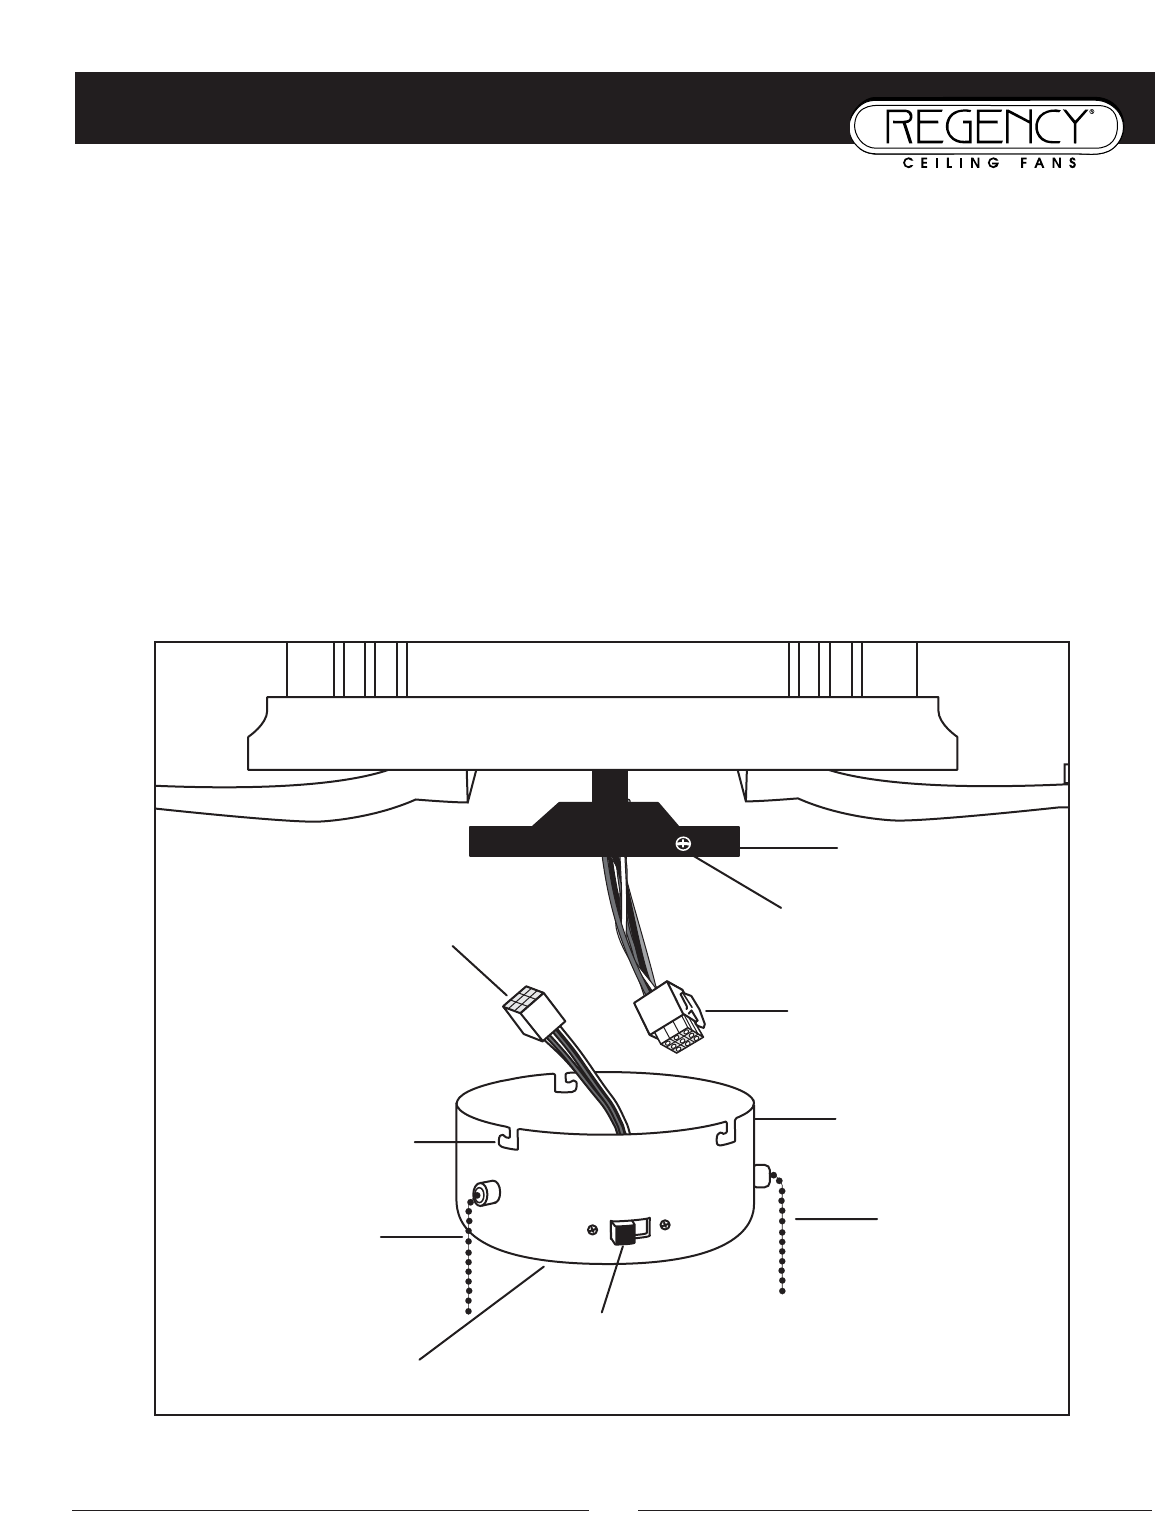
INSTALLATION OF REMOVABLE SWITCH HOUSING
NOTE: Be sure the power is off before installing.
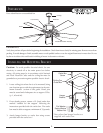
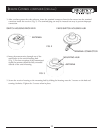
1. Loosen the 3 side screws on switch housing hub halfway.
2. If installing light kit, carefully remove light kit plug in bottom of switch housing. Attach light kit to switch housing
per instructions supplied with light kit. See “Electrical Connections” for hook-up of light kit.
3. Connect the plug and receptacle and make sure side buckle snaps in place.
4. Attach the switch housing to the switch housing hub. Align the side screws with keyhole slots on edge of switch
housing and tighten the side screws.
5. Attach pull chain fobs to ends of the switch’s pull chains – one for fan speed and one for uplight on/off.
6. Install candelabra base (E12, 25 watt) bulbs into sockets on top of fan housing for uplight. DO NOT EXCEED
THE RECOMMENDED WATTAGE FOR EACH BULB!
7. Turn the power on. Your Regency Ceiling Fan is now ready to enjoy!
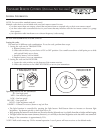
Side Screw (x3)
Connector with Side Buckle
Switch Housing Hub
(bottom of motor)
Switch Housing
Keyhole Slot (x3)
Connector (receptacle)
Pull Chain
Reverse Switch
Pull Chain
Optional light kit (not included)
connects to bottom of switch housing