


15
E33 FPI Direct Vent Gas Insert
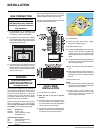
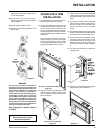
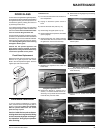
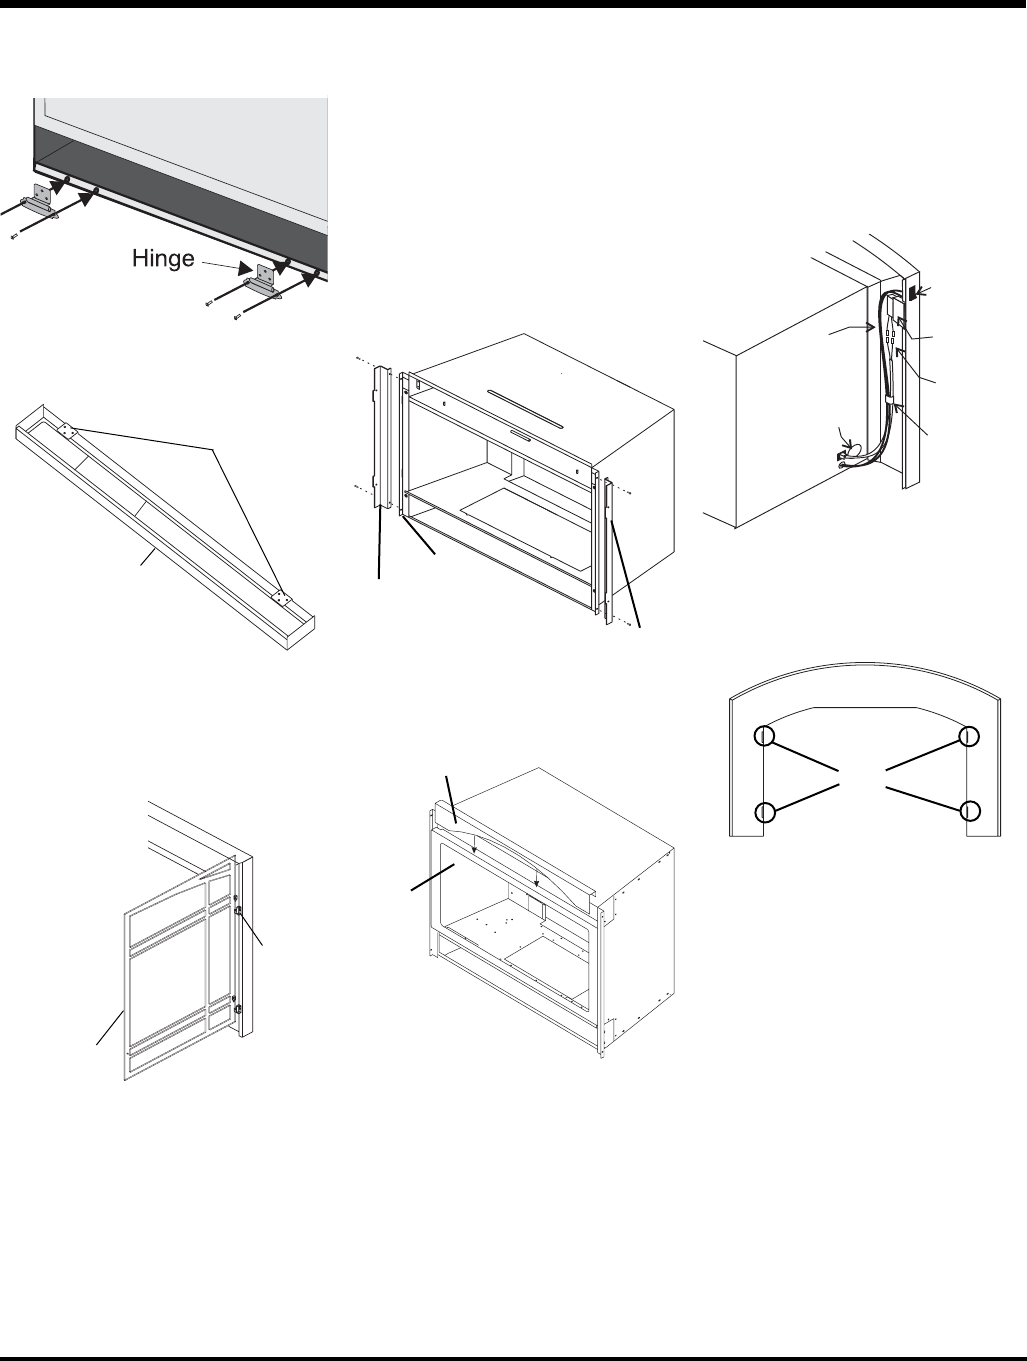
1) Align the left side Faceplate Trim Bracket
with the Firebox Flange and secure using
2 screws as shown in diagram 1. Repeat
for right side.
Faceplate
Trim Bracket
Firebox
Flange
IMPORTANT NOTE:
When using the Surround, the unit must be set 1"
further into the fi replace than the standard face-
plate installation. See page 6 for the Minimum
Fireplace Opening Excalibur Option.
Diagram 1
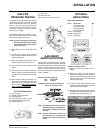
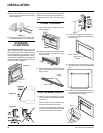
2) Push the Blanking Plate down on top of the
Glass Door (refer to Diagram 2).
Blanking Plate
Top of
Glass
Door
INSTALLATION
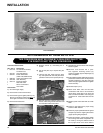
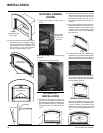
EXCALIBUR SURROUND
INSTALLATION
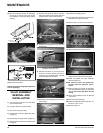
6) Place Bottom Frame near hinge. Flip hinge
over Bottom Frame and secure with 3 screws
each.
5) Install Spring Hinges to the Left and Right
Side of the bottom of the fi rebox using 2
screws per hinge.
Bottom
Frame
Hinge Location
7) Install the Left and Right Side Screen Doors
by placing over top of the hinges on the
faceplate. Hold the door at a 45 degree
angle to avoid scratching the faceplate.
8) Close screen doors.
Hinge
Screen Door
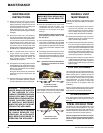
3) Hold the Faceplate Trim up against the unit
in order to make the following wire connec-
tions.
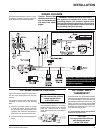
3a) Pull the ON/OFF connector wires from the
fi rebox and connect them to the switch.
3b) Connect the fan switch wires with the wire
connectors from the fan speed control. Place
clips over wires and tuck into side trim.
for gas
connection
Self-adhesive
wire clip
ON/OFF
switch
wires to
ON/OFF
switch
wires to
Fan switch
connectors
Fan Speed
Switch
(Rear View)
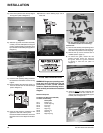
4) Secure the Faceplate by sliding the slots in
the Faceplate into the fl anges on the left and
right side Faceplate Trim Brackets. Once the
Faceplate is in place secure using 2 screws
per side.
Faceplate
Slots
Faceplate
Trim Bracket
NOTE: If you are installing the
Excalibur, the minimum fi replace
dimensions are as follows:
Width (at front): 34-1/2" (876mm)
Depth: 17-3/4" (451mm)
Height: 26" (660mm)
Diagram 2