


8
U20/E21 Gas Insert Zero Clearance Kit
INSTALLATION
INSERT INSTALLATION
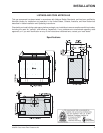
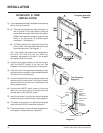
1) Insert the U20/E21 Zero Clearance box into desired
location and frame according to the instructions on
page 5.
2) Run required gas and electrical connections to the
Zero Clearance box, both are located on the left hand
side of the U20/E21 Insert. See "Gas Supply Line" on
page 9 and "Electrical Supply" on page 9.
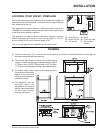
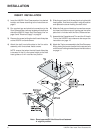
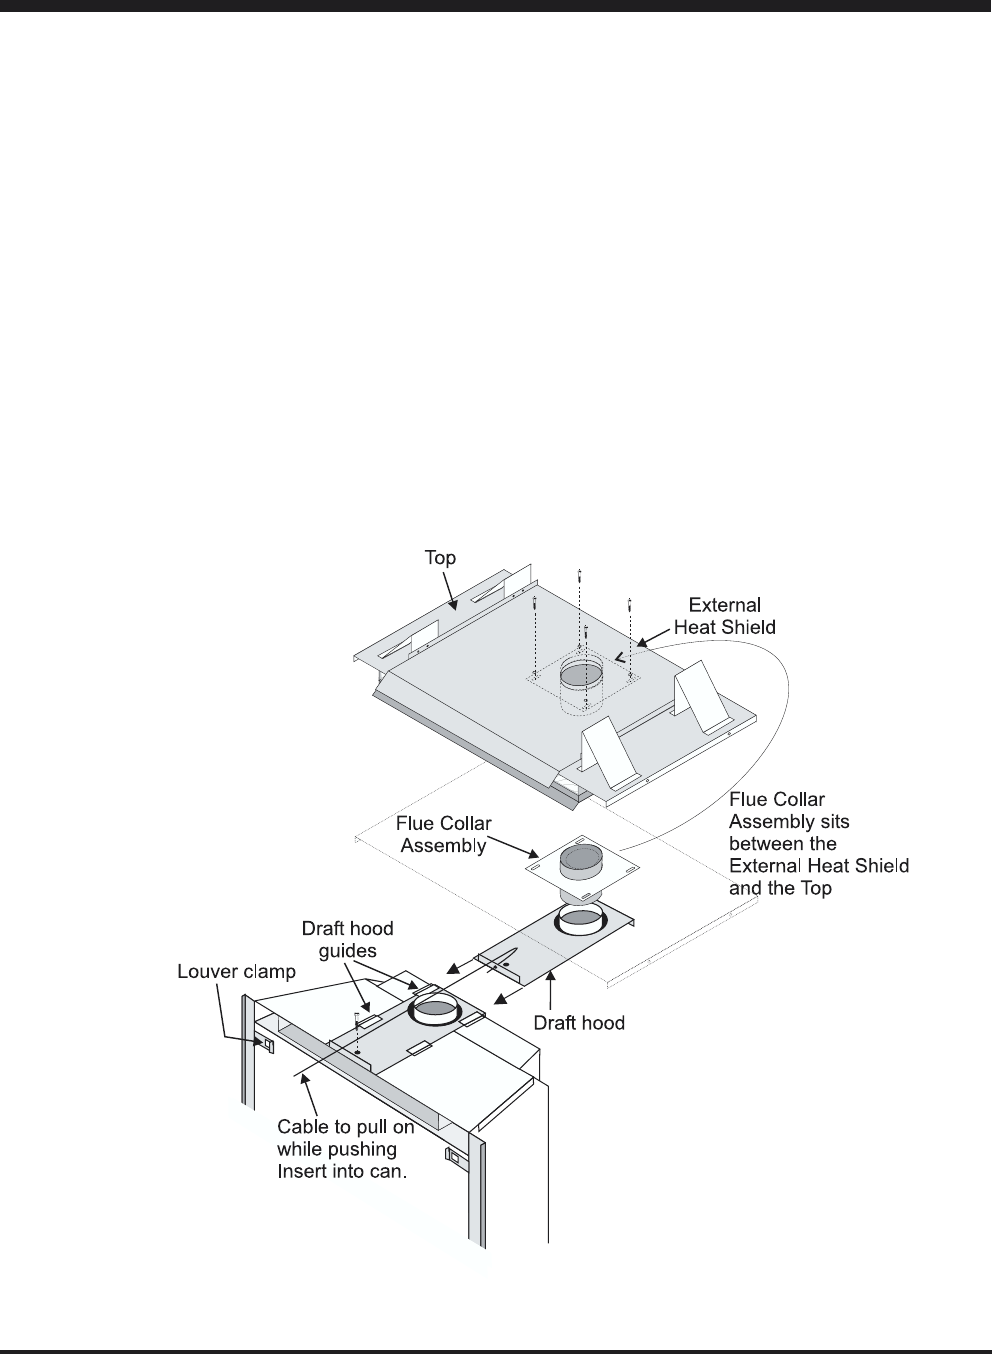
3) Remove the screw holding the draft hood slide plate
on the U20/E21 unit and remove.
4) Attach the draft hood slide plate to the flue collar
assembly with three sheet metal screws.
NOTE: ensure that when the draft hood slide plate
is screwed in that it is the same height as the draft
hood guides or it will not slide into position.
Note: Do not operate unit if draft hood is not fastened
in original position.
5) Slide the gas insert in all the way back using the draft
hood guides. Draft hood must be in original position
and replace the screw holding the draft hood.
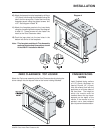
6) Make the final gas and electrical connections as per
the Insert Instruction manual. Use the gas line cover
plate that is included with the Zero Clearance box.
7) Assemble the Faceplate and Trim and the 4" Hearth
Trim to the U20/E21 zero clearance box as per the
instructions on page 10.
8) Attach the Top louver assembly to the Zero Clearance
Kit by placing the louver clamps into the square hole
on the louver holding brackets as per the instructions
on page 11.