


66
SECTION S: CONNECTING CONDENSING HEAT EXCHANGER (CHX)
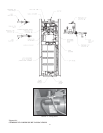
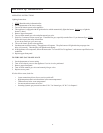
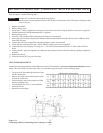
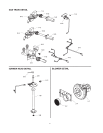
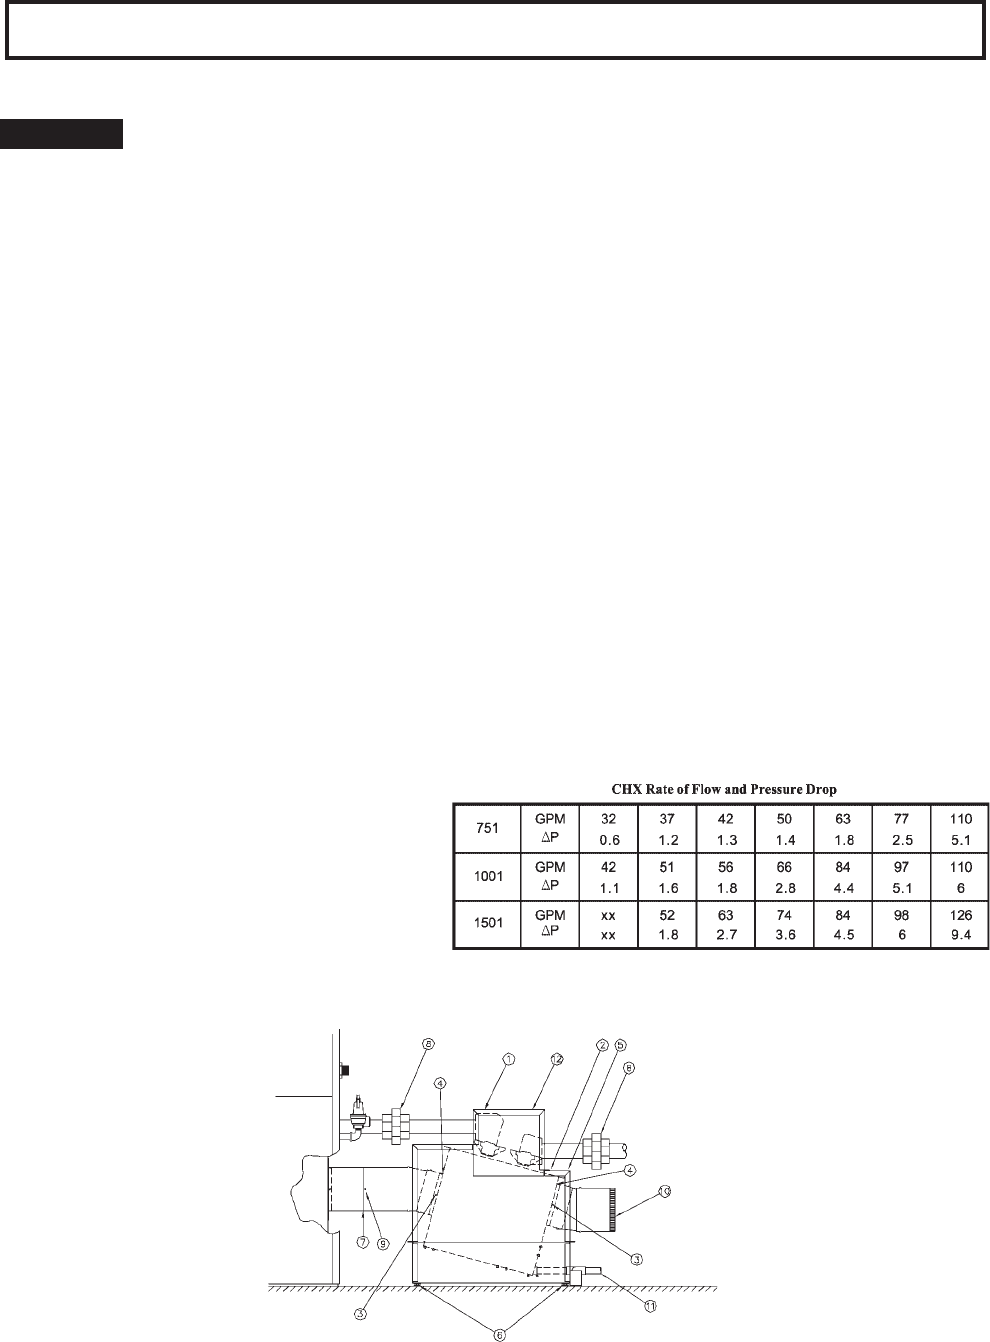
Figure S-1
Connecting Add-On Condensing Heat Exchanger to ADB
Refer to Figure S-1 for the following steps:
NOTICE: Connect the vent before connecting the water piping.
Install unions on water inlet and outlet of CHX for ease of maintenance. The CHX require cleaning as often
as once the year.
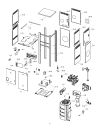
1. Remove the shroud.
2. Remove the top cover.
3. Secure the 15° elbows (supplied) as shown one on each side of the CHX, using the stainless steel screws (supplied).
4. Seal the connection with high temperature RTV (supplied).
5. Replace the top cover.
6. Level the CHX with the ADB by adjusting the leveling screws at the base.
7. Place a line of RTV on the crimped end of the flue outlet from the ADB and slide the CHX to join the ADB flue outlet
to the CHX flue inlet.
8. Connect the CHX water as specified in the piping diagram. Check for water leak.
9. Secure the flue connection from step 7 above with the stainless steel screws (supplied).
10. Connect the flue vent (Category IV venting, UL 17-38 Certified Venting Material) to the 15° elbow of the CHX flue
outlet.
11. Connect the PVC pipe (not supplied) for condensate water disposal (check with local authority regarding condensate
disposal).
12. Replace the shroud.
13. Allow the silicone (RTV) to cure over-night.
VENT SWITCH ADJUSTMENT:
In order to insure proper operation of the ADB boiler with a CHX attached to it, the vent switch must be adjusted to proper
setting. The vent switch is located on the J-box, just outside the ignition module. Use the following steps:
• Turn power off; disconnect the electrical wiring
and the rubber hose.
• Remove the switch (it has a black plastic orifice
at the hose connection).
• On the backside, remove the (purple) seal from
atop the adjusting screw.
• Turn the plastic hex screw 1½ turn clockwise.
• Seal with silicone.
• Reinstall in reverse order.