


32
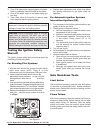
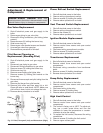
Burner Tray Removal
1. Shut-off power and gas supply to the boiler.
Disconnect union(s) and pilot tubing when pres-
ent; then loosen and remove burner hold-down
screws.
2. Disconnect wires at gas valve and slide burner
tray out.
Main Burner and Orifice Removal
1. Remove screws and burner hold-down bracket.
2. Lift burners from slotted spacer and slide from ori-
fices. Clean with a wire brush.
3. Orifices usually do not need to be replaced. To
clean, run either copper wire or wood through ori-
fice. Do not enlarge hole. To remove orifice, use a
socket wrench and remove the manifold. DO NOT
over-tighten when reinstalling.
NOTE: If the heat exchanger is sooted badly, the
burner hold-down bracket and spacer can become
distorted from direct flame impingement and this
usually necessitates replacement of these parts.
REPAIR PROCEDURES
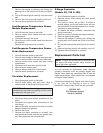
Tube Cleaning Procedure
(Typical)
Establish a regular inspection schedule, the frequency
of which depends on the local water condition and
severity of service. Do not let the tubes clog up solid-
ly. Clean out deposits over 1/16" in thickness.
To clean the tubes, remove the heat exchanger, ream
tubes and immerse heat exchanger in non-inhibited
de-scale solvent.
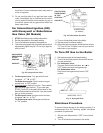
Heat Exchanger Removal
1. Shut water, gas and electricity off, close valves,
relieve pressure and remove relief valve. Remove
front inspection panel.
2. Remove top holding screws.
3. Remove draft diverter, lift and remove top and flue
collector on stack type models.
4. Loosen bolts and disconnect flange nuts on
inlet/outlet header, loosen union(s) at gas pipe,
and slide boiler away from piping until studs clear
the heater.
5. Lift heat exchanger straight up using caution not to
damage refractory.
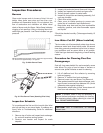
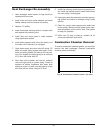
Extension Pieces (5) Auger with Carbide Tip Wire Brush
RAYPAK TUBE CLEANING KIT
F078250 NP - "8/7F178250 NP - "8/5
Fig. 35: Raypak Tube Cleaning Kit