


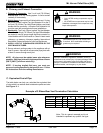


R
September 1, 2008
7034-106E
Page 19
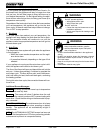
Mt. Vernon Pellet Stove (AE)
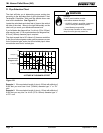
3 to 3 inch Top Vent Adapter
3 to 6 inch Top Vent Offset Adapter
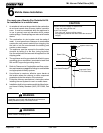
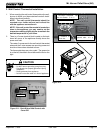
1.
Put a layer of high temperature silicone on the
3
inch (76mm) exhaust outlet. Figure 19.1.
2. Slide the top vent adapter onto the rear exhaust
outlet and adjust the assembly to a vertical position
until the top of the flue outlet is centered and is in
a level position. Figure 19.1.
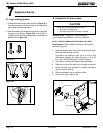
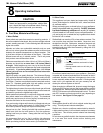
3. Align slot on left of adapter with hole in the back of
the unit and secure with screw. You may drill out the
hole using #26 drill bit provided but only if needed.
Figure 19.2.
4. Install the 5 mounting screws, 3 on the left and 2
on the right.
5. Drill 2 holes with #26 drill bit through the rear
exhaust outlet using the 2 holes already in the short
horizontal pipe in the top vent adapter as a guide.
Install the screws. Figure 19.2.
6. Install the vent pipe into the top vent adapter (be
sure to silicone all joints). To use an existing 6
inch (152mm) vent system, install the 3 to 6 in (76-
152mm) offset adapter before installing vent pipe.
7. To clean top vent adapter, open clean-out cover
and remove any debris build-up. Figure 19.2.
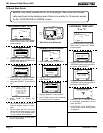
C. Top Vent Adapter Installation
3 in. to 6 in
.
Offset Adapt
er
Silicone Rear
Exhaust Outlet
3 in. to 3 in. Top
Vent Adapter
Clean-Out
Cover
Drill Hole, 1
on each side
Align slot holes on the adapter
to holes on the a k of the nit
Figure 19.2
Figure 19.1
Installing the Top Vent Adapter
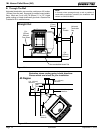
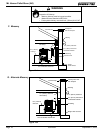
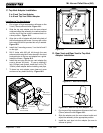
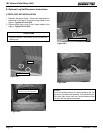
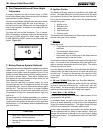
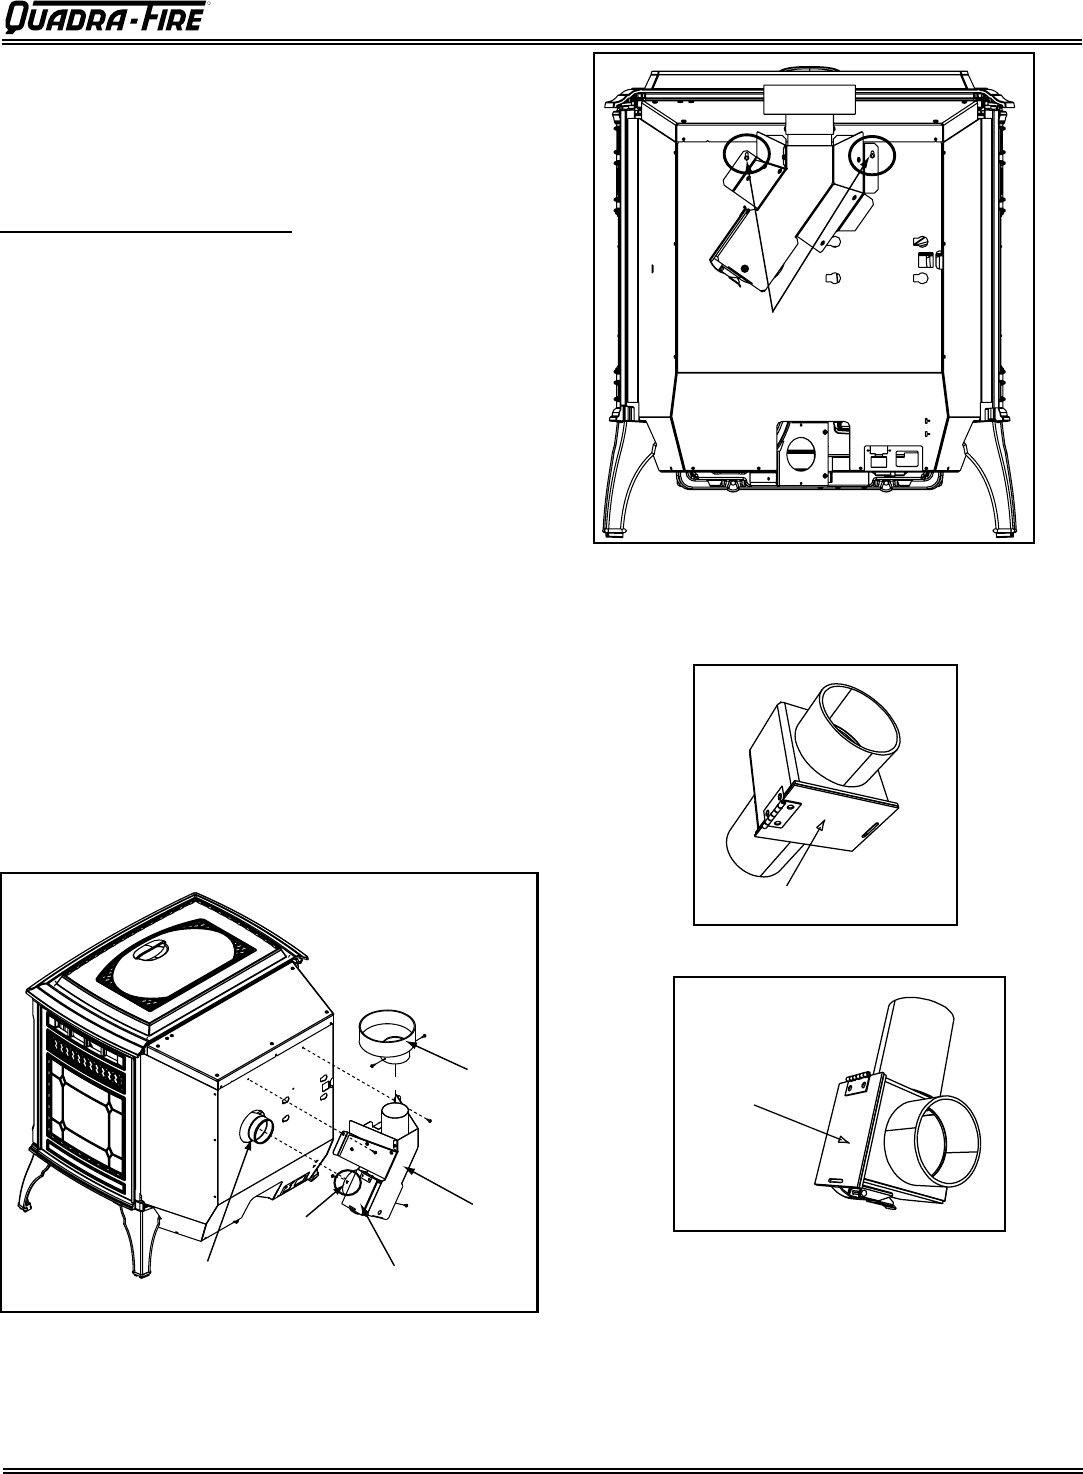
D. Rear Vent and Rear Vent to Top Vent
Adapter Installation
Clean-Out Cover
Clean-Out Cover
Figure 19.3 - Rear Vent Adapter
Figure 19.4 - Rear to Top Vent Adapter - 90
o
1. Put a layer of high temperature silicone on the 3 inch
(76mm) exhaust outlet. Figure 18.1.
2. Slide the adapter onto the rear exhaust outlet and
adjust the assembly to the appropriate position.
3. Install the vent pipe into the adapter (be sure to
silicone all joints)