Potterton Solar - Solar Thermal Domestic Hot Water System4
1
.0 Commissioning of system
1.2 Flushing the pipework
Before the system is commissioned the pipework must
be flushed to remove any contaminants. It is recommended
that this is done using the solar heat transfer fluid as it
will be impossible to fully drain all parts of the system.
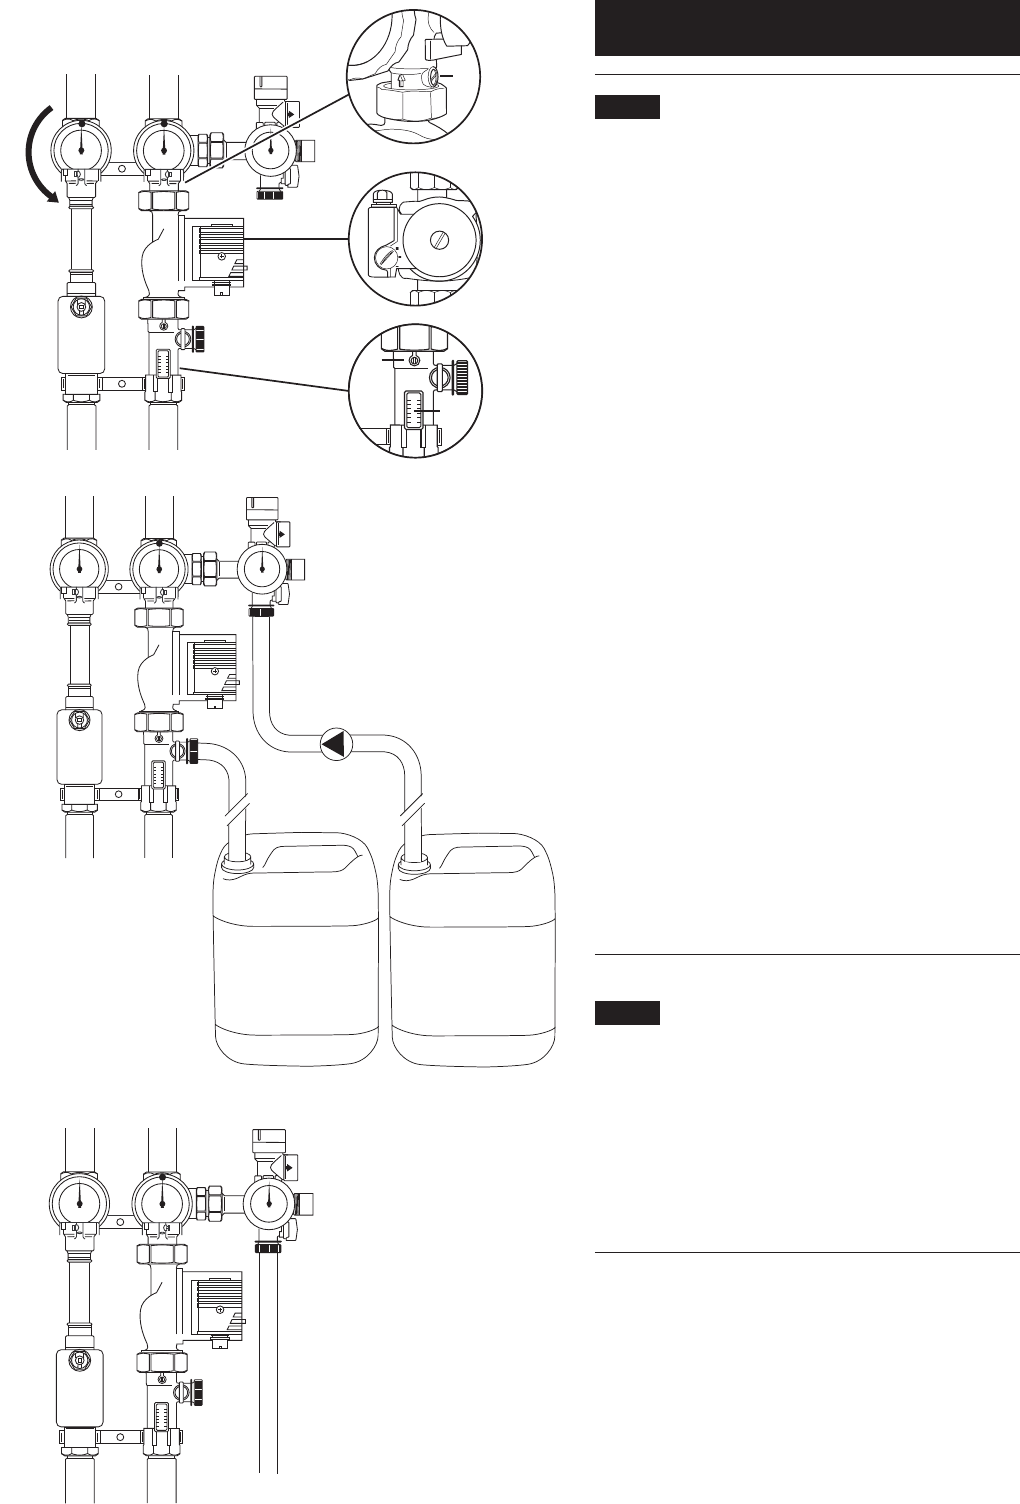
Connect the flushing pipes to the fill & drain valve on
the safety group (Fig. 1 Item 1) and to the fill & drain
valve on the flow meter (Fig. 1 Item 2).
Open the fill & drain valves.
Turn the slot of the adjusting screw (Fig. 1 Item 3) in the
return so the slot is vertical to open the non-return
valve.
Turn the left hand isolating valve with integral
thermometer in the flow (Fig. 1 Item 4) in the direction
indicated by the arrow (to a 45° position) to open the
non-return valve.
Ensure that the right hand isolating valve with integral
thermometer in the return (Fig. 1 Item 5) is open
indicated by the dot on the thermometer bezel being
at the top.
Turn the slot of the adjusting screw of the flow meter
(Fig. 1 Item 6) in the return vertically to open the flow
limiter (Fig. 1 Item 7).
Flush the solar primary pump by pumping the fluid into
the system via the fill and drain valve on the safety group.
Close right hand isolating valve (dot on thermometer
bezel at 9 o’clock position). Flush solar primary pipework
and panels via the fill and drain valve on the safety group.
If reusing flushed fluid ensure this is filtered before re-
introducing into the system(see Fig. 2).
1.3 Filling the pipework
Close the fill and drain valve (Fig. 3 Item 2) on the flow
meter. Open the righthand isolating valve (Fig. 3. Item 1)
with integral thermometer by turning so that the dot on
the bezel is at the top. Fill the solar primary system by
pumping in fluid until the system pressure reads 1.5 to
2.0 bar. Close the fill and drain valve (Fig. 3. Item 3) on
the safety group.
4
5
3
6
7
Fig. 1
Fig. 2
Fig. 3
Solar fluid Solar fluid
Filling pump
Filter
1
2
1
3
2


