


12 1-800-732-2677 (US), 1-800-457-3911 (Canada)
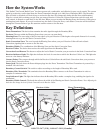
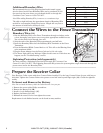
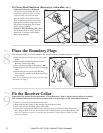
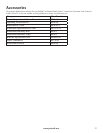
To Cross Hard Surfaces (driveways, sidewalks, etc.)
• Concrete Driveway or Sidewalk
(7C): Place the Boundary Wire in a
convenient expansion joint or create
a groove using a circular saw and
masonry blade. Place the Boundary
Wire in the groove and cover with an
appropriate patching compound. For
best results, brush away dirt or other
debris before patching.
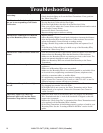
• Gravel or Dirt Driveway (7D): Place
the Boundary Wire in a PVC pipe or
water hose to protect the Boundary
Wire before burying.
7C
7D
__________________________________________________
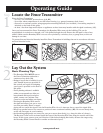
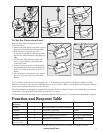
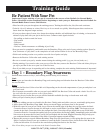
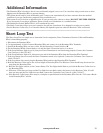
Place the Boundary Flags
The Boundary Flags are visual reminders for your pet of where the Warning Zone is located.
1. Hold the Receiver Collar at your pet’s neck
height.
2. Walk towards the Warning Zone until the
Receiver Collar beeps (8A).
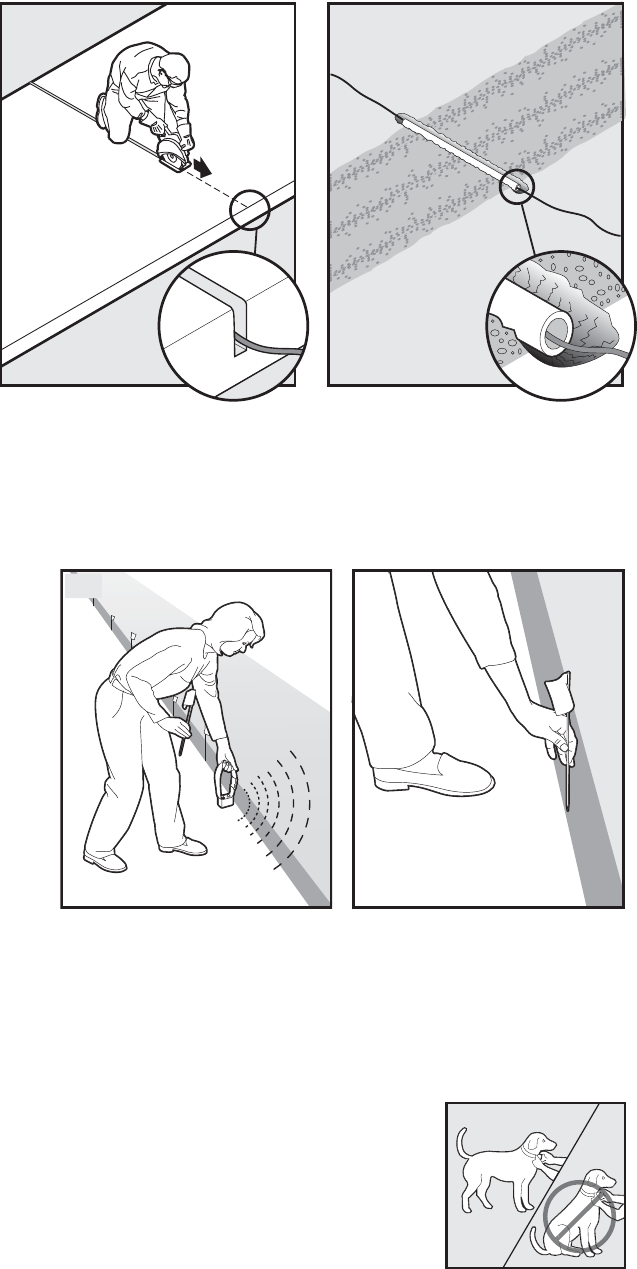
3. Place a Boundary Flag in the ground (8B).
4. Walk back into the Pet Area until the beeping
stops.
5. Repeat this process around the Warning
Zone until it is marked with Boundary Flags
every 10 feet.
Note: If you cannot hear the beep, see the Test Light
Instructions in Step 6.
8A
8B
__________________________________________________
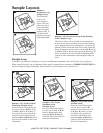
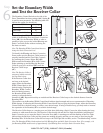
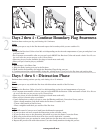
Fit the Receiver Collar
Important: The proper fit and placement of your Receiver Collar is important for effective training.
The Contact Points must have direct contact with your pet’s skin on the underside of his neck.
To assure a proper fit, please follow these steps:
1. Make sure that the battery is not installed in the Receiver Collar.
2. Start with your pet standing comfortably (9A).
3. Center the Contact Points underneath your pet’s neck, touching the skin. If your pet
has a long or thick coat, use the enclosed long Contact Points to reach through the hair.
Note: It is sometimes necessary to trim the hair around the Contact Points to make sure that
contact is consistent.
9A
Step
9
Step
8