


6 Pelco Manual C459M-E (1/96)
4.2 INSTALLATION OF CAMERA/LENS
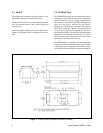
To install the camera/lens, perform the following steps:
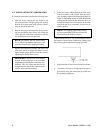
1. Open the lid by releasing the two latches at the
rear of the enclosure. The gas springs will securely
hold the lid in place when fully opened. If neces-
sary, the lid can be removed.
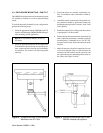
2. Remove the camera sled from the rail by loosen-
ing the two Phillips head screws and sliding the
sled to the rear. Attach the camera/lens with the
1/4-20 Phillips head screws provided.
NOTE: For cameras with low optical center
line or using a large diameter lens, remove and
invert the camera sled for proper positioning.
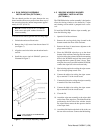
3. Replace the camera/sled assembly onto the rail and
slide along the rail to adjust the camera to maxi-
mum forward camera position; lock into place by
tightening the Phillips head screws.
IMPORTANT: Set the focus for the shortest
distance to extend the lens to the maximum
length before positioning the camera/lens com-
binations. This will ensure that the lens has
enough clearance and will not come in contact
with the window during focusing.
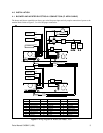
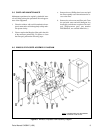
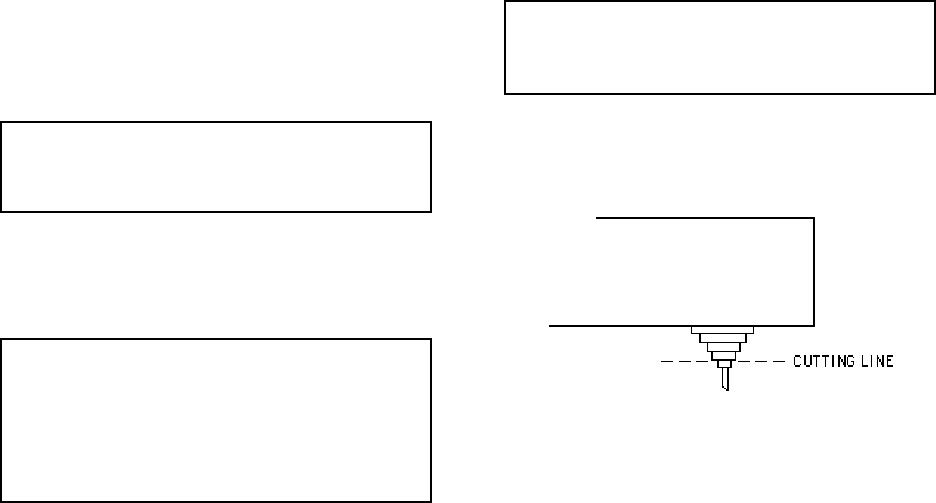
4. Route the camera cables through the cable entry
boot and connect to the camera. Wire the enclo-
sure according to the wiring diagram provided (see
Figure 2). Depending on the size of the cable bundle
coming into the enclosure, the cable entry boot can
be modified in the field. Horizontally cut the cable
entry boot one lip at a time until you have an ad-
equate opening.
NOTE: For shipping purposes the cable en-
try boot is positioned inside the enclosure. Re-
move and reinstall the boot as shown.
Conduit knock-outs (1/2"-3/4") have been provided in
the bottom of the enclosure. When using conduit, plug
the remaining holes with the hole plugs provided.
5. Replace and/or close the lid and secure the latches.
6. Attach the enclosure to the appropriate mount or
pan and tilt using the instructions provided with
the mounting equipment.