


14 C3407M-D (1/07)
SWITCH SETTINGS
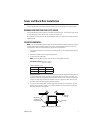
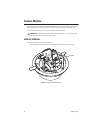
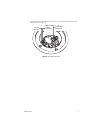
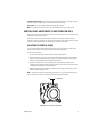
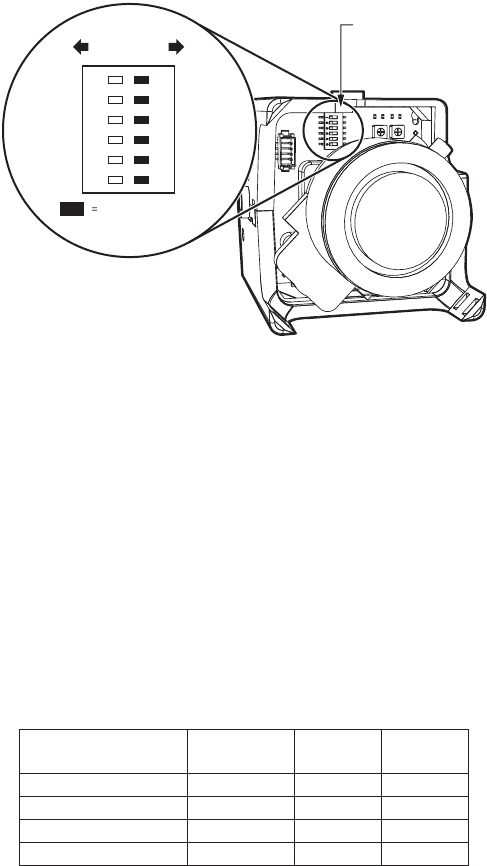
Locate the DIP switch (refer to Figure 9). Then set the switches for your installation.
Figure 9.
DIP Switch
SW1: Video Format
Set to ON for NTSC. Set to OFF for PAL. The default is ON.
SW2: Line Sync
Set to ON to use AC line lock. Set to OFF for internal line sync. The default is ON.
SW3: Interlaced Scanning/Progressive Scanning
Set to ON to select interlaced scanning. Set to OFF to select progressive scanning. The default is ON.
SW4: Auto White Balance (AWB)/Auto Tracking White Balance (ATW)
Set to ON to enable ATW. This is the default.
To manually set and lock the white balance (AWB), power up the unit. Then place a white background
in front of the lens and turn SW4 to OFF.
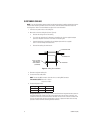
SW5/SW6: Profile
Select the preset profile that best matches your installation:
General (default):
Use for most installations. This profile provides very good general image quality.
Extended shutter:
Use for installation that are mostly low light.
Profile
Minimum
Illumination
SW5 SW6
General (default) 6.0 lux ON ON
Extended shutter 0.5 lux (15 fps) OFF ON
Extended dynamic range 3.0 lux ON OFF
Fluorescent 3.0 lux OFF OFF
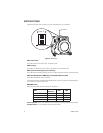
123456
ON
DOWN UP
SWITCH POSITION
DIP SWITCH