- 13 -- 32 -
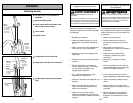
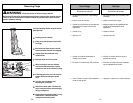
➢ No enchufe hasta que el montaje esté
completo.
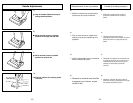
➢ Quite el tornillo del mango.
➢ Meta el mango con los sujetadores del
cordón en la parte posterior de la
aspiradora.
➢ Instale el tornillo.
➢ Apriete el tornillo.
➢ Empuje el cordón eléctrico hacia el
soporte del cordón.
➢ Envuelva el cordón eléctrico alrededor
de los sujetadores del cordón.
➢ Asegure la clavija en el cordón eléctrico.
➢ Ne brancher qu’une fois l’assemblage
terminé.
➢ Retirer la vis du manche.
➢ Insérer le manche avec les crochets de
rangement du cordon à l'arrière de
l'aspirateur.
➢ Insérer la vis.
➢ Serrer la vis.
➢ Insérer le cordon d’alimentation à
l’intérieur du crochet.
➢ Enrouler le cordon autour des crochets.
➢ Fixer la fiche au cordon d’alimentation à
l’aide de son agrafe.
Colocación del mango
Montaje
Assemblage
Montage du manche
+
Hose
Tuyau
Manguera
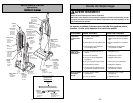
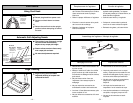
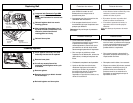
Removing Clogs
For best cleaning results, keep the airflow
passage clear.
➢➢
Unplug vacuum cleaner.
➢➢
Check each starred area occasionally
for clogs.
➢➢
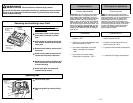
Disconnect the hose from the nozzle
hose and check the hose for clogging.
➢➢
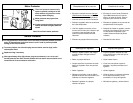
Inspect hose end and clear any
obstructions.
➢➢
Reinstall hose and lower plate.
➢➢
While running the
vacuum cleaner
with the hose disconnected, stretch
the hose in and out to remove the clog.
➢➢
I
f the clog still exists, turn the vacuum
cleaner OFF and unplug the power
cord.
➢➢
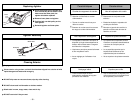
Turn the vacuum cleaner over,
exposing the underside.
➢➢
Remove the lower plate. Remove the
short nozzle hose from the housing by
lifting it straight up.
➢➢
Inspect the hose end and clear it of any
obstructions. Reinstall the short
nozzle hose and lower plate.
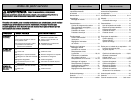
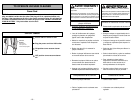
WARNING Electrical Shock or Personal Injury Hazard
Disconnect the electrical supply before servicing or cleaning the vacuum cleaner.
Failure to do so could result in electrical shock or personal injury from vacuum
cleaner suddenly starting.


