38
MAINTENANCE
in which case, a qualified plumber will need to be contacted to follow the Coil Cleaning Instructions
(Section D) included in this section to dissolve deposit and clean condensate line.
D. COMBUSTION CHAMBER COIL CLEANING INSTRUCTIONS*
*Before beginning this procedure, you must have on hand the following items:
– a nylon, stainless or brass brush (not steel)
– “Rydlyme” (recommended for best results) (available on line www.rydlyme.com) or “CLR”
(available at most hardware stores)
1. Shut down the Munchkin by using the following steps:
a. Close the gas valve, shut down the unit and wait for the unit to be cool to the touch
b. Disconnect the condensate hose from the outside connection, (not from the Munchkin side),
so the flow can be observed.
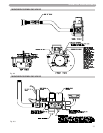
c. Remove screws and loosen bracket holding gas valve in place.
d. Pull connector to the venturi by sliding gas valve to left, remembering to disconnect both
Molex connectors.
e. Remove the (6) 10MM nuts from the burner plate assembly to access the coils.
f. Pull the entire burner plate assembly towards you, while removing or pushing aside any
wiring to allow the removal of the assembly.
2. Using a spray bottle filled with the recommeded product “RYDLYME” or “CLR”, spray liberally on the
coils, making sure the solution penetrates and funnels down through the condensate hose. If the con-
densate hose is blocked, let the chemical penetrate for at least 15 minutes or until it drains.
3. Use the nylon, stainless or brass brush (do not use steel) and scrub coils to remove any buildup, then
vacuum the debris from the coils.
4. Spray the coils with clear water, making sure to confine the spray to the area being cleaned (Try to avoid
getting the back cermic wall of the unit wet). Flush the combustion chamber with fresh water. At this
point, the Munchkin should be ready to power back up.
Before powering up the Munchkin follow the steps below
a. Re-install the burner assembly
b. Replace the (6) 10MM nuts to the burner plate
c. Re-connect the Molex connectors
d. Re-connect gas valve, air-gas mixer and replace bracket. (IMPORTANT: CHECK FOR GAS
LEAKS)
e. Re-set thermostats (IMPORTANT: MAKE SURE EXHAUST VENT IS NO LONGER BLOCKED!)
f. Turn the Munchkin back on** and observe condensate flow.
g. Re-connect the condensate hose to the outside connection.
**NOTE: When firing up the boiler for the first few times you may experience some flut-
tering of the gas burner that may result in a flame lockout. This is normal and will
require you to re-cycle the unit until this clears up. This is caused by water still present
in the combustion chamber.
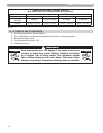
DANGER
IT IS EXTREMELY IMPORTANT TO MAKE SURE THE EXHAUST VENT IS NO LONGER
BLOCKED. FAILURE TO DO SO MAY RESULT IN PERSONAL INJURY OR DEATH.
DANGER
IT IS EXTREMELY IMPORTANT THAT YOU CHECK FOR LEAKS WHEN
RECONNECTING THE GAS VALVE AND MAKING SURE THE EXHAUST VENT IS NO
LONGER BLOCKED. FAILURE TO DO SO MAY RESULT IN SEVERE PERSONAL INJURY
OR DEATH.


