


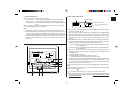
– 12 –
<Setting the Weekly Timer>
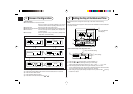
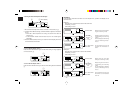
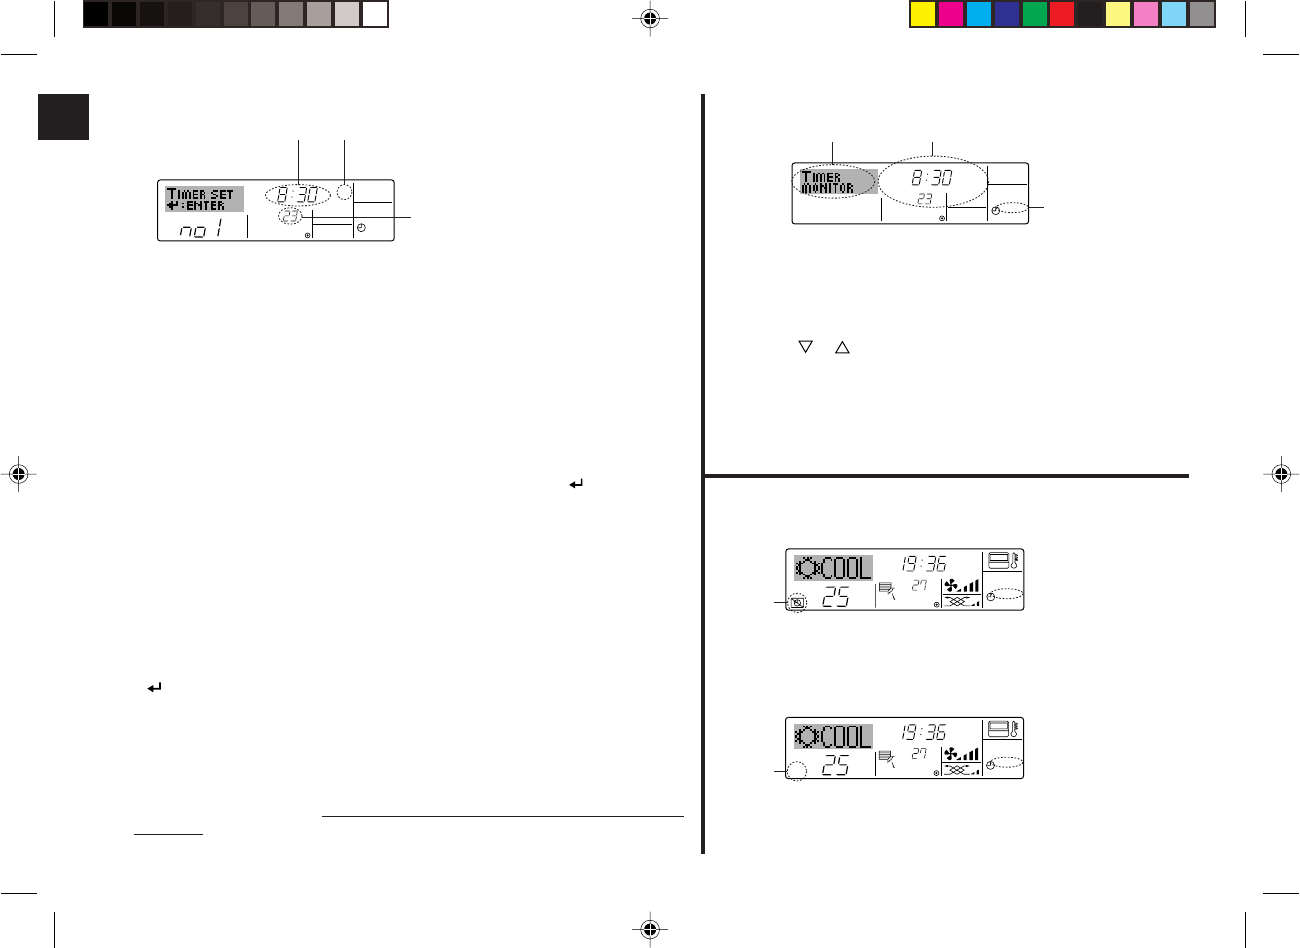
5. Press the appropriate Set Time button A as necessary to set the desired time (at 5).
* As you hold the button down, the time first increments in minute intervals, then in ten-
minute intervals, and then in one-hour intervals.
6. Press the ON/OFF button 1 to select the desired operation (ON or OFF), at 6.
* Each press changes the next setting, in the following sequence: No display (no setting) →
“ON” → “OFF”
7. Press the appropriate Set Temperature button 3 to set the desired temperature (at 7).
* Each press changes the setting, in the following sequence: No display (no setting)
⇔ 24 ⇔ 25 ⇔ ... ⇔ 29 ⇔ 30 ⇔ 12 ⇔ ... ⇔ 23 ⇔ No display.
(Available range: The range for the setting is 12 °C to 30 °C. The actual range over which
the temperature can be controlled, however, will vary according to the type of the
connected unit.)
8. After making the appropriate settings at Steps 5, 6. and 7, press the Filter
button 4 to lock
in the values.
To clear the currently set values for the selected operation, press and quickly release the
Check (Clear) button 1 once.
* The displayed time setting will change to “—:—”, and the On/Off and temperature settings
will all disappear.
(To clear all weekly timer settings at once, hold down the Check (Clear) button 0 for two
seconds or more. The display will begin flashing, indicating that all settings have been
cleared.)
Note:
Your new entries will be cancelled if you press the Mode (Return) button 2 before pressing the
Filter
button 4.
If you have set two or more different operations for exactly the same time, only the operation with
the highest Operation No. will be carried out.
9. Repeat Steps 3 to 8 as necessary to fill as many of the available cells as you wish.
10. Press the mode (Return) button 2 to return to the standard control screen and complete the
setting procedure.
11. To activate the timer, press the Timer On/Off button 9, so that the “Timer Off” indication
disappears from the screen.
Be sure that the “Timer Off” indication is no longer
displayed.
* If there are no timer settings, the “Timer Off” indication will flash on the screen.
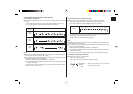
Shows the temperature setting
* Does not appear if temperature is not set.
˚C
SUN
ON
WEEKLY
6
7
5
Shows the time setting
Shows the selected operation (ON or OFF)
* Does not appear if operation is not set.
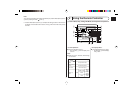
<How to View the Weekly Timer Settings>
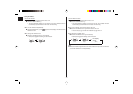
Timer Settings
1. Be sure that the weekly timer indicator is visible on the screen (at 1).
2. Press the Timer Menu button B so that “Monitor” is indicated on the screen
(at 8).
3. Press the Timer On/Off (Set Day) button 9 as necessary to select the day
you wish to view.
4. Press the
or Operation button (7 or 8) as necessary to change the
timer operation shown on the display (at 9).
* Each press will advance to the next timer operation, in order of time
setting.
5. To close the monitor and return to the standard control screen, press the
Mode (Return) button 2.
˚C
TIMER
SUN
ON
OFF
WEEKLY
1
9
8
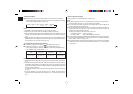
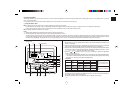
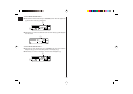
<To Turn Off the Weekly Timer>
Press the Timer On/Off button 9 so that “Timer Off” appears at 0.
˚C
˚C
TIME SUN
WEEKLY
0
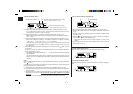
˚C
˚C
TIME SUN
WEEKLY
0
<To Turn On the Weekly Timer>
Press the Timer On/Off button 9 so that the “Timer Off” indication (at 0) goes
dark.