


Installation (for qualified installers only) 9
Travis Industries 100-01135 4040809
Vent Requirements
! Always maintain the required 1” clearance (air space) to combustible materials to prevent a fire hazard.
Do not fill air spaces with insulation.
! The gas appliance and vent system must be vented directly to the outside of the building, and never
be attached to a chimney serving a separate solid fuel or gas-burning appliance. Each direct vent gas
appliance must use it’s own separate vent system.
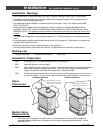
• This appliance is equipped only for
altitudes 0-2000 feet. However, our
in-house testing has shown that the
unit operated at altitudes to 8000 ft.
! Failure to adjust the air shutter
properly may lead to improper
combustion which can create a safety
hazard. Consult your dealer or
installer if you suspect an improperly
adjusted air shutter.
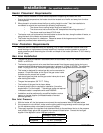
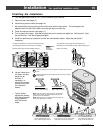
• When the vent passes through a wall,
a wall thimble is required. When the
vent passes through a ceiling, a
support box or firestop is required.
When the vent passes through the
roof, a roof flashing and storm collar
are required. Follow the instructions
provided with the vent (from
Duravent®) for installing these items.
Use a firestop spacer whenever
passing through a ceiling
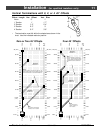
Vertical Termination
NOTE:
always use the "high-wind"
version (if applicable)
Use a roof flashing and storm collar
whenever passing through the roof
Use a support box
on exposed vent
Vertical Vent
Requirements
Use a firestop whenever
passing through a wall
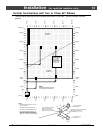
Horizontal Termination
Maintain a minimum 1"
clearance from vent to any
combustible.
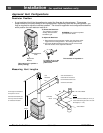
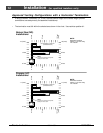
Minimum
Framing for
wall thimble
Horizontal Vent
Requirements
Minimum framing
for fire stop
Maintain a minimum 1"
clearance from vent to
any combustible
8-5/8"
8-5/8"
• Use of of the following 6-5/8" diameter co-axial gas direct vent systems:
Manuafacturer Series
Simpson Dura-Vent Model GS
Selkirk Hearth Products Direct-Temp
American Metal Products Ameri-Vent
Metal-Fab Inc. Direct-Vent with 4DHT or 4DVT Cap
NOTE : Always use the high-wind cap for the type of vent you are using (if applicable)
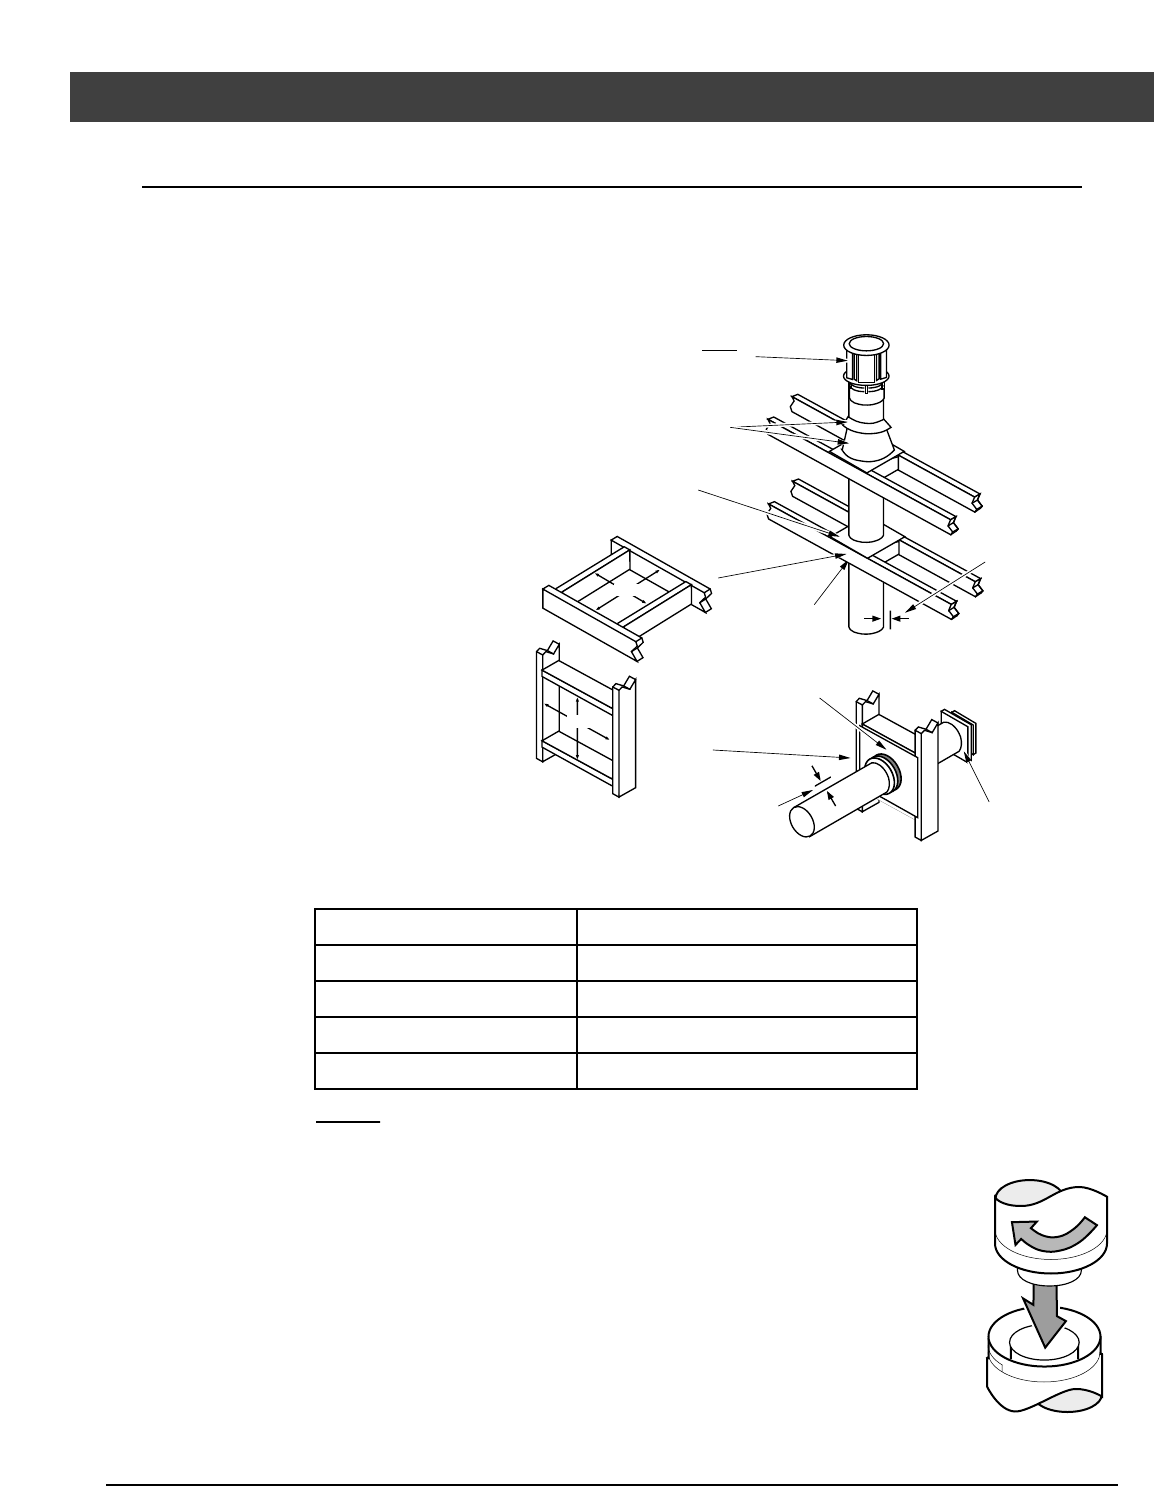
• Slide the vent sections together and turn 1/4 turn until the sections lock in place.
• Screws are not required to secure the vent. However, three screws may be used to
secure vent sections together if desired.
• High temperature sealant is recommended at the appliance starter section connection
(use high-temperature silicone or Mill-Pac®).
• If disassembly is required, at time of re-assembly check to see if the vent creates a tight
fit. If it does not, apply high temperature sealant to the joints of the affected sections.
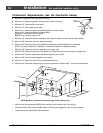
• Horizontal sections require a 1/4" rise every 12" of travel
• Horizontal sections require non-combustible support every three feet (e.g.: plumbing
tape)