System Operation, Testing, and Maintenance
54
Replacement Procedures
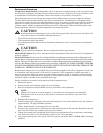
Compressor Replacement: Infrequently a fault in the motor insulation may result in a motor burn-
out (if system is properly installed, motor burnout rarely occurs). Primarily this type of failure is due
to mechanical or lubrication problems, where the burnout is a secondary consequence.
Early detection can prevent a large percentage of the problems that can cause compressor failures.
Periodic maintenance inspections by alert service personnel (i.e., identification of abnormal opera-
tion) can be a major factor in reducing maintenance costs. It is easier and more cost-effective to imple-
ment the necessary preventative steps that ensure proper system operation; rather than ignore a
problem until it results in compressor failure and costly replacement. When troubleshooting a com-
pressor problem, check all electrical components for proper operation:
• Check all fuses and circuit breakers.
• Check pressure switch operation.
• If a compressor failure has occurred, determine whether its cause is an electrical or mechanical
problem.
Mechanical Failure: If you have determined that a mechanical failure has occurred, the compressor
must be replaced.
Electrical Failure: In the event of an electrical failure and subsequent burnout of the refrigeration com-
pressor motor, proper procedures must be followed to thoroughly remove any acids that would cause a future
failure. There are two kits that can be used with a complete compressor burnout: Sporlan System Cleaner
and Alco Dri-Kleener. Follow the manufacturer's procedure. DAMAGE TO A REPLACEMENT COMPRES-
SOR DUE TO IMPROPER SYSTEM CLEANING CONSTITUTES ABUSE UNDER THE TERMS OF THE
WARRANTY, THEREBY VOIDING THE WARRANTY.
Replacement compressors are available from your Liebert supplier and will be shipped to the job site
in a reusable crate (as required by the service contractor). If the compressor is under warranty, it
must be returned to Liebert in order to receive proper warranty credit. It should be returned in the
same container the replacement was shipped in. The possible cause(s) or condition(s) of the damage
should be legibly recorded on the provided return tag.
Proper procedures to remove and replace the failed compressor are:
1. Disconnect power
2. Attach suction and discharge gauges to access fittings.
3. Recover refrigerant using standard recovery procedures and equipment.
4. Remove failed compressor.
5. Install replacement compressor and make all connections. Pressurize and leak test the system at
approximately 150 psig (1034kPa) pressure.
6. Follow manufacturer's instructions for clean out kits.
7. Evacuate the system twice to 1500 microns, and the third time to 500 microns. Break the vacuum
each time with clean, dry refrigerant to 2 psig (13.8 kPa).
8. Charge the system with refrigerant (R-22) based on requirements of the evaporator, condensing
unit, and lines. Refer to the installation manual or the unit nameplate.
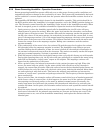
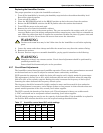
9. Apply power and operate the system. Check for proper operation. Refer to Table 16 for discharge
pressure.
!
CAUTION
Avoid touching or contacting the gas and oils with exposed skin. Severe burns will result. Use
long rubber gloves in handling contaminated parts.
!
CAUTION
System contains refrigerant. Recover refrigerant before maintenance
NOTE
Release of refrigerant to the atmosphere is harmful to the environment and unlawful.
Refrigerant must be recycled or discarded in accordance with federal, state, and local
regulations.


