


Site Preparation and Installation
8
2.4 Installing the Evaporator or Chilled-Water Units
The evaporator unit and indoor condensing unit are usually mounted above the ceiling and must be
securely mounted to the roof structure. The ceiling and ceiling supports of existing buildings may
require reinforcements. Be sure to follow all applicable codes. Use field-supplied 1/2"-13 tpi threaded
suspension rods and 1/2"-13 tpi hardware kit.
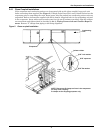
Recommended clearance between ceiling grids and building structural members is unit height plus 3
inches.
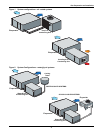
Install the four field-supplied rods by suspending them from suitable building structural members.
Locate the rods so that they will align with the four mounting holes in the flanges that are part of the
unit base.
Using a suitable lifting device, raise the unit up and pass the threaded rods through the four mount-
ing holes in the flanges that are part of the unit base.
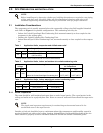
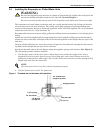
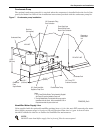
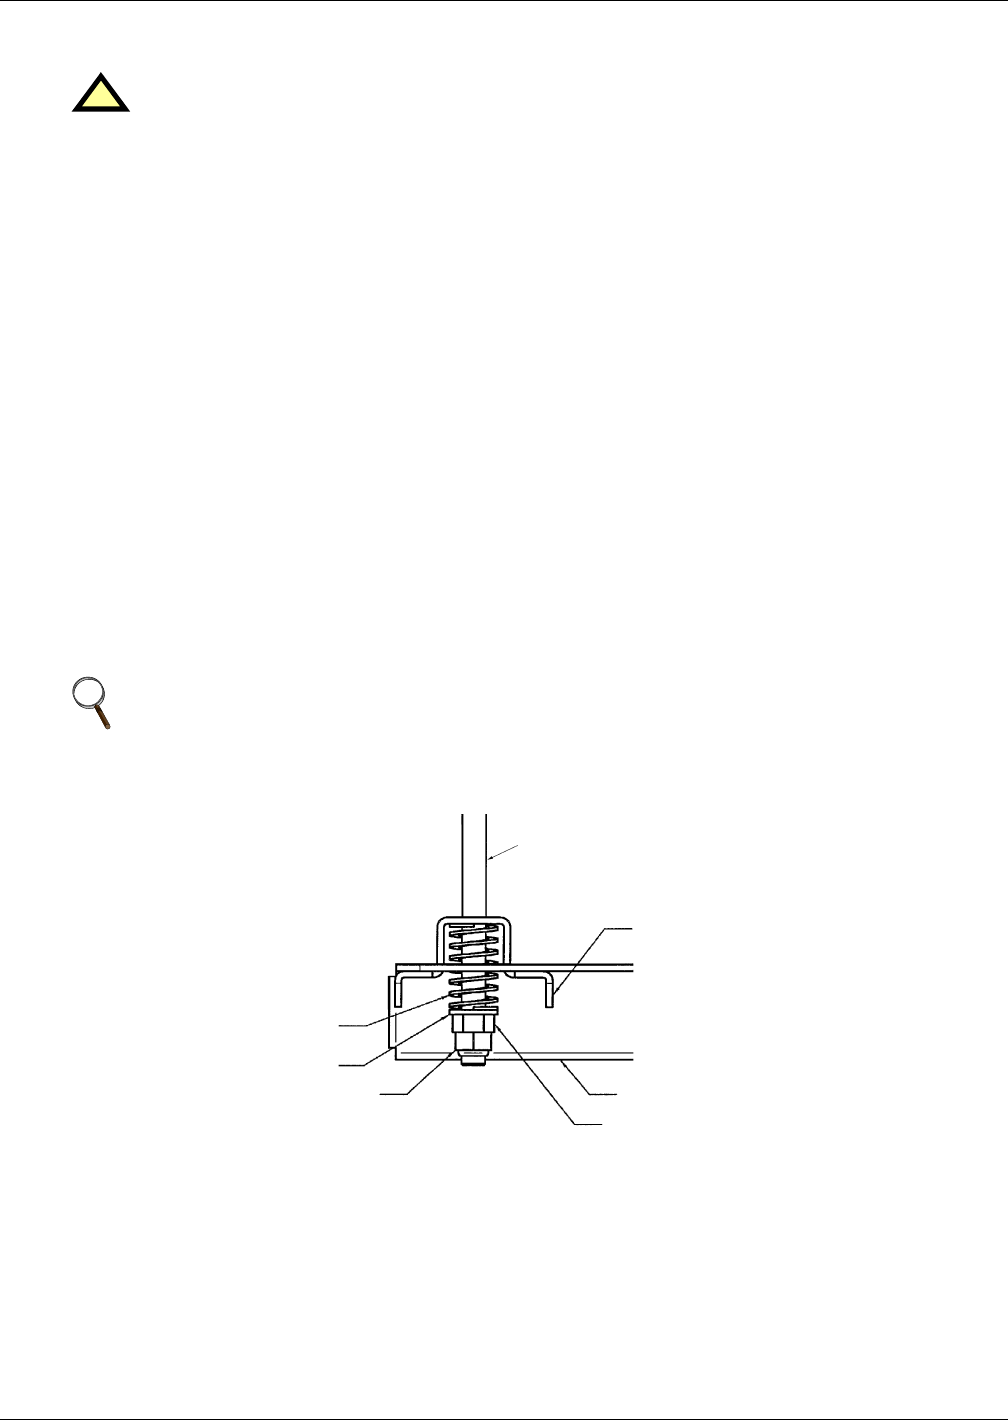
Attach the threaded rods to the unit flanges using the supplied, springs, and washers. (See Figure 4).
The coil springs provide vibration isolation.
1. Use the plain nuts to hold unit in place. Adjust these nuts so that the weight of the unit is
supported by the four rods, does not rest on the ceiling grid, and is level. Ensure none of the
springs are compressed to solid height. The coil side of the unit is heavier, so these springs will be
compressed more than the other side.
2. Use the Nylock nuts to “jam” the plain nuts.
Figure 4 Threaded rod and hardware kit installation
!
WARNING
Be sure the supporting roof structure is capable of supporting the weight of the unit(s) and the
accessories during installation and service. (See 2.2 - System Weights.)
Be sure to securely anchor the top ends of the suspension rods. Make sure all nuts are tight.
NOTE
The units must be level in order to drain condensate properly.
1/2" threaded rod
(supplied by field)
hanging bracket
base pan (ref)
1/2" hex nut
1/2" Nylock
locking nut
1/2" flat washer
1" O.D. spring