


20
NOTE: DIAGRAMS & ILLUSTRATIONS ARE NOT TO SCALE.
cLeaning the heat exchanger
Caution: Do not operate the heat exchange scraper when
the stove is hot. Located at the center of the grill on the top
front of the stove is a bent rod that is attached to a scraper
on the heat exchange tubes. To remove ash build-up and
maintain efficient heat extraction from the stove, this rod
should be pulled in and out at least once a week.
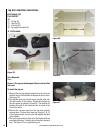
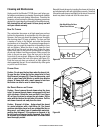
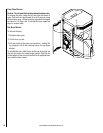
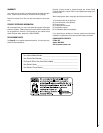
cLeaning the combustion bLower
To clean the combustion blower, remove the six nuts labeled
A in Figure 46 with an 11/32” wrench. After removing these
nuts, the motor with fan attached can be pulled from the
fan housing. The fan blades and the fan housing can be
vacuumed once the motor is removed. When reinstalling
the motor, a new gasket may need to be installed between
the motor and the fan housing. To complete the reinstalla
-
tion, place the motor back on the fan housing and reinstall
the six nuts. Make sure the motor’s green ground wire is
secured under one of the nuts.
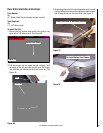
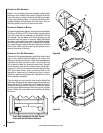
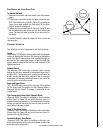
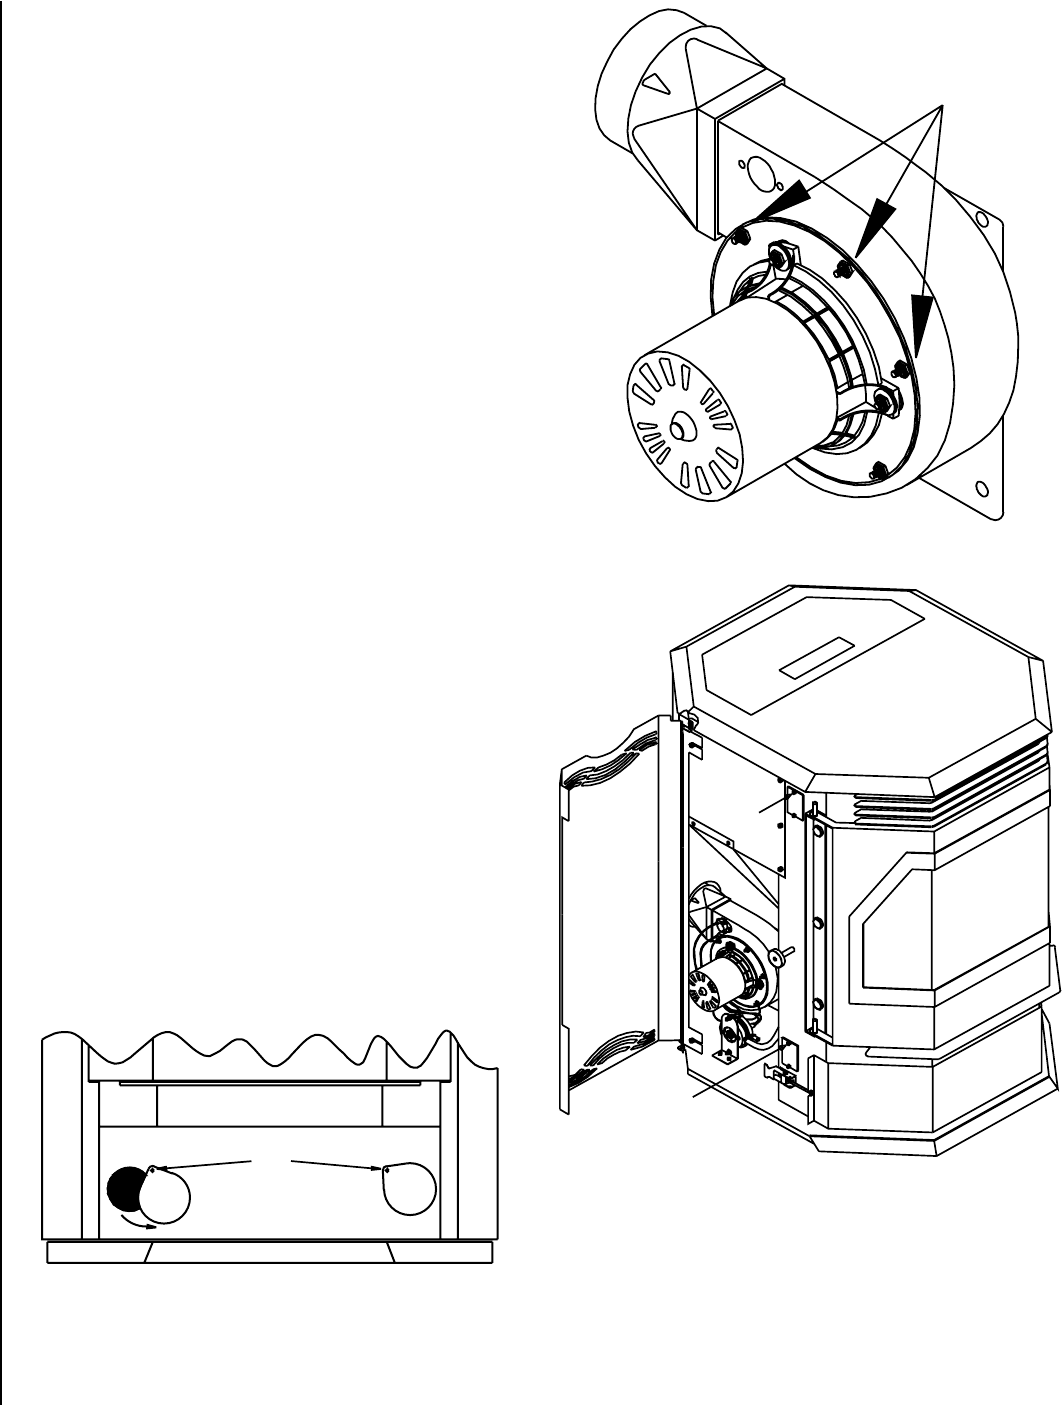
cLeaning the FLue gas passageways
Cleaning the flue gas passageways should be done at least
once a year. Burning high ash pellets may require this
cleaning to be done more often. Clean these passageways
only when the stove and ash are cold - do not start a fire
in the vacuum cleaner by vacuuming up hot ash. On each
side of the stove there are two access covers (see B and C
in Figure 47) that can be removed by unscrewing the two
5/32” allen head screws. Insert a cleaning brush in the
openings to loosen any ash build-up and use a vacuum
cleaner to remove the loosened ash. Reinstall the covers
when cleaning is complete.
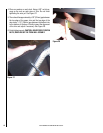
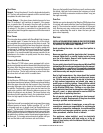
There are also two more access holes located behind the
ash drawer. Remove the ash drawer (see previous page) and
loosen the two 5/16” screws with a 1/2” socket or wrench,
the screws are shown as D in Figure 45. Rotate the covers
over the access holes and use a brush and vacuum to clean
the ash. Rotate the covers back over the holes and tighten
the screws.
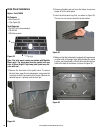
Front View Looking into the Ash Drawer
Cavity with the Ash Drawer Removed
A
D
C
B
A
B
C
D
Figure 46
Figure 47
Figure 45