


12
NOTE: DIAGRAMS & ILLUSTRATIONS ARE NOT TO SCALE.
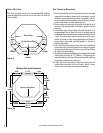
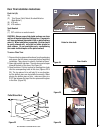
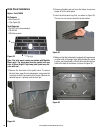
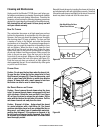
4. Place one washer on each stud. Using a 3/8” nut driver,
snug up the nuts on each piece of trim. Do not finish
tightening the nuts yet. See Figure 27.
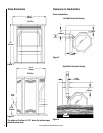
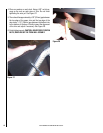
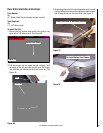
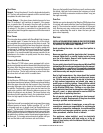
5. There should be approximately a 7/8” (22mm) gap between
the top edge of the upper trim and the top edge of the
door and a 1-1/2” (38mm) gap between the bottom trim
to the bottom of the door. Visually inspect the alignment
of the trim and adjust if necessary. See Figure 28.
6. Finish tightening nuts. CAUTION - DO NOT OVER-TIGHTEN
NUTS, DIMPLING OF THE TRIM WILL OCCUR!!!
Figure 28
Figure 27