


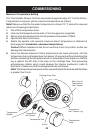

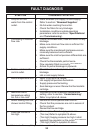
17
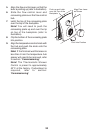
Note! For laminated panels the shower
valve must be positioned from the rear of
the panel.
Panel thickness must be between 4 and
22 mm (if a thicker panel is used it will be
necessary to recess the securing brackets
into the rear of the panel).
Important! Make sure that there is a
minimum clearance of 64 mm behind the
laminated panel to house the shower valve.
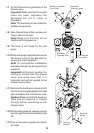
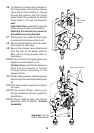
3.1 Remove the three securing screws and
remove the shower valve from the
building-in shroud (retain the screws
for later use).
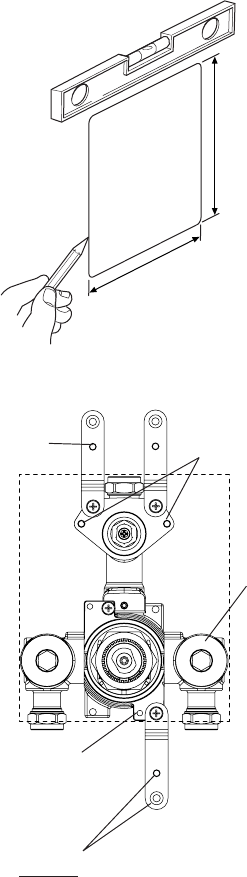
3.2 Mark the position of the shower valve,
a cut out 150 x 170 mm (Max) is
required.
Note! Use a spirit level to make sure
that the hole cutout will be horizontal
and vertical.
3.3 Carefully cut out the laminated panel
and make sure that the building-in
shroud fits inside the hole cutout.
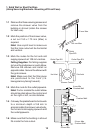
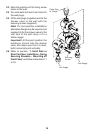
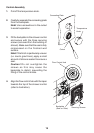
3.4 Fit the securing brackets to the shower
valve.
Important! The brackets must be fixed
vertically as illustrated.
Important! Make sure that the correct
holes are used, otherwise the
backplate will not fit (see Warning
below).
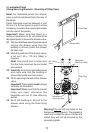
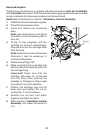
3.5 Re-fit the building-in shroud to the
shower valve using the three fixing
screws.
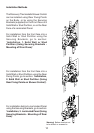
3. Laminated Panel
(Using Securing Brackets - Mounting off Rear Face)
M5 Fixing
Hole
Backplate
Securing Hole
Backplate
Securing Holes
Filter Plug
170 mm Max
150 mm Max
Warning! Do not drill any holes for the
bottom securing bracket. The bracket is
used only to align the valve. If holes are
drilled they will not be covered by the
concealing plate.