


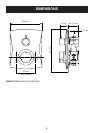


13
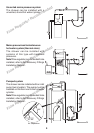
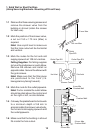
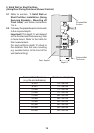
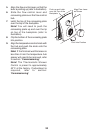
1.7 Fit the three securing brackets to the
shower valve.
Important! Make sure that the correct
holes are used, otherwise the
backplate will not fit (refer to
illustration).
Note! The brackets can be rotated for
suitable fixing points.
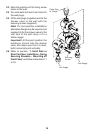
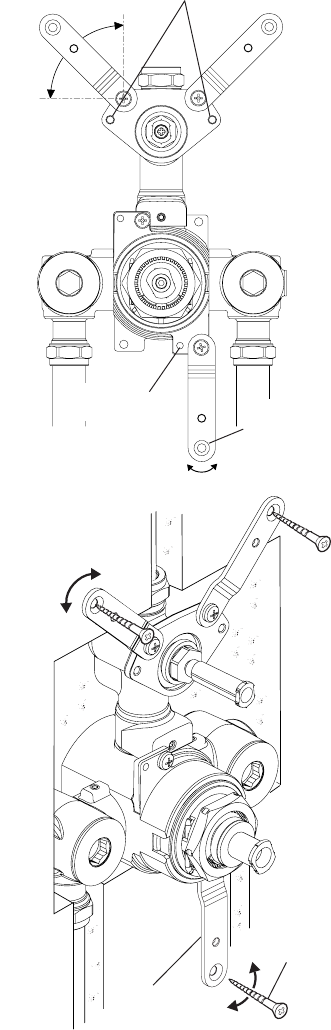
1.8 Mark the positions of the countersunk
fixing holes on the wall.
Note! Make sure that they do not
interfere with the pipework.
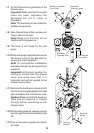
1.9 Drill three 6 mm holes for the wall
plugs.
1.10Fit the wall plugs (supplied) and secure
the shower valve to the wall with the
securing screws (supplied).
Note! For stud partition installations
alternative fixings may be required (not
supplied).
Important! At this point position the
building-in shroud onto the shower
valve and make sure that it is
horizontal and will be parallel to the
finished wall surface.
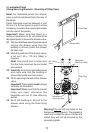
1.11Remove the building-in shroud and fit
the hot and cold supply pipes and outlet
pipe and tighten the compression nuts.
Caution! Make sure that the olives are
fitted and all pipework is flushed
through before connecting to the
shower valve.
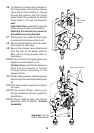
1.12Fit the outlet pipework, leaving enough
pipe through the wall to temporarily cap
off.
1.13Turn on the water supplies and check
for leaks.
Securing
Screw
Securing
Bracket
Backplate
Securing Holes
Rotate for Suitable
Fixing Point
Backplate
Securing Hole
Countersunk
Fixing Hole