


8
21
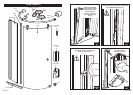
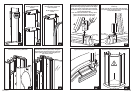
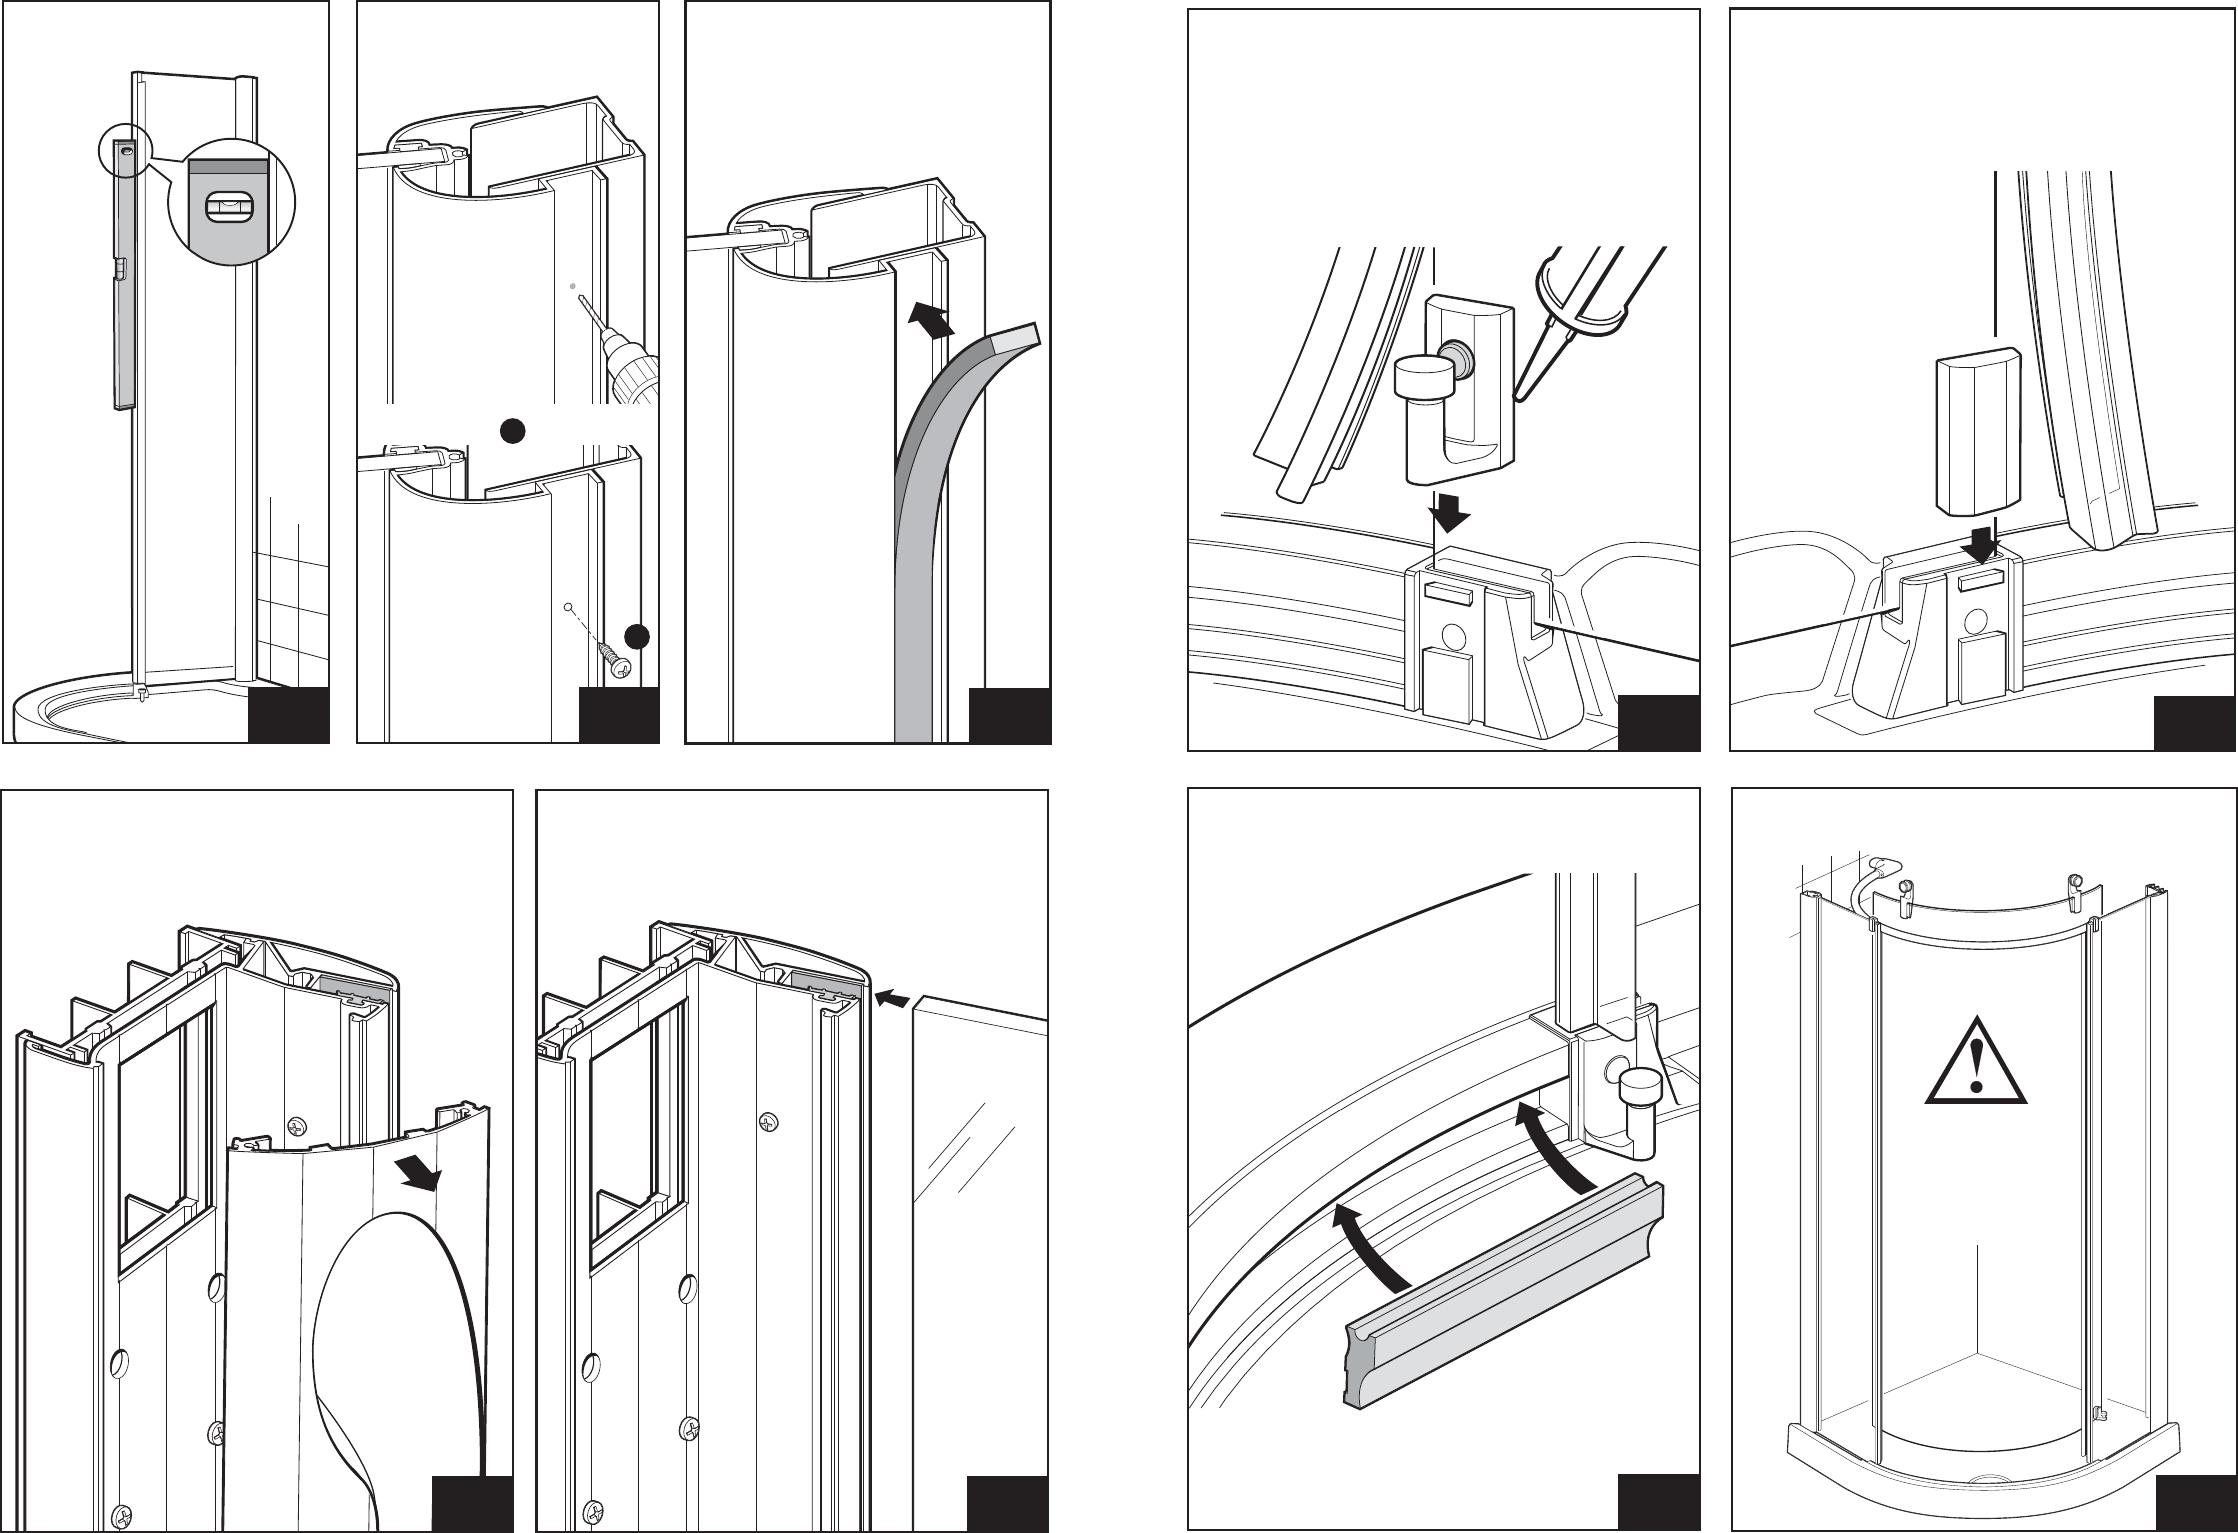
Check glass is vertical. If not
remove screws, re-drill and
re-fit as required.
Re-fit rubber strip over
screws
Drill 4 x 3mm holes
through jamb into wall
channel
STEP
10
STEP
11
Fit 4 x screws
B
Ensure glass panel is vertical
STEP
9
Slacken screws ‘A’. Push the glass panel between
the wall jamb and the glass clamp. The glass
should be 2mm lower than the top of the wall
jamb. Tighten screws ‘A’ when the glass is in
the correct position
STEP
13
B
CFI230J
CFI230J
Carefully remove the Water Delivery System
from the Water Delivery Wall Jamb.
A
STEP
12
Fit the fixed roller to the tray on the same side as
lintel wall fixing, applying sealant on the edges.
Note: The seal ‘A’ on the glass panel will need
to be pulled away, to allow the roller to be fitted,
and re-fitted afterwards.
Push the roller onto the slot in the tray until it
locks in place ensuring the plastic glass
guide is retained inside the roller body
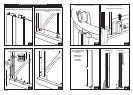
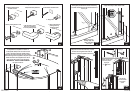
STEP
29
Fit the blanking cap on the other side
of the tray.
Note: The seal ‘A’ on the glass panel will need
to be pulled away, to allow the cover to be fitted,
and re-fitted afterwards.
STEP
28
STEP
26
STEP
27
A
Carefully lift door into the enclosure
Important: Requires a minimum of 2 people
Caution
Push the door stop vinyl into the track and
against the fixed roller (except 800)
±0mm