


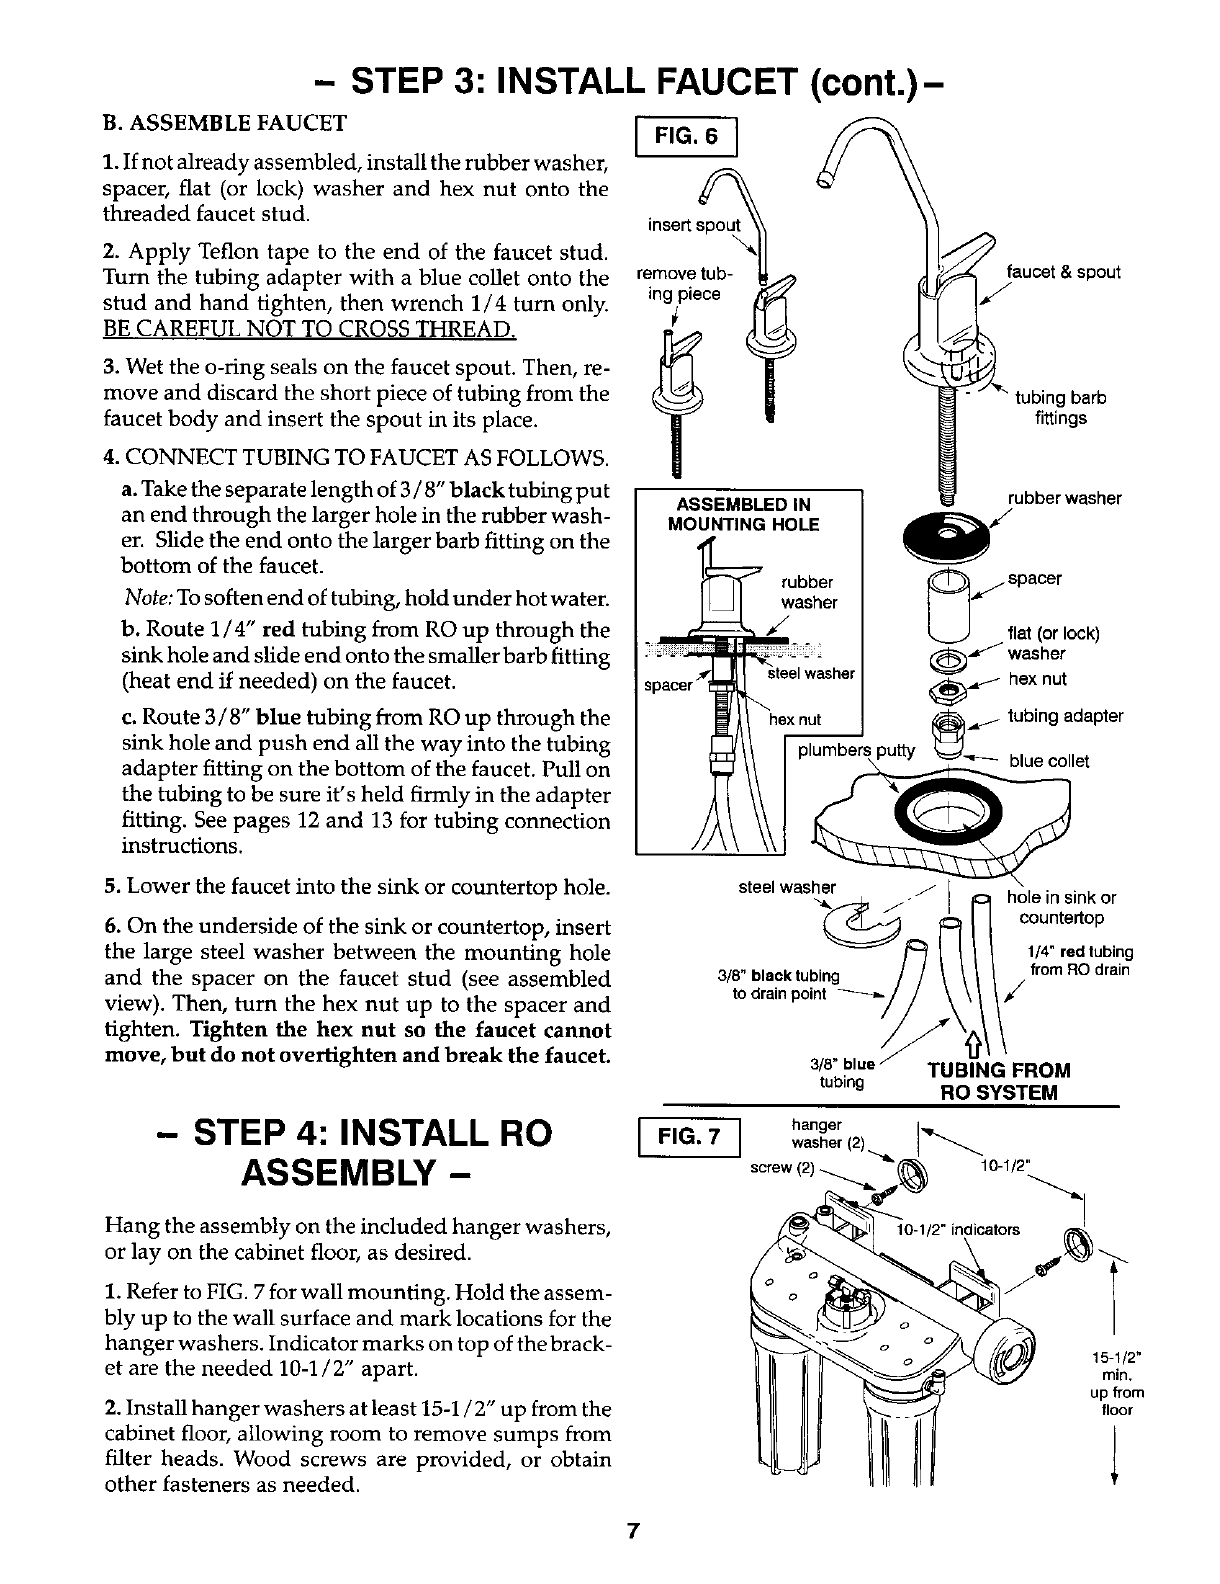
- STEP 3: INSTALL FAUCET (cont.)-
B. ASSEMBLE FAUCET
1. If not already assembled, install the rubber washer,
spacer, flat (or lock) washer and hex nut onto the
threaded faucet stud.
2. Apply Teflon tape to the end of the faucet stud.
Turn the tubing adapter with a blue collet onto the
stud and hand tighten, then wrench 1/4 turn only.
BE CAREFUL NOT TO CROSS THREAD.
3. Wet the o-ring seals on the faucet spout. Then, re-
move and discard the short piece of tubing from the
faucet body and insert the spout in its place.
4. CONNECT TUBING TO FAUCET AS FOLLOWS.
a. Take the separate length of 3 / 8" black tubing put
an end through the larger hole in the rubber wash-
er. Slide the end onto the larger barb fitting on the
bottom of the faucet.
Note: To soften end of tubing, hold under hot water.
b. Route 1/4" red tubing from RO up through the
sink hole and slide end onto the smaller barb fitting
(heat end if needed) on the faucet.
c. Route 3/8" blue tubing from RO up through the
sink hole and push end all the way into the tubing
adapter fitting on the bottom of the faucet. Pull on
the tubing to be sure it's held firmly in the adapter
fitting. See pages 12 and 13 for tubing connection
instructions.
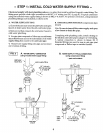
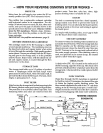
FIG. 6 ]
insert spou_
remove tub-
ing piece
ASSEMBLED IN
MOUNTING HOLE
rubber
washer
_ =_,=_/spacer
°ek
_.,_ hex nut
_._ tubing adapter
putty blue collet
5. Lower the faucet into the sink or countertop hole.
6. On the underside of the sink or countertop, insert
the large steel washer between the mounting hole
and the spacer on the faucet stud (see assembled
view). Then, turn the hex nut up to the spacer and
tighten. Tighten the hex nut so the faucet cannot
move, but do not overtighten and break the faucet.
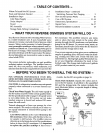
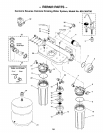
- STEP 4: INSTALL RO
ASSEMBLY -
Hang the assembly on the included hanger washers,
or lay on the cabinet floor, as desired.
1. Refer to FIG. 7 for wall mounting. Hold the assem-
bly up to the wall surface and mark locations for the
hanger washers. Indicator marks on top of the brack-
et are the needed 10-1/2" apart.
2. Install hanger washers at least 15-1/2" up from the
cabinet floor, allowing room to remove sumps from
filter heads. Wood screws are provided, or obtain
other fasteners as needed.
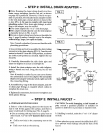
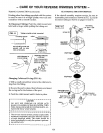
steelwasher .J I _ holein sink or
_ _1-[ countertop
114"red tubing
to drain point _-_-// \ \/ /_
YJ
3/8"blue / TUBING FROM
tubing RO SYSTEM
FIG. 7 ] hanger I'_,_
washer (2) I_
screw (2) _(_) 10-1/2"
15-1/2"
min.
up from
floor
7